Ordering, Design, Manufacturing and Assembly Instructions for Cap:
- Part contains a Two Custom Coils which I estimated using Trial and error.
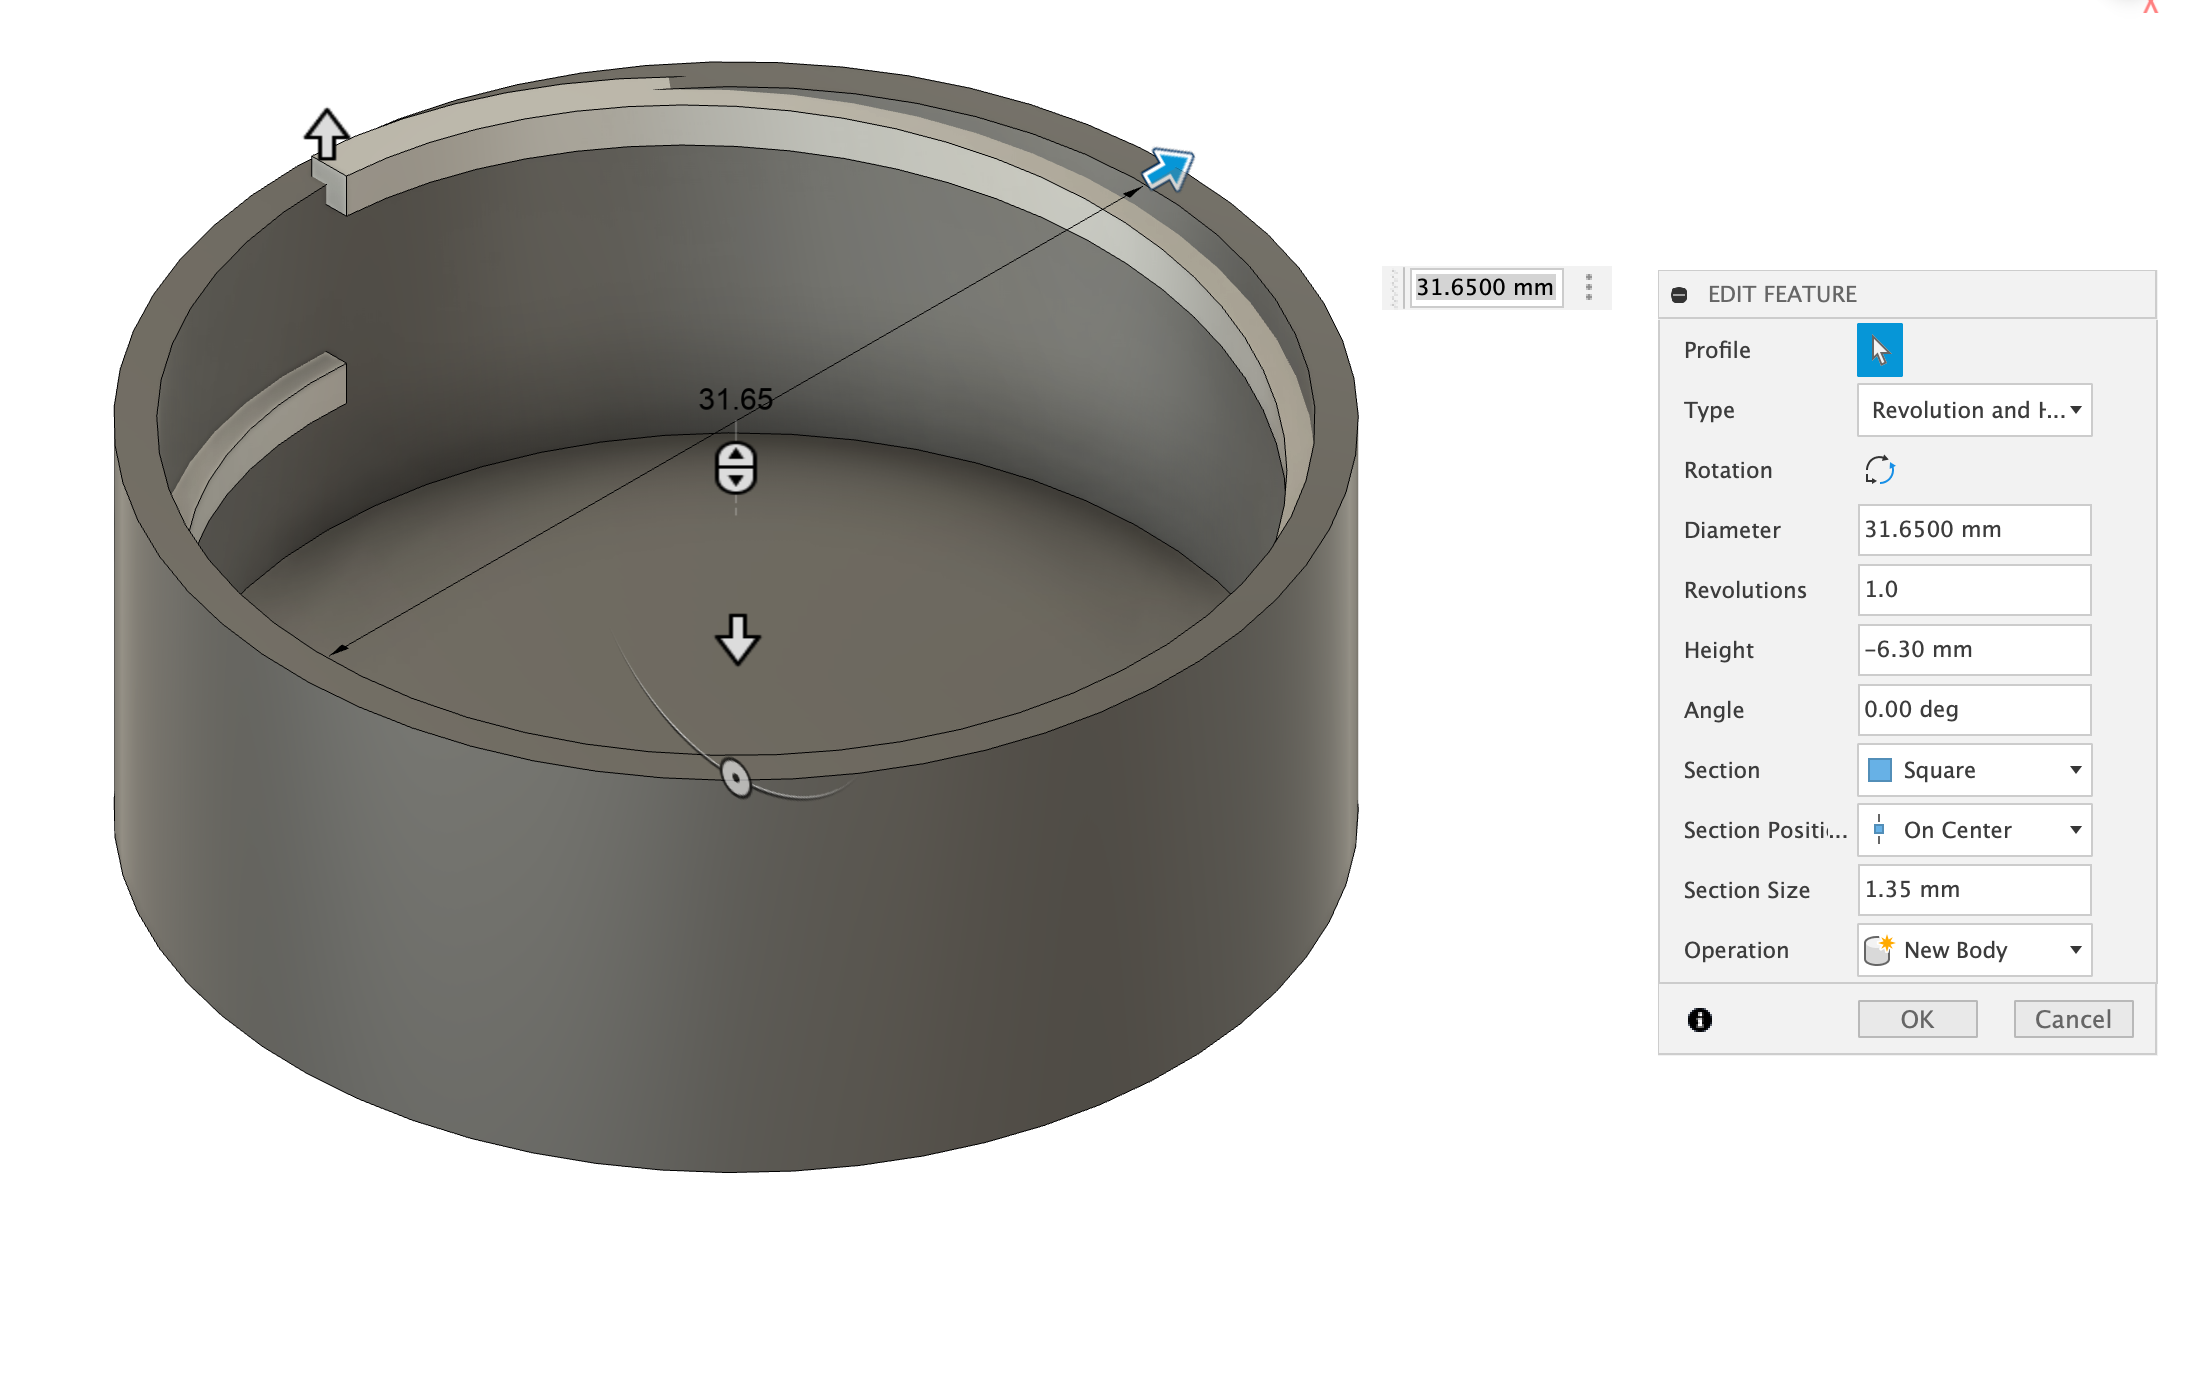
- The Two Coils Are 180 Degrees apart. The Screenshot should give you the dimensions of the first coil.
- I then moved these coils and fillet them before fusing them with the main body in the Model.
- The F3D File should have the complete design history.
- I have also provided Intermediate Versions of the STEP file to help if you don't have Autodesk Fusion.
- The Two Coils Are 180 Degrees apart. The Screenshot should give you the dimensions of the first coil.
- You can also modify the design to make a two port version.
- One of the Sketches in the F3D file should allow you to make the two port version.
- I ordered these parts from RapidDirect
- CNC Machining / Aluminum 6061-T6 / As machined (Ra1.6)
- I orderd both: As Machined and Anodized parts.
- I recommend anodizing since you can autoclave the parts if necessary.
- Anodizing Type II (Black, Glossy)
- General tolerance: ISO2768M
- Tightest tolerance: ISO2768F
- Threads and tapped holes: Standard threads
- In the notes please do mention: 1/4-28 UNF 1B(Loose Fit) is needed.
- I've also included a Drawing document but did not mention details of the Custom Thread. Please do include the Dimensions of the Custom Coils in the Notes
- You can also send them the intermediate files and the Screenshot with the Dimensions of the Coils to RapidDirect.
- Cost
- I ordered 60 Caps and the total came to about 11 USD per cap including shipping in May 2024.
- Commercial Versions of these reservoirs cost about 120 USD or more. I recommend having them made with these CAD files to save money.
- Finished Part Videos. You can watch videos of the Machined Finished Parts here:
- Anodized Version
- As-Machined Version
- Both Parts Work Equally Well. But I recommend getting the Anodized version.
- 30 Anodized Caps should be enough for one ChronoSeq device.
- Adding Gasket/O-Ring
- O-Ring Gasket Was Ordered from Primal23Industrial
- Place this O-Ring at the Bottom of the Cap so it seals the Gap between the 50ml Falcon Tube and the CNC Machined Cap.
- You can also order from Amazon
- E12534116-100 1 1/4 OD X 3/4 ID X 1/16 Thickness Neoprene Rubber Washers - Endeavor Series Select Pack Quantity: 100 Pack. Cost about 20$.
- Additional Parts:
- To Block one of the Ports you can use a Delrin Plug.
- You can Connect Pneumatic Tubing Using a Barb.
- You can connect 1/16" OD tubing to the CAP using a Nut and Ferrule.
- Leak Test Video:
- In this Video the Fully Assembled Part was Submerged in Water and there were no leaks when pressurized to 2 Bar.
- Optional Additive Manufacturing Version:
- You can also print these parts using an FDM Printer but removing supports can be tricky.
- You can use a toolkit like this to help with support removal.
- SLA (Resin) Prints with a 50μm layer height is recommended.
- In addition you will need to add another O-Ring in the 1/4-28 UNF Ports to prevent gas leaks, especially for the FDM Printed Version.
- Oil-Resistant Soft Buna-N O-Rings, 1/16 Fractional Width, Dash Number 004, Packs of 100
- The Ferrule should be in contact with the additional O-Ring to Prevent Leaks for the FDM Version.
- You can also print these parts using an FDM Printer but removing supports can be tricky.
- Tolerance Compensation for FDM and SLA Prints
- Tolerance compensation was needed for the FDM Version of the CAP. I used a XY Tolerance Compensation of 0.15mm
- The 3MF File and was printed on a Bambu Lab X1 Carbon.
- You can load the 3MF File into the Orca Slicer directly to inherit the print settings.
- For the Bambu Lab X1 Carbon we had:
- 0.4mm Nozzle
- Textured PEI Plate
- For the Resin Prints Tolerance compensation might also be needed. But I haven't tried it. Instead I:
- Used a Tap and Tap Wrench to shave off excess plastic from the print.