Instructions for Assembling Vortex Relay Controller

Brief Description

  • We need to a way to keep our Beads evenly suspended before an injection.
  • We can use Vortices to keep our beads suspeneded.
  • However, we don't want to keep these Vortices turned on all the time.
  • Keeping them on all the time can shear the beads into smaller fragments.
  • It becomes difficult to Load the Beads or change the 50ml Tubes if the vortex is Turned on all the time.
Location of Vortex Stirrer(s) in Schematic
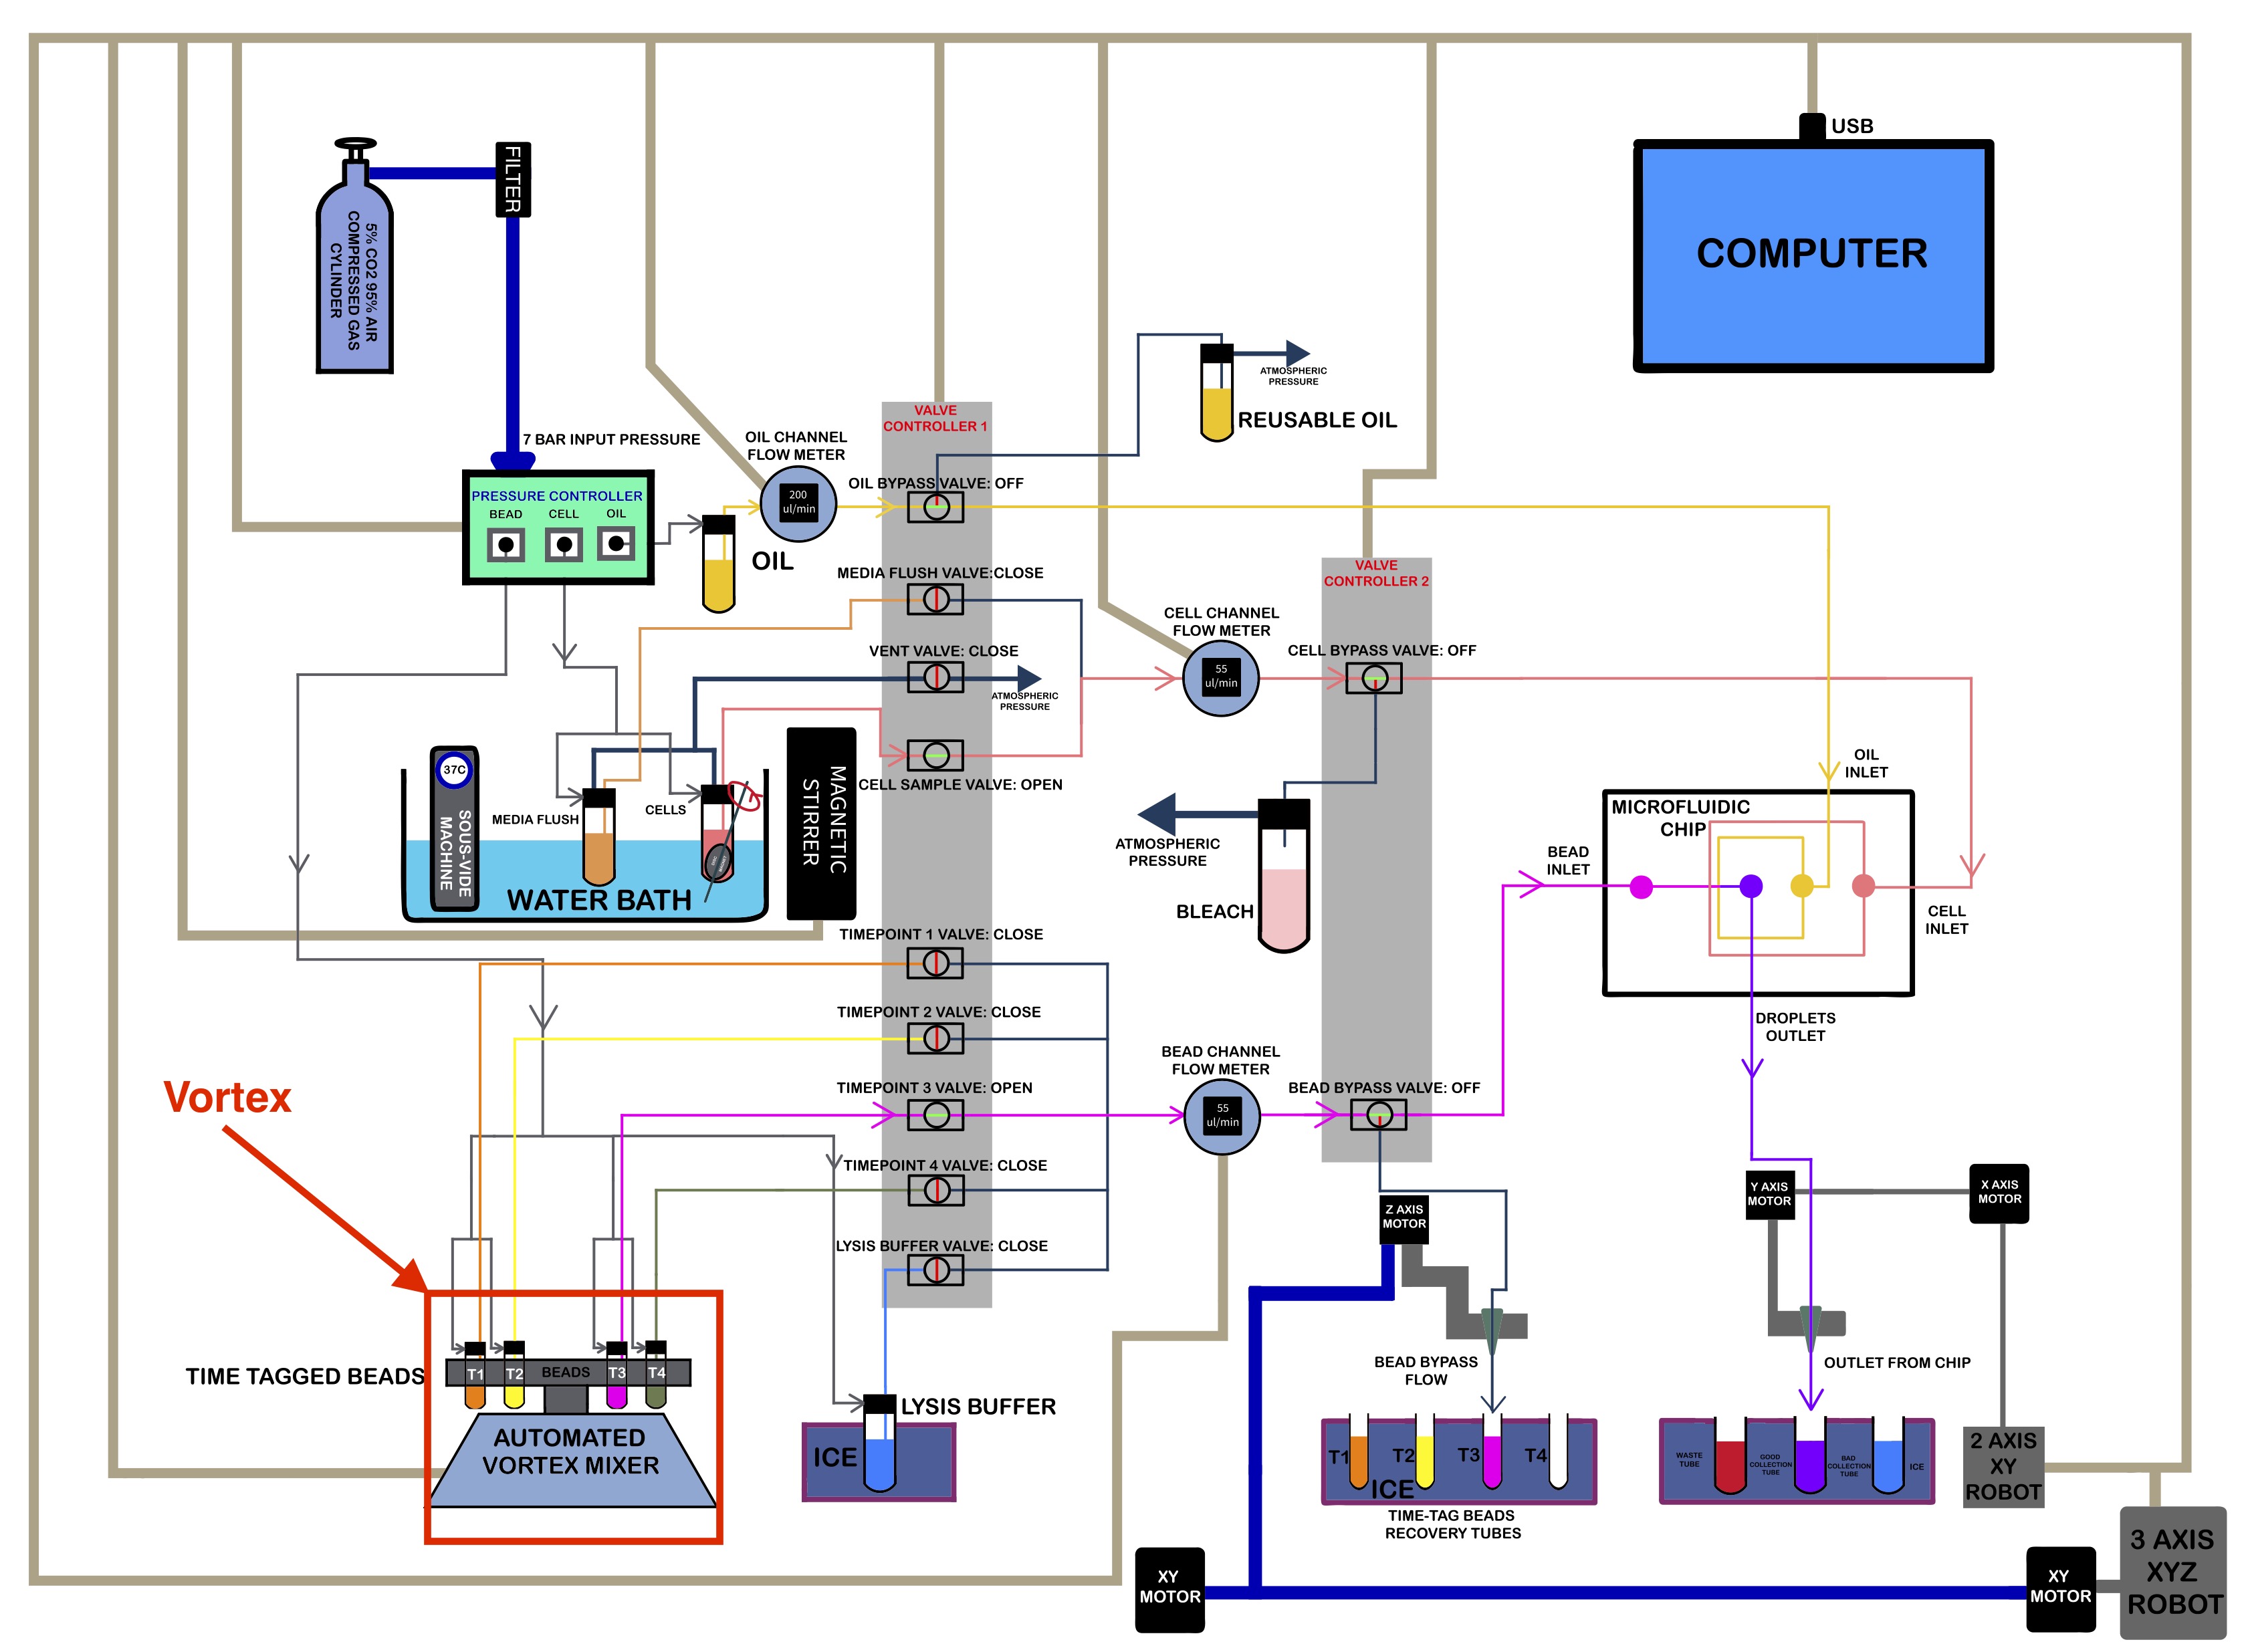
Ordering the Parts

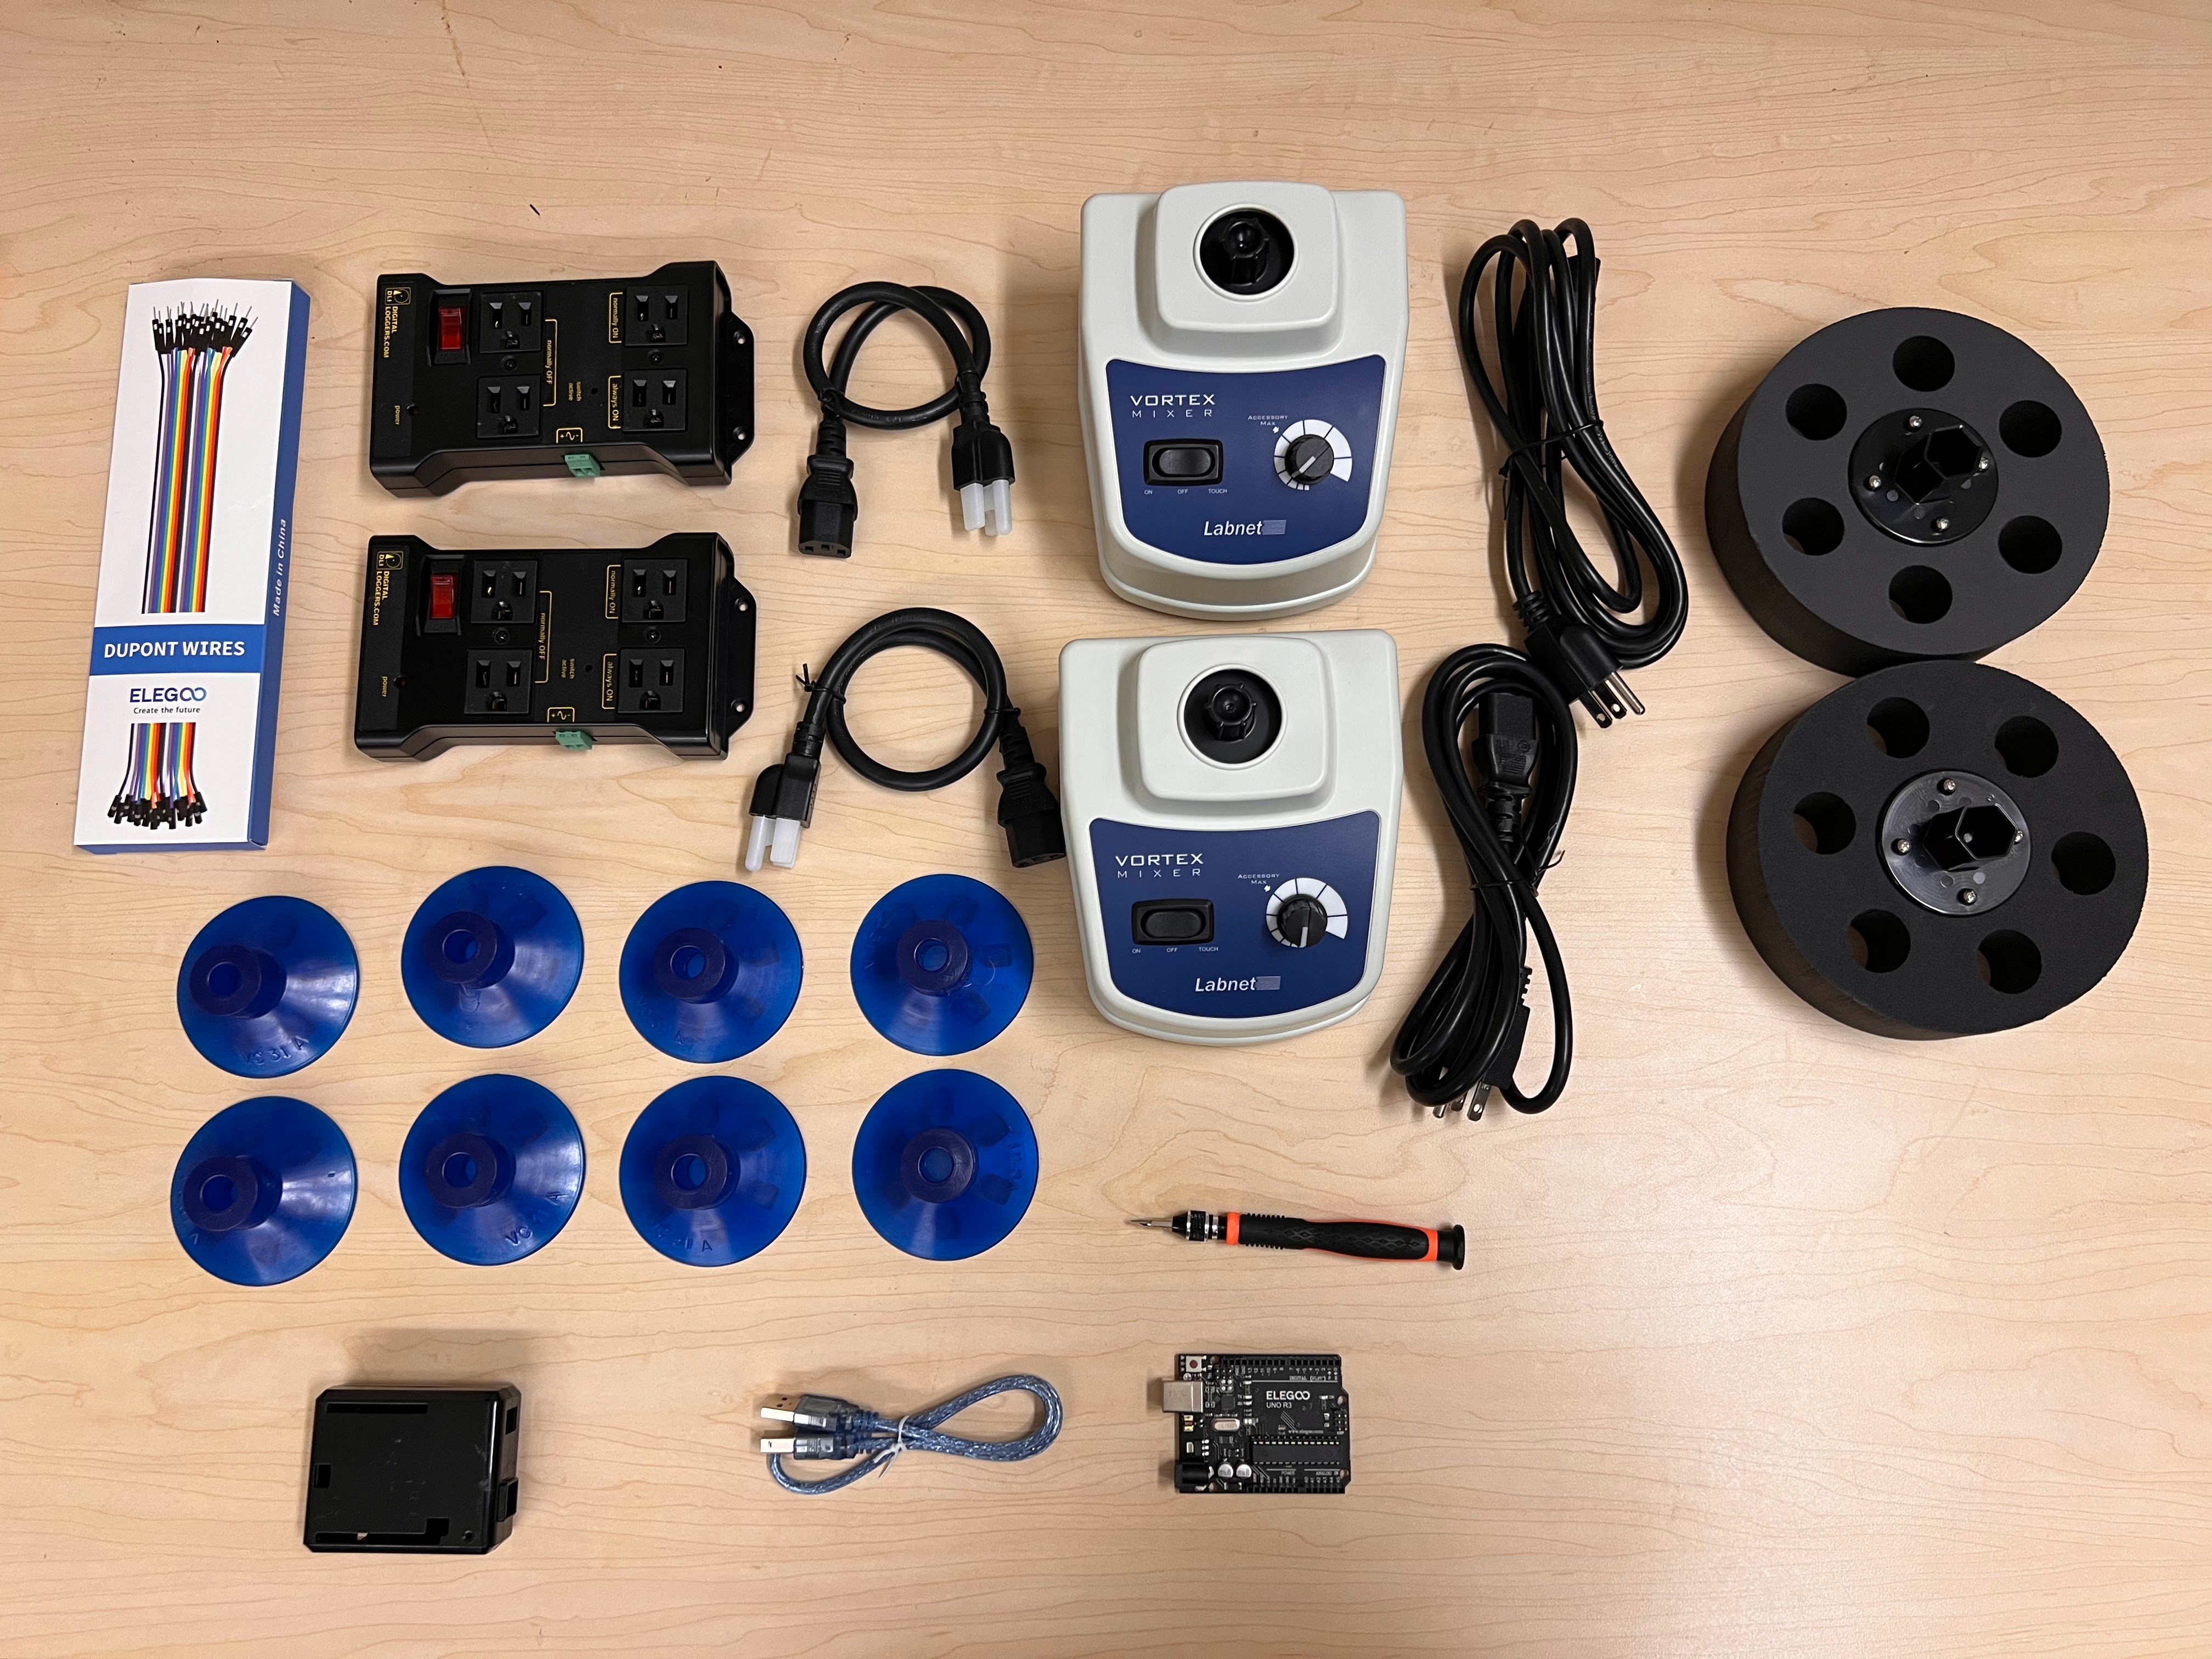
  • You will need the following parts:
    • Two AC Relay Boxes
    • Male to Male Dupont Jumper Wires
    • Eight Suction Cups
    • Electronics Screw Driver Set
    • Arduino UNO R3 Clone
    • Arduino UNO R3 Case
    • Two VX-200 Vortex Mixers
    • Two 50ml Heads for the VX-200 Vortex Mixers
  • We used the 3mm Flat Head for our screwdriver for the next part.
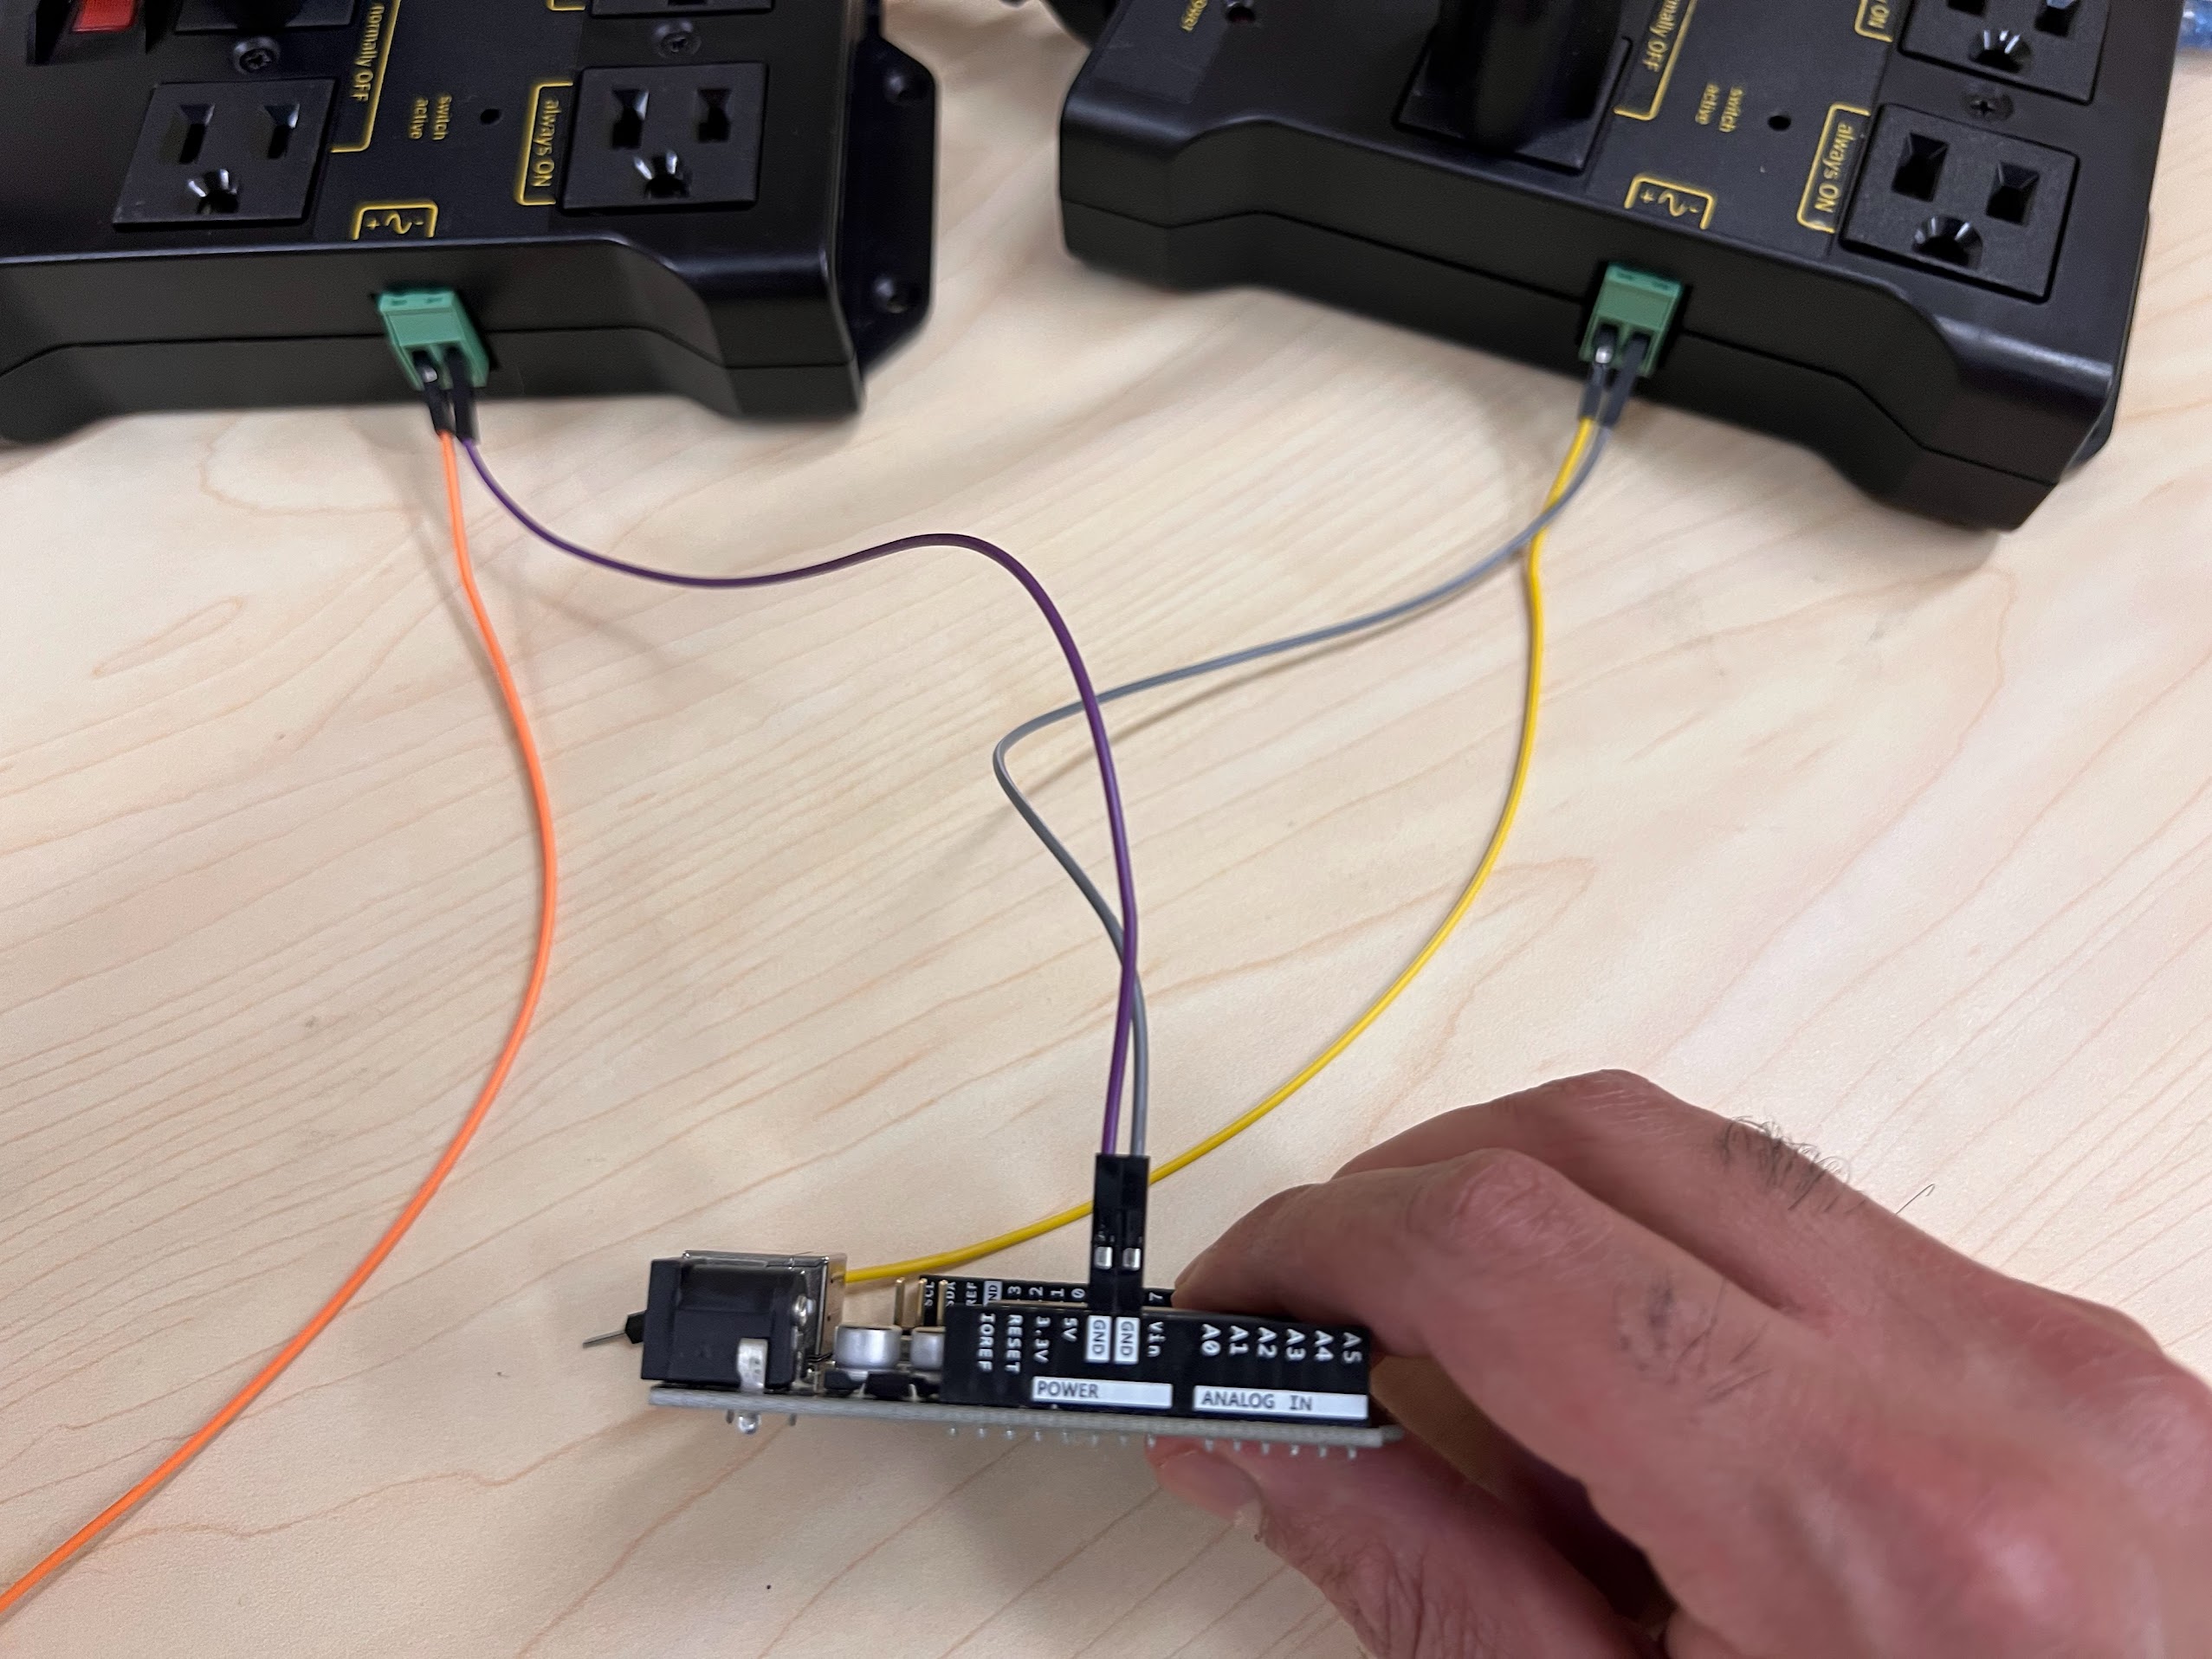
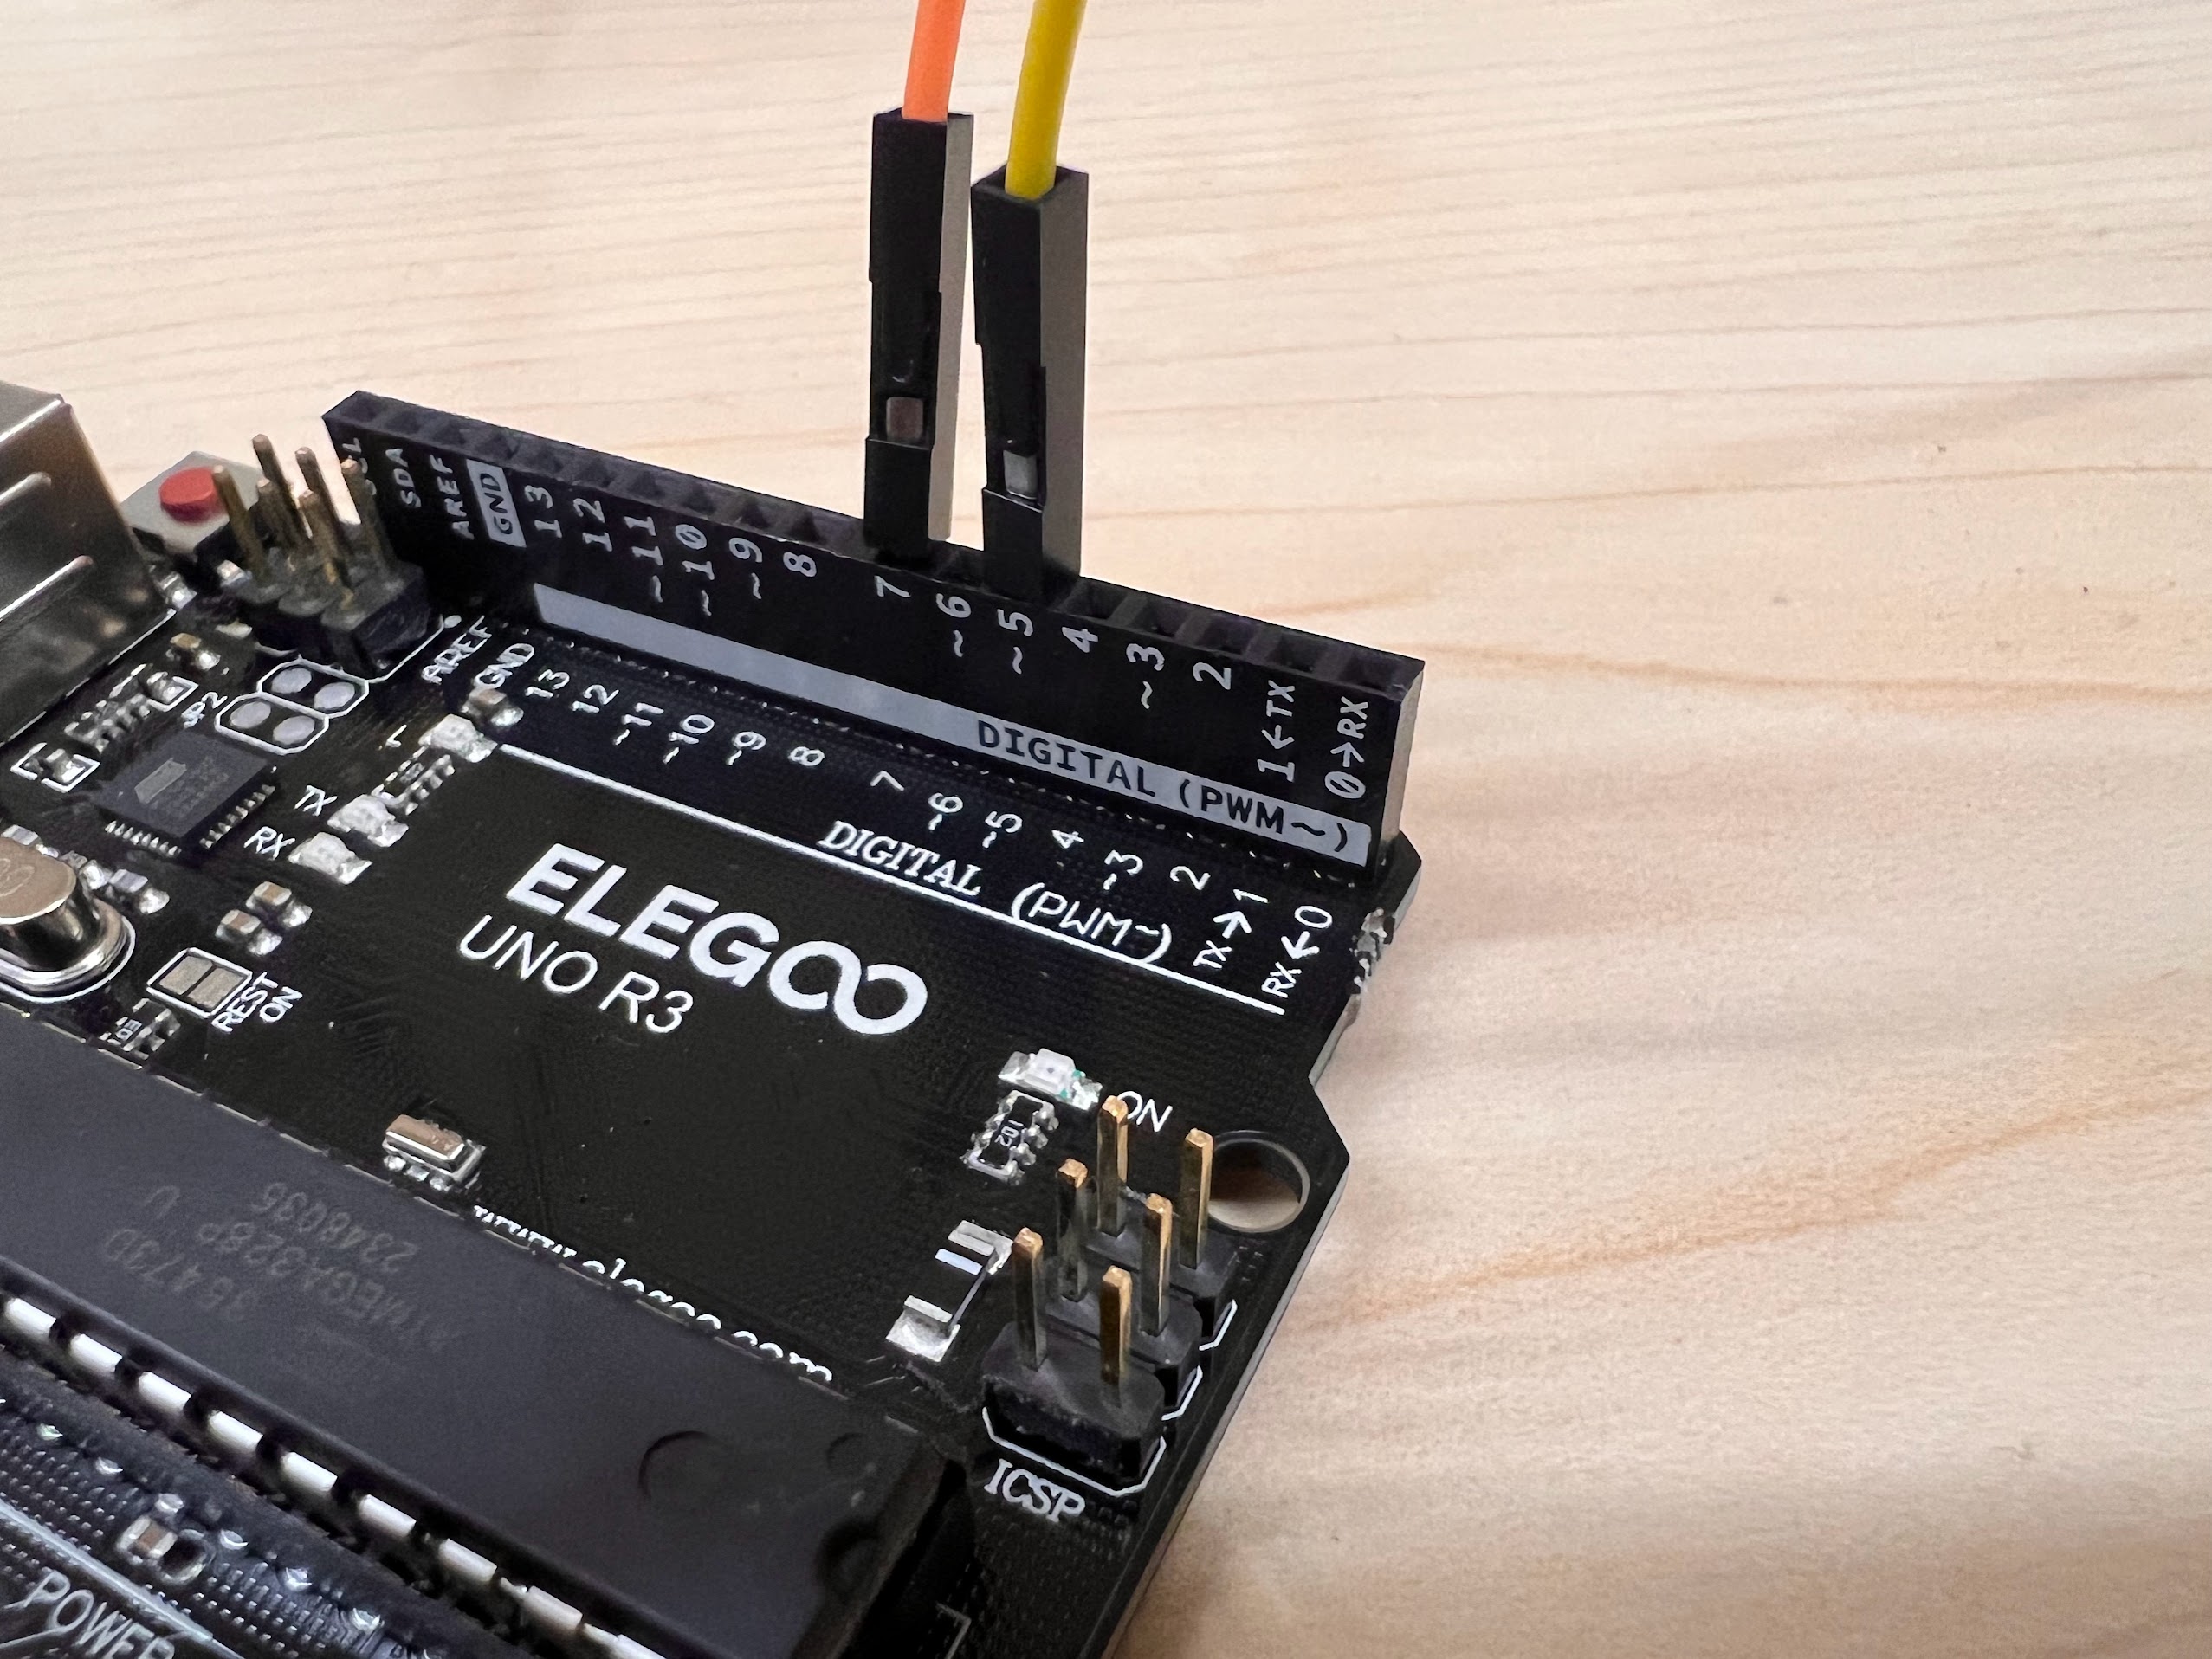
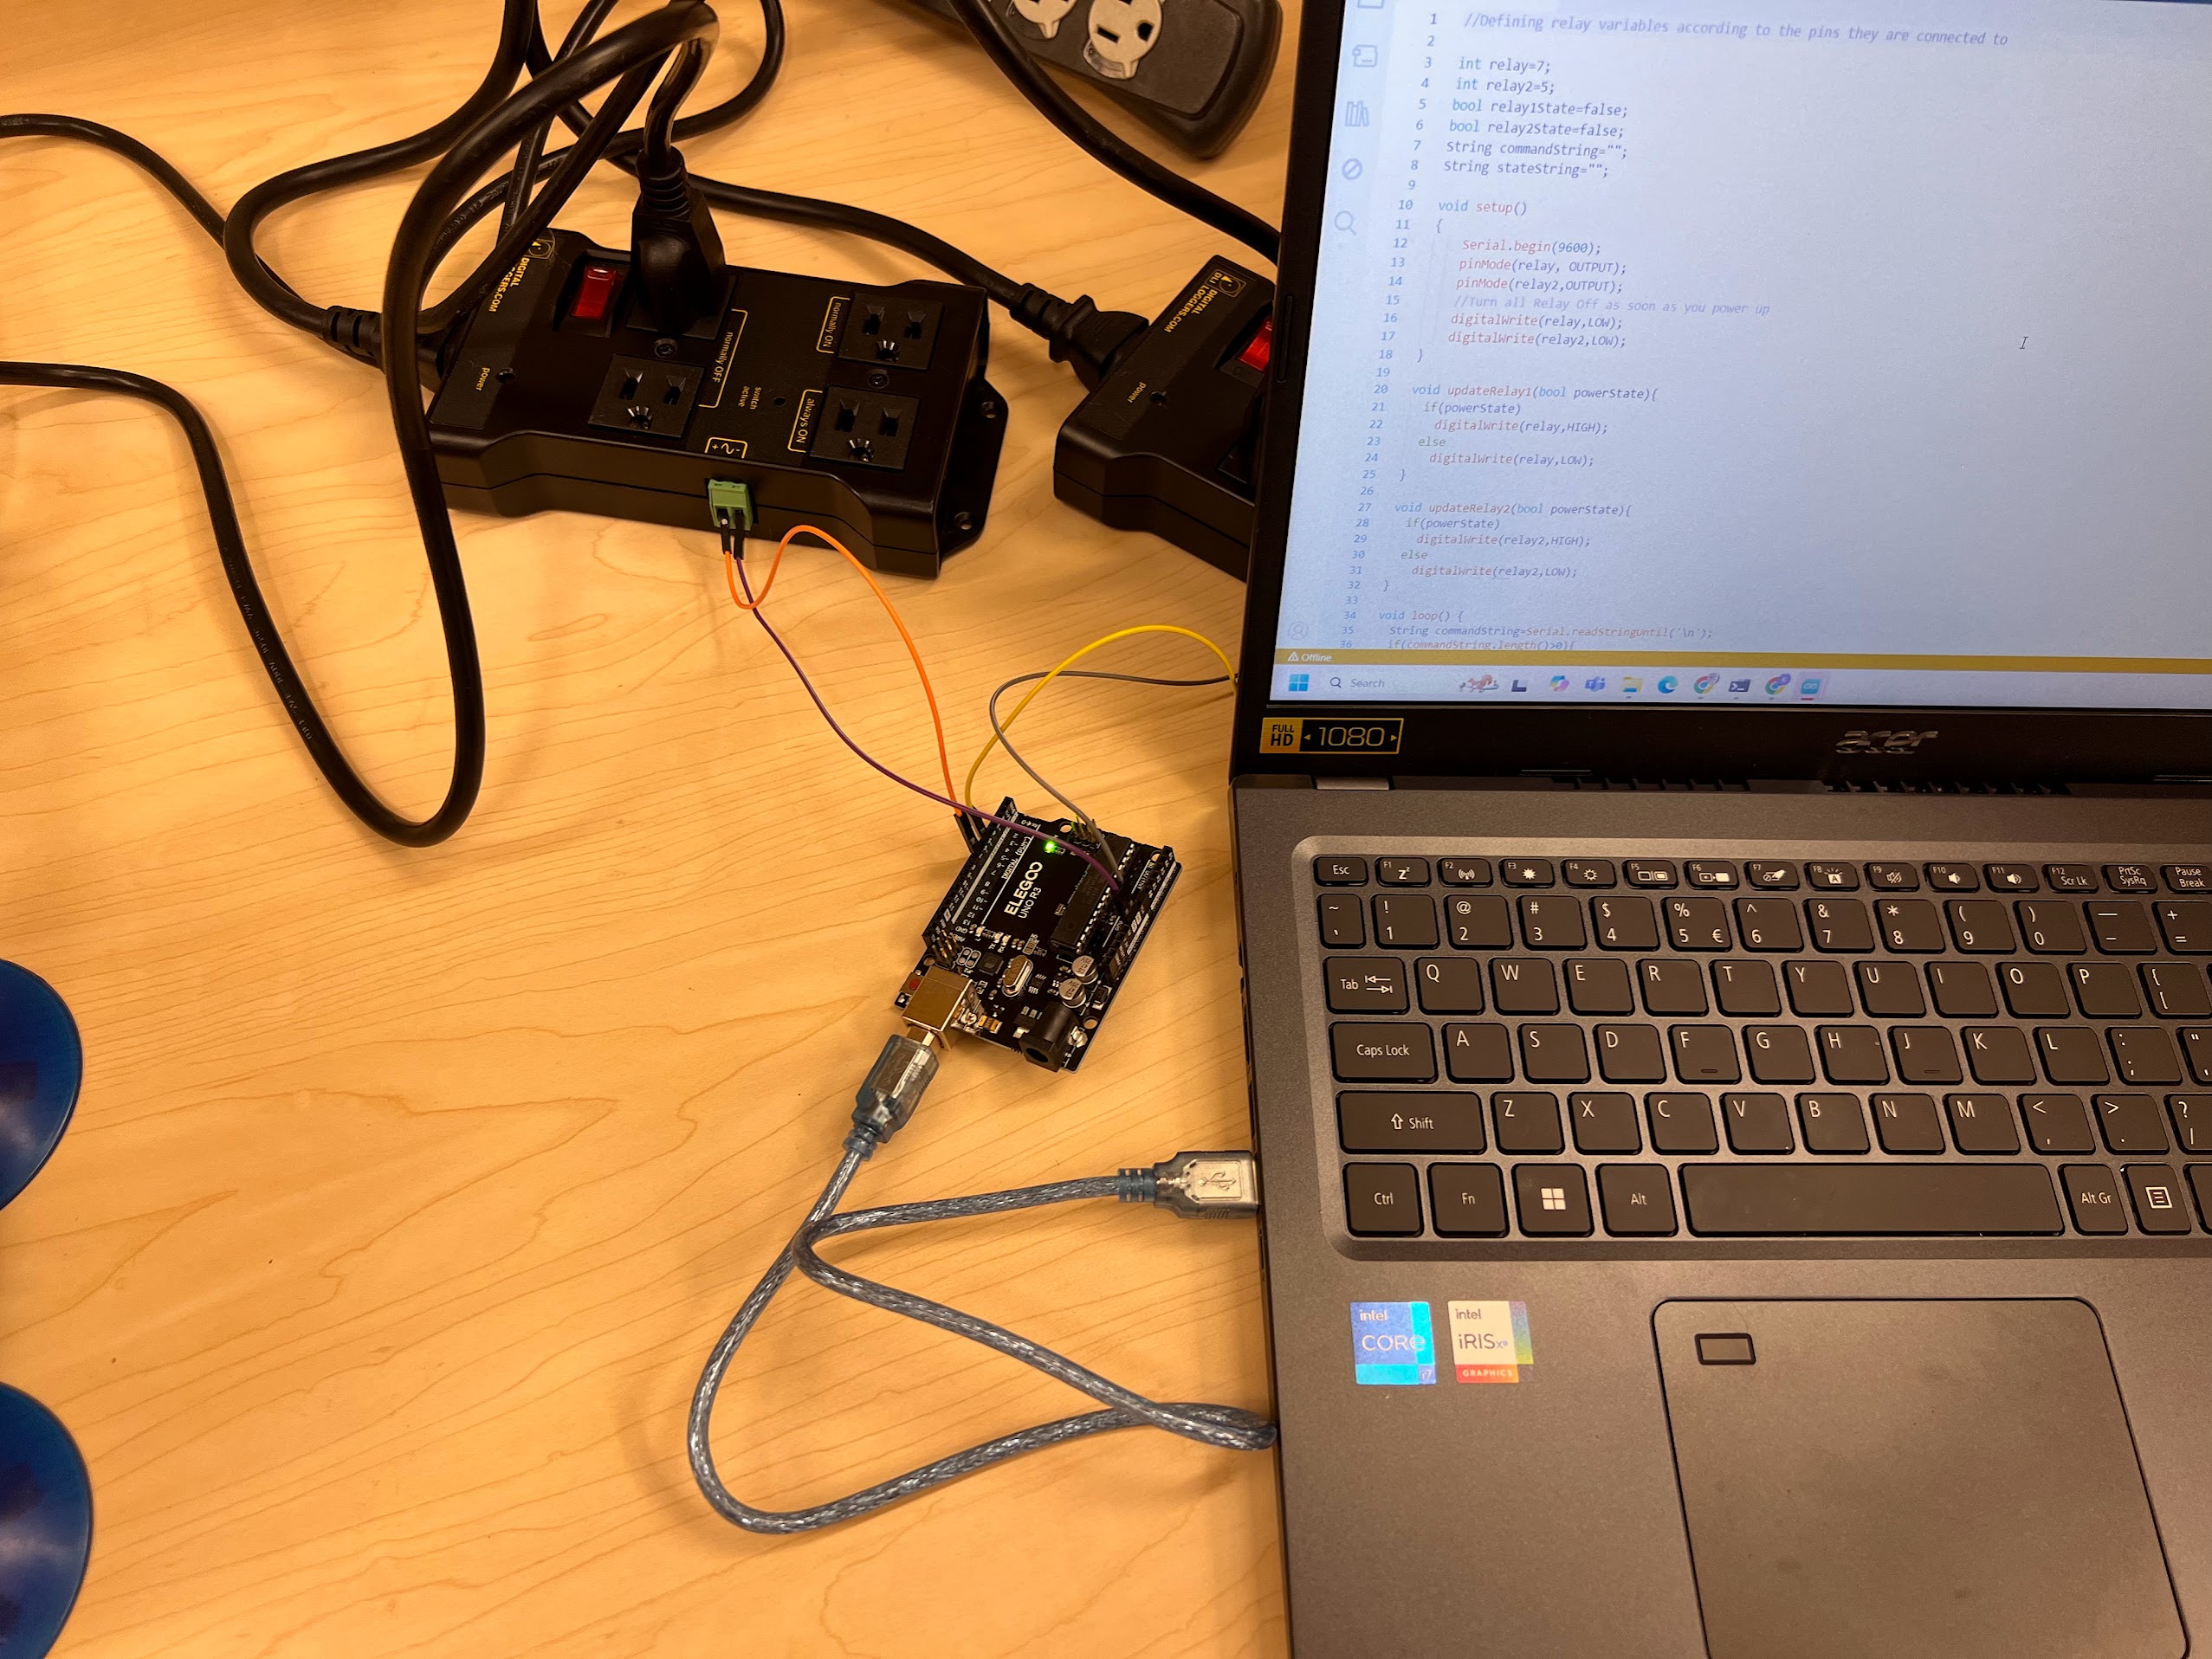
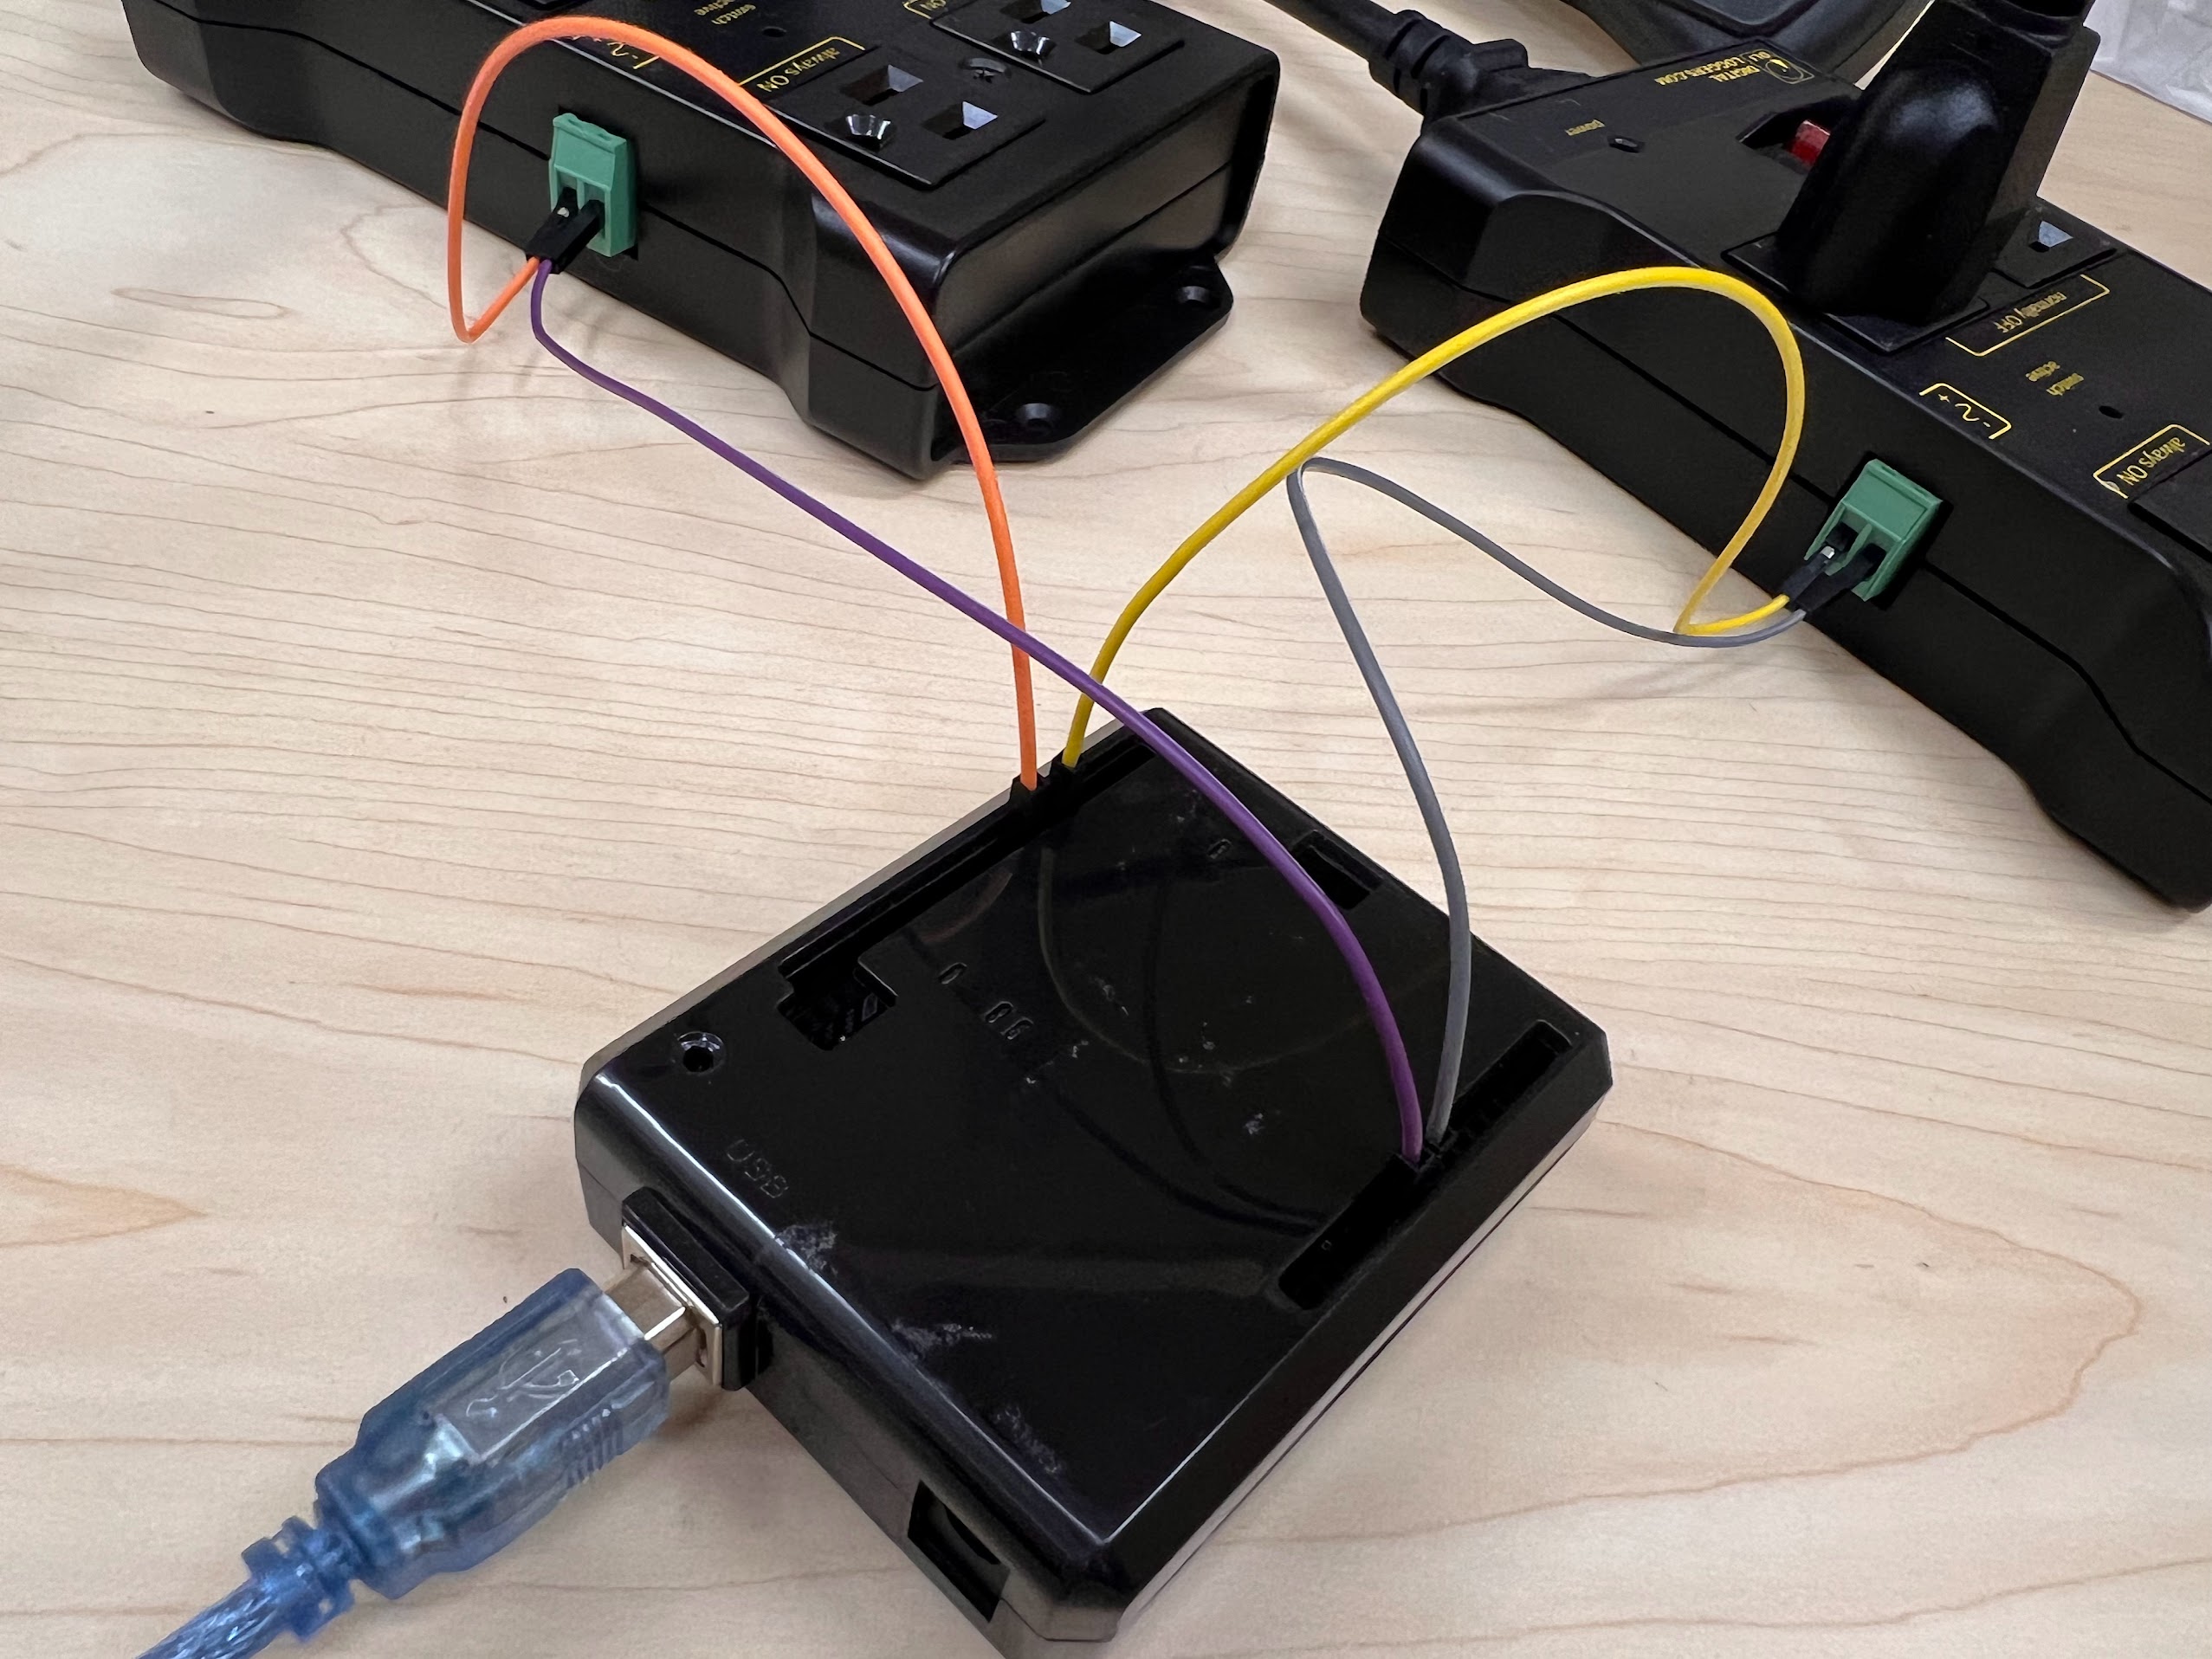
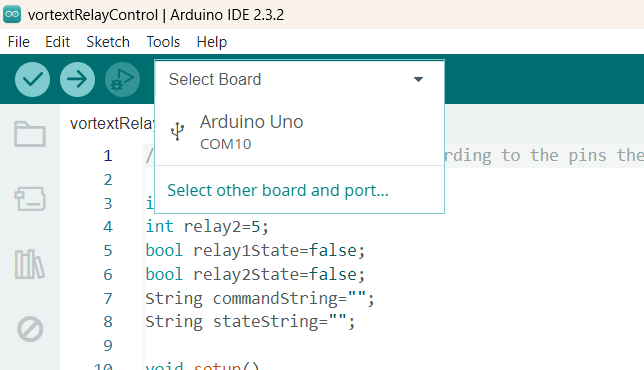
    • Execute the cell below to learn how to wire up your Vortices to the AC Relay Boxes.
In [1]:
%%HTML
<iframe width="800" height="600" src="https://www.youtube.com/embed/jQMEU1Do160?si=86x4RakOEsa86G7K" title="YouTube video player" frameborder="0" allow="accelerometer; autoplay; clipboard-write; encrypted-media; gyroscope; picture-in-picture; web-share" referrerpolicy="strict-origin-when-cross-origin" allowfullscreen></iframe>
  • Using the Male to Male Jumper Cables connect the Negative Terminals on the AC Relay Boxes to GND Terminals on the UNO R3 Board.
  • Connect the First Relay to Pin 7 and the Second Relay to Pin 5 on the UNO R3 Board.
  • Connect your UNO R3 Board to your computer via the provided USB Cable.
  • Upload the vortexRelayControl sketch to your UNO R3 Board using the Arduino IDE.
    • Execute the cell below to watch a video of the upload and testing process for controlling the Vortices using our computer.
In [2]:
%%HTML
<iframe width="800" height="600" src="https://www.youtube.com/embed/dEWZSLP9jBE?si=sIji_38-MLjGlG81" title="YouTube video player" frameborder="0" allow="accelerometer; autoplay; clipboard-write; encrypted-media; gyroscope; picture-in-picture; web-share" referrerpolicy="strict-origin-when-cross-origin" allowfullscreen></iframe>
  • Disconnect your USB Cable and Turn the Power Off.
  • Put your UNO R3 Board in a UNO R3 Case.
  • Reconnect your USB Cable and Turn the Power On.
  • Now we will control our Vortices using our Computer

Controlling the Vortices through Serial Commands Via Jupyter Notebooks

  • We can identify the COM Port by connecting and then disconnecting the UNO R3 Board via USB. By checking which new COM Port shows up in Arduino IDE.
    • In our case the port is COM10.
  • Close the Arduino IDE before moving to the next step.
    • Execute the cells below to test controlling the vortices via Jupyter notebooks.
In [3]:
import serial
import time

vortexRelayCOM="COM10"
vortexRelay=serial.Serial(vortexRelayCOM,timeout=1,write_timeout=0)
time.sleep(5)
print(vortexRelay.name)
print(vortexRelay.get_settings())
print(vortexRelay.is_open)
if not vortexRelay.is_open:
    vortexRelay.open()
    time.sleep(5)
    
def stop_bead_vortex():
    stop_both_vortices()
    
def start_bead_vortex():
    vortexRelay.write("A1|B0\n".encode())
                                
#Use this method to stop the Bead Channel Vortex
def stop_bead_vortex2():
    stop_both_vortices()

def start_bead_vortex2():
    vortexRelay.write("A0|B1\n".encode())

def start_both_vortices():
    vortexRelay.write("A1|B1\n".encode())
    
def stop_both_vortices():
    vortexRelay.write("A0|B0\n".encode())
COM10
{'baudrate': 9600, 'bytesize': 8, 'parity': 'N', 'stopbits': 1, 'xonxoff': False, 'dsrdtr': False, 'rtscts': False, 'timeout': 1, 'write_timeout': 0, 'inter_byte_timeout': None}
True
  • Lets try turning the first vortex on for 10 seconds.
  • Then we will turn off the first vortex and turn on the second vortex for 10 seconds.
  • We will then turn both of them on for 10 seconds after which we will turn both off.
  • Lets try it. Execute the cell below
In [4]:
start_bead_vortex()
time.sleep(10)
start_bead_vortex2()
time.sleep(10)
start_both_vortices()
time.sleep(10)
stop_both_vortices()
time.sleep(10)
  • Now lets close our connection to the board.
In [5]:
vortexRelay.close()