Protocol for creating the PDMS Microfluidic Chips from the Mold at Nano3 Facility at UC San Diego:

  • Protocol adapted from Nano3 PDMS Molding Course.
  • Make a reservation of the PDMS Clean Space for 6 hours using the FOM Reservation System.
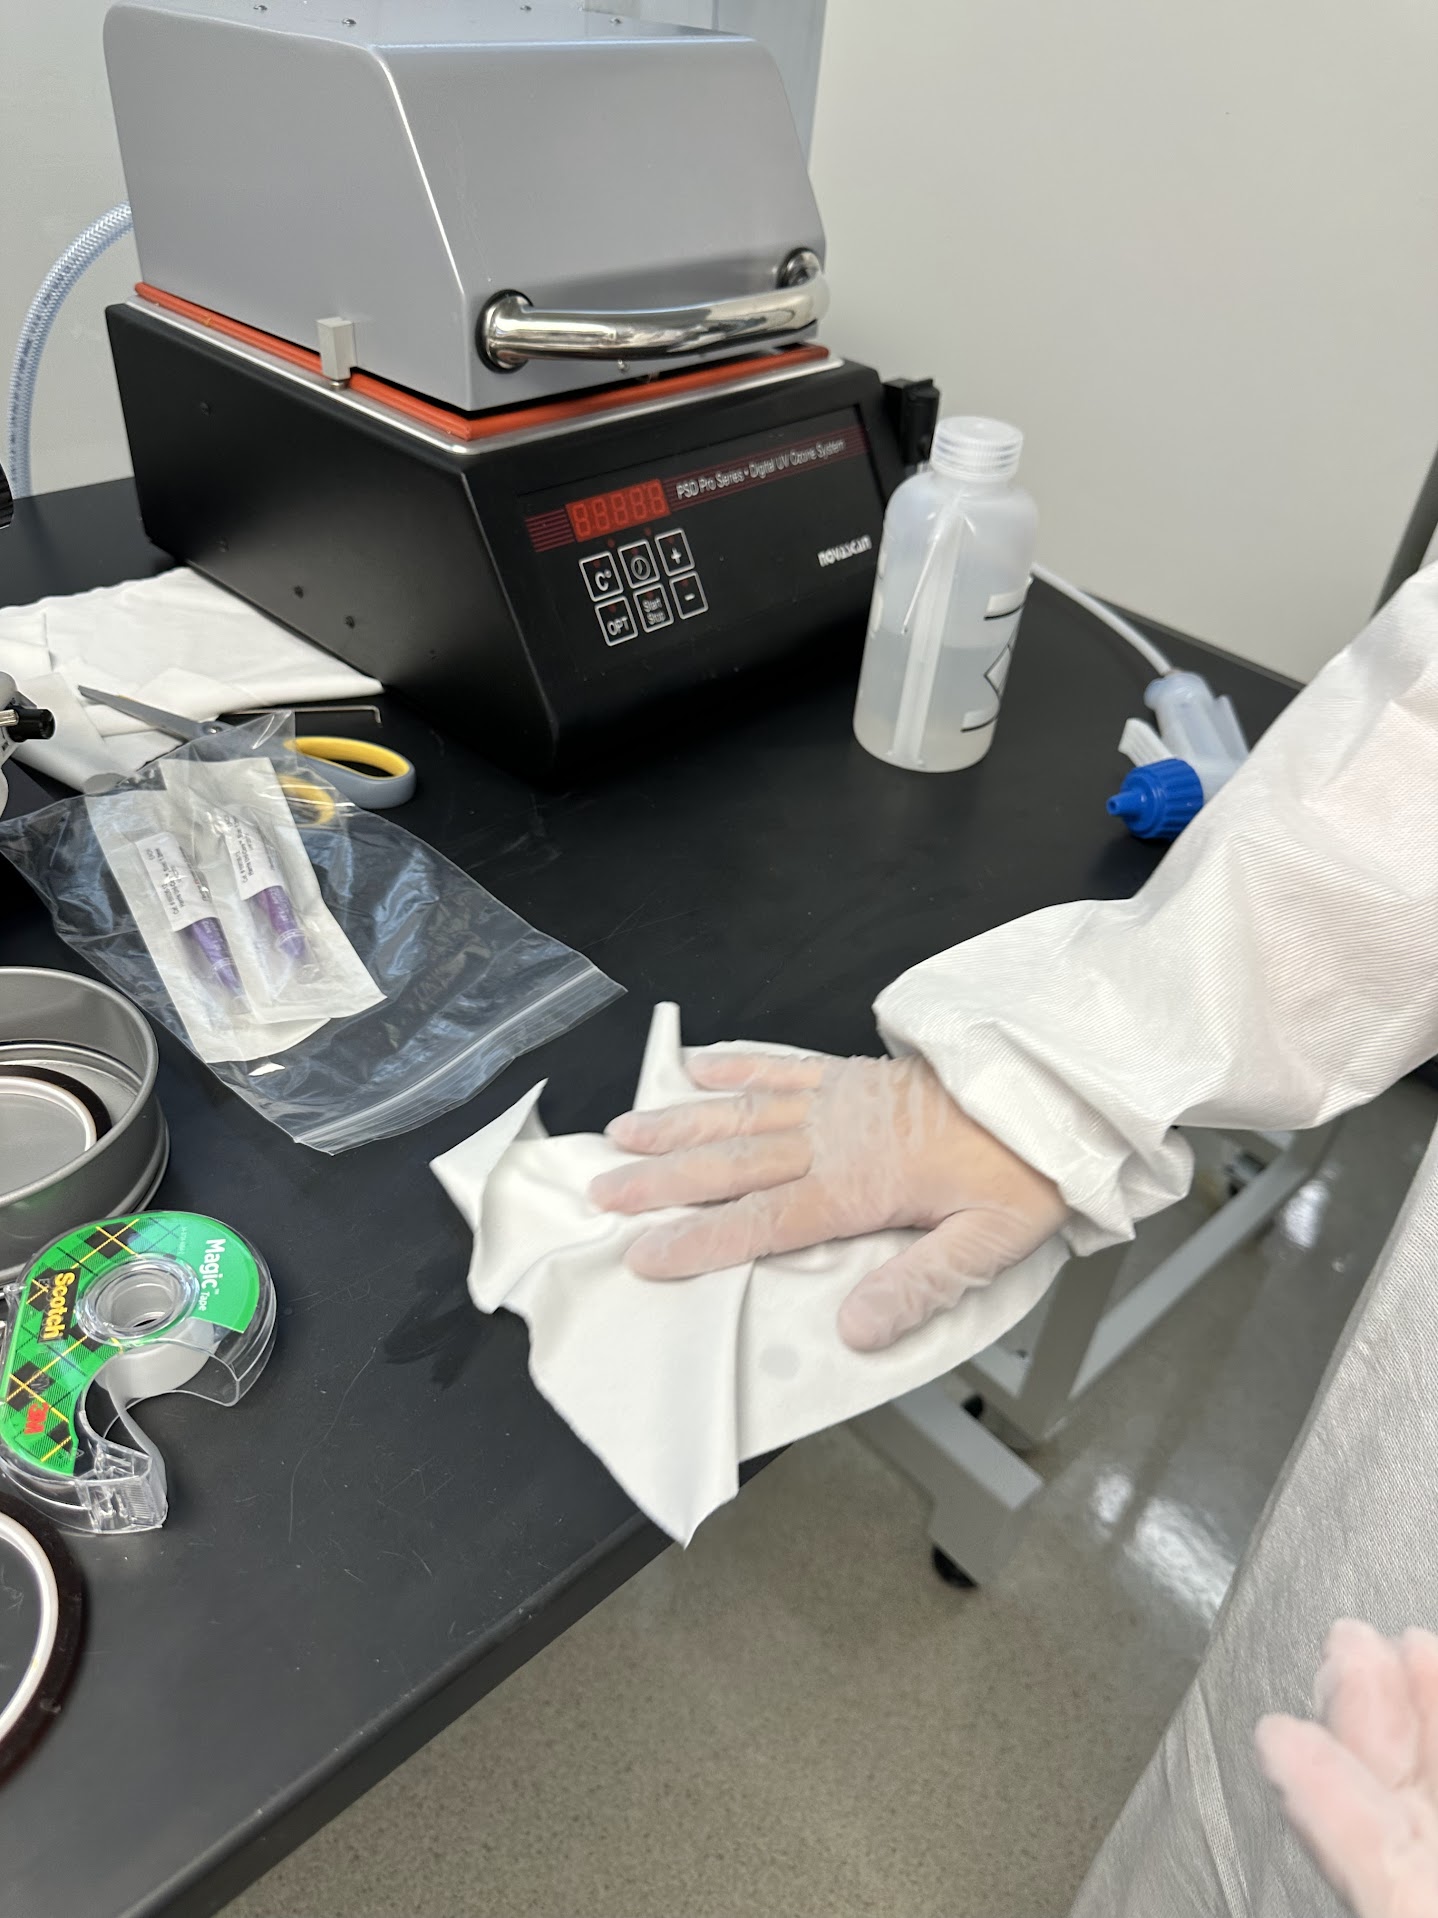
  • Clean the work area with Isopropanol(IPA) and cloth cleanroom wipes.
  • Clean the containers/wafer carriers brought into the cleanspace as much as possible.
    • I generally store the items I want to keep dust/particle free in a sealed container which I only open inside the Cleanroom/Cleanspace.
    • Wafers should also only be stored inside the Wafer Carrier. The Wafer Carrier should only be opened inside the Cleanspace/Cleanroom.
    • Both the PDMS Cleanspace and Cleanroom have filtered air which keeps the air dust and particle free.
  • Clean the Springform Pan Thoroughly:
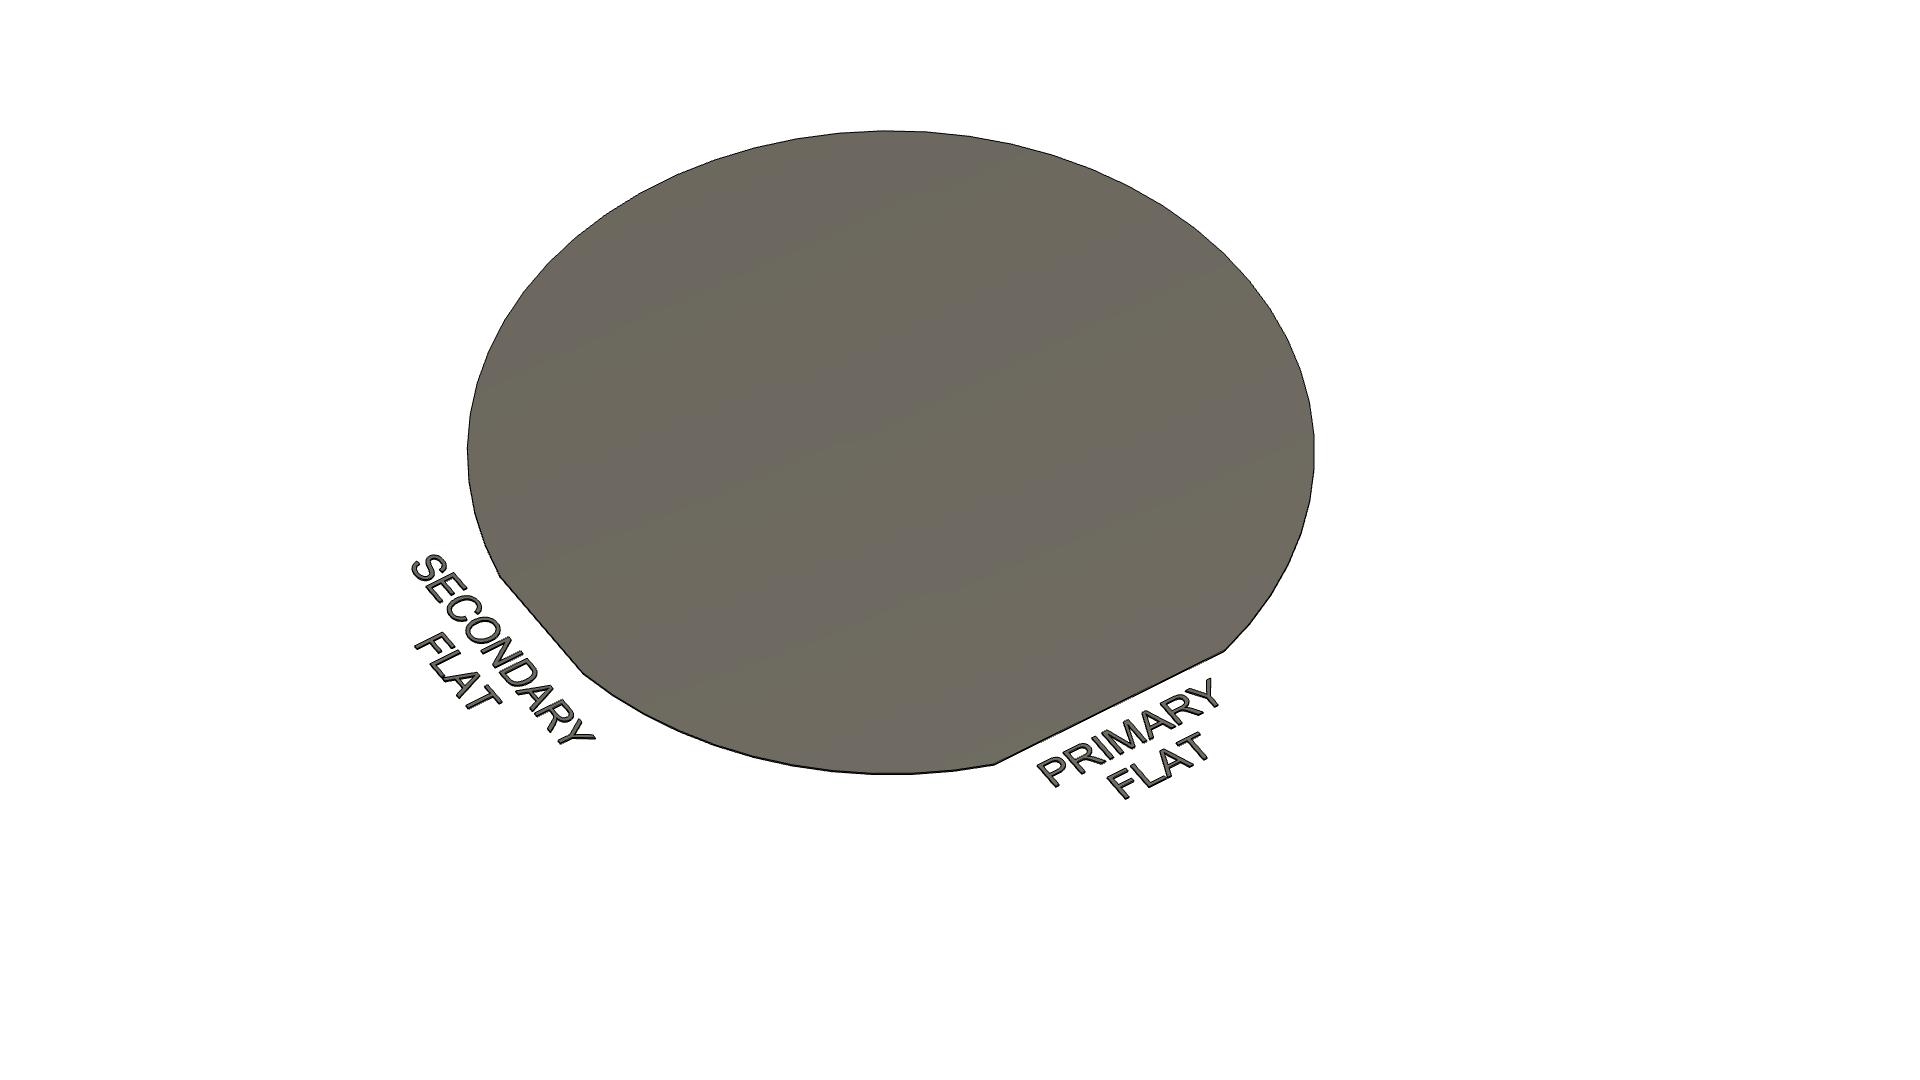
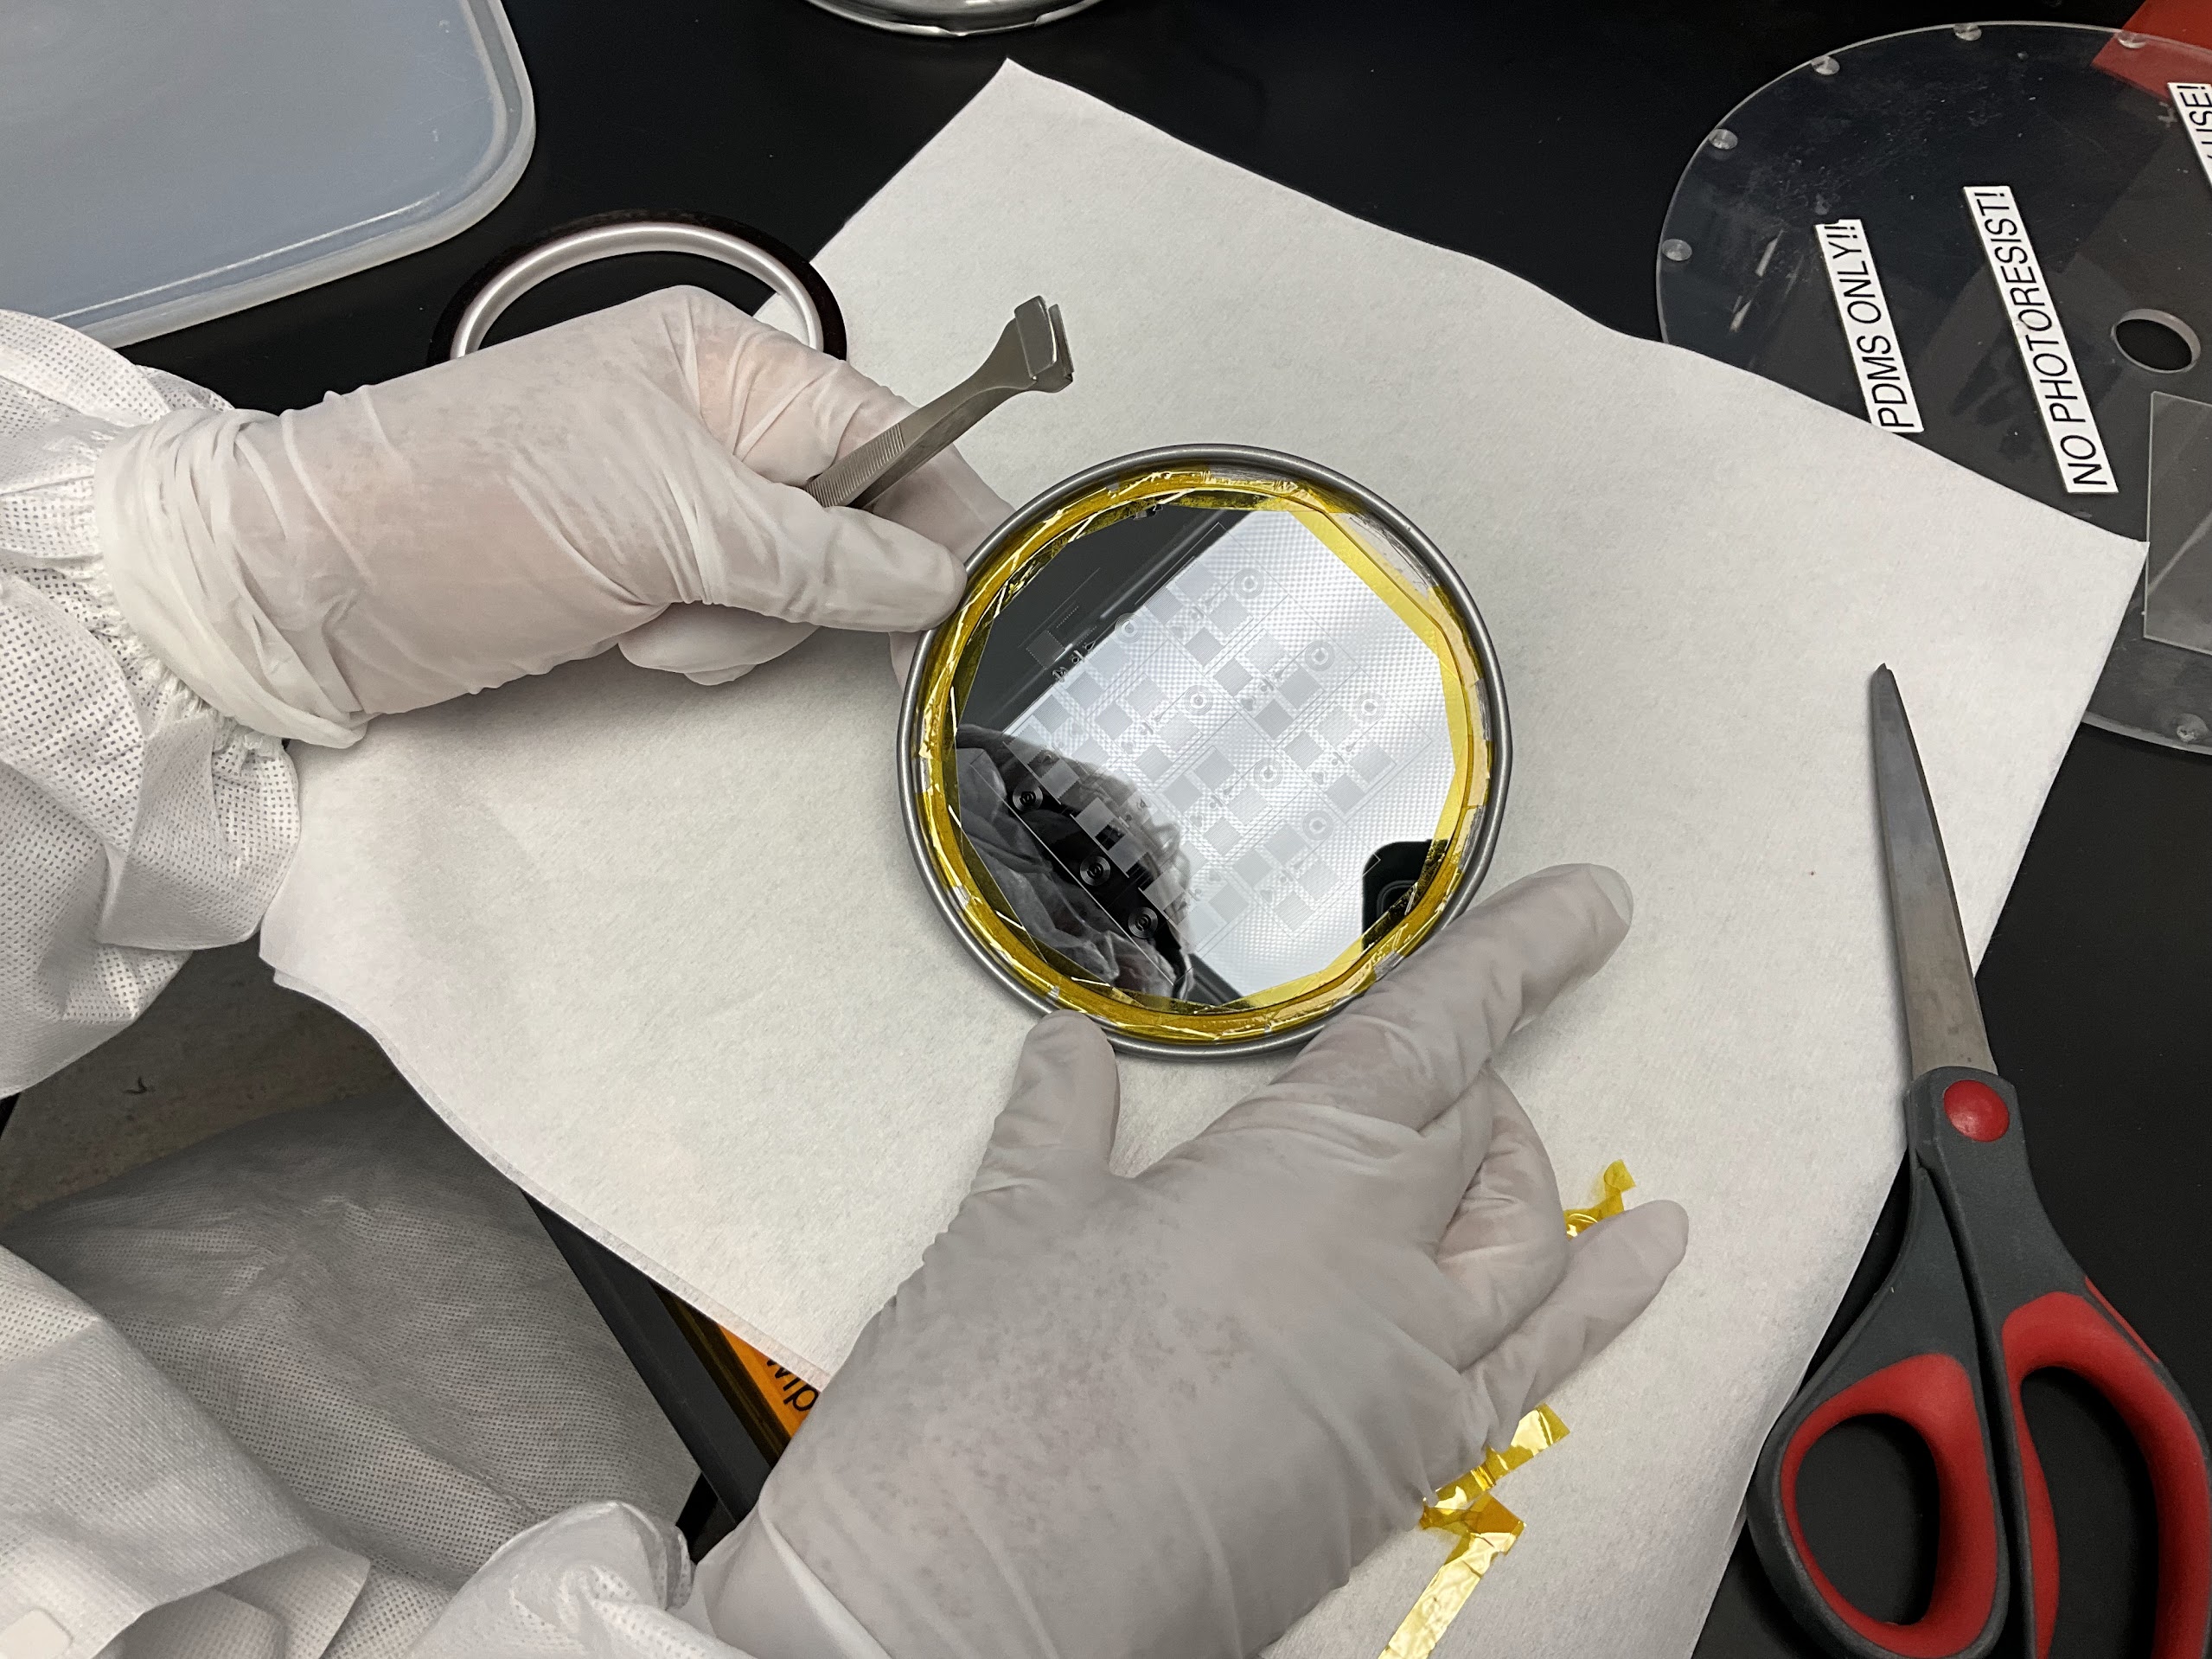
    • Remove the base from the top part of the 4.5 inch Springform pan by releasing the latch on the side of the pan.
    • Clean the springform pan top and its base as much as possible. There should be no particles on the pan base.
    • Any Remaining particles on the base can create large air gaps under the wafer which can make the wafer hard to remove and possibly even destroy the wafer when you try to remove it.
    • Please clean the pans throughly with IPA and Cloth Cleanroom wipes.
    • Execute the cell below to watch a video on how to clean.
In [1]:
%%HTML
<iframe width="800" height="600" src="https://www.youtube.com/embed/TSA35ryxp5A?si=cVorGDyViiJA3n4_" title="YouTube video player" frameborder="0" allow="accelerometer; autoplay; clipboard-write; encrypted-media; gyroscope; picture-in-picture; web-share" allowfullscreen></iframe>
  • Using the wafer tweezers carefully remove the wafers you will be using for the PDMS molding from the Wafer Carrier.

    • Check the back of the wafers to make sure there are no particles or PDMS residue.
    • Blow dry with the Nitrogen gun to get rid of any particles.
    • Avoid touching the pattern on the front of the wafer.
    • Use IPA and Cloth wipes to clean the back of the wafer if necessary. Use Nitrogen gun to blow dry the IPA.
  • Attach the Wafer to the Base of the Spingform pan:

    • Clean the roll of Kapton Tape to make sure there is no dust stuck to the side of the Tape.
    • Put the wafer inside the springform pan base with the patern facing towards you.
    • Try to align the wafer with the center of the pan so that the edge/circumference of the wafer is equidistant to the edge/circumference of the springform pan base.
    • Label the pan if necessary so you know which wafer is in the pan.
    • Cut a small segment of 1/4 inch Kapton tape to attach the Wafer to the base of the springform pan.
    • The first place you should put a tape segment is along the primary flat of the wafer.
    • Attach the tape segment along the outer edge of the wafer.
    • Take care to completely cover the edge so that no PDMS can seep below the wafer surface.
    • I suggest attaching the tape in small overlapping segments in a clockwise pattern around the wafer.
    • Execute the Cell Below to Watch a video of the Process:
In [2]:
%%HTML
<iframe width="800" height="600" src="https://www.youtube.com/embed/NrDzEiwqU4s?si=-4xxLSDZnIigS-KK" title="YouTube video player" frameborder="0" allow="accelerometer; autoplay; clipboard-write; encrypted-media; gyroscope; picture-in-picture; web-share" allowfullscreen></iframe>
  • The Taped Wafer should look like this:
  • Remove any air gaps:
    • Press along the edge of the wafer to eliminate any air gaps. Ideally no PDMS should flow between the tape and the wafer bottom.
    • If PDMS does flow between the pan and the wafer, then it can strongly bind the wafer to the pan making it hard to remove.
    • If PDMS does bind the wafer there is a separate video and section below on how to deal with it.
    • Execute the Cell Below to watch a video on how to remove any air gaps.
In [3]:
%%HTML
<iframe width="800" height="600" src="https://www.youtube.com/embed/qgjGMCidta4?si=1ojCnNEGMWitIAT_" title="YouTube video player" frameborder="0" allow="accelerometer; autoplay; clipboard-write; encrypted-media; gyroscope; picture-in-picture; web-share" allowfullscreen></iframe>
  • Reattach the base of the Springform Pan back to the top.
  • Blow particles away from the pattern on the wafer using the Nitrogen Gun.
In [4]:
%%HTML
<iframe width="800" height="600" src="https://www.youtube.com/embed/lALzSerBPo0?si=Iw6mkiMZ4nG-iLwr" title="YouTube video player" frameborder="0" allow="accelerometer; autoplay; clipboard-write; encrypted-media; gyroscope; picture-in-picture; web-share" allowfullscreen></iframe>
  • Weigh the PDMS Base and PDMS Curing Agent provided by Nano3 and write an entry into the Logbook with the Initial Weights.


  • Take a Disposable Plastic Mixing cup from the rack. Make sure there are no particles in the cup by blowing air into it using the Nitrogen Gun.
    • Execute the Cell Below to Watch a video of the process.
In [5]:
%%HTML
<iframe width="800" height="600" src="https://www.youtube.com/embed/gPXo4vWa7Sc?si=kT3SEI-HQNwNJ7g5" title="YouTube video player" frameborder="0" allow="accelerometer; autoplay; clipboard-write; encrypted-media; gyroscope; picture-in-picture; web-share" allowfullscreen></iframe>
  • Add Exactly 30g of PDMS Base into the mixing cup:
    • Put the mixing cup on an electronic weighing scale.
    • Zero the scale and carefully add exactly 30 grams of PDMS base provided by Nano3 to the bottom of the cup.
    • Keep frequently pressing down slightly on the scale with your finger since this forces the scale to update the weight to a more accurate value.
    • This is necessary because there is a slight time lag in the weight shown by the scale and the actual weight of the cup.
    • Execute the Cell Below to Watch a video on the Process:
In [6]:
%%HTML
<iframe width="800" height="600" src="https://www.youtube.com/embed/a3e080GSnTw?si=JDxGIqIrSMqNB_5C" title="YouTube video player" frameborder="0" allow="accelerometer; autoplay; clipboard-write; encrypted-media; gyroscope; picture-in-picture; web-share" allowfullscreen></iframe>
  • Now add exactly 3 grams of PDMS curing agent. For a 10:1 Ratio of Base:Curing Agent and a total weight of 33 grams. Take the same precautions with the Weighing scale mentioned previously.
    • Execute the Cell Below to Watch of Video of the process.
In [7]:
%%HTML
<iframe width="800" height="600" src="https://www.youtube.com/embed/YLBES1D8ooI?si=RdYLqwrWxSQYnvfI" title="YouTube video player" frameborder="0" allow="accelerometer; autoplay; clipboard-write; encrypted-media; gyroscope; picture-in-picture; web-share" allowfullscreen></iframe>
  • Add the cup to the Thinky mixer:
    • Make sure the weight of the counterbalance in the Thinky mixer approximately matches the weight of the mixing cup and carrier.
    • Zero the weighing scale and measure the total weight of the cup and carrier.
    • This should approximately match the setting on the counterbalance inside the Thinky mixer.
    • Rotate the knob inside the mixer to set the counterbalance weight.
    • Run the Thinky mixer for 3 minutes and 30 seconds at 2000 RPM. Your PDMS Base and Curing agent should now be evenly mixed.
    • Execute the Cell Below to Watch a video of the process.
In [8]:
%%HTML
<iframe width="800" height="600" src="https://www.youtube.com/embed/eLMiRxg1J48?si=HQBL4CWClhE_an3u" title="YouTube video player" frameborder="0" allow="accelerometer; autoplay; clipboard-write; encrypted-media; gyroscope; picture-in-picture; web-share" allowfullscreen></iframe>
  • Remove cup from Mixer and Pour PDMS onto the Mold:
    • Bend the cup inward to pull it out from the Mixing cup Carrier easily.
    • Now Pour the mixed PDMS over the Wafer mold.
    • Wait 3 minutes for most of the viscous PDMS mix to be poured in.
    • Execute the Cell Below to Watch a Video of the Process.
In [9]:
%%HTML
<iframe width="800" height="600" src="https://www.youtube.com/embed/HOrSke8NK9w?si=W4Dr45GC_-Klh7J4" title="YouTube video player" frameborder="0" allow="accelerometer; autoplay; clipboard-write; encrypted-media; gyroscope; picture-in-picture; web-share" allowfullscreen></iframe>
  • Degassing the PDMS to remove air bubbles:
    • This is a necessary step to avoid damaging your mold.
    • Skipping this step will lead to a poor PDMS replica with fine features missing and permanent damage to your Wafer Mold.
    • You now need to turn the vacuum on. To do this you need to make sure the valve leading to the Degassing bowl is open.
    • There are three orange valves under the bench.
    • The one on the right is for the vacuum pump. This right valve needs to be open. This valve is open when the orange handle is vertically oriented in the direction of the pipe.
    • The center valve is for the PDMS Spinner. This valve needs to be closed. Rotate the orange handle till the valve handle is perpendicular to the direction of the pipe.
    • The left valve is for the Degassing bowl. This valve needs to be open.
    • There is another rotary valve connected to the black tube attached to the Degassing bowl. This should be inline with and directly behind the Degassing bowl.
    • The black pin that controls the rotary valve should be along the same direction as the tubing.
    • Now place the springform pans inside the Degassing Bowl and close the lid. Make sure you do not block the center hole inside the Bowl.
    • Now turn on the red switch for the Vacuum pump below the bench. If you hear leaking air then the rotary valve is most likely still open. The black pin needs to be turned 180 degrees with the pin still oriented along the direction of the tubing.
    • Degas under vacuum between 30-45 mins.
    • You should see a large number of bubbles coming out from the PDMS mix inside the degassing bowl when you turn the vacuum on.
    • Try lifting the bowl by the lid. The lid should be tightly attached to the base because of the vacuum.
    • The Degassing process should get rid of almost all bubbles on the wafer surface inside the PDMS mix.
    • Execute the Cell Below to Watch a Video of the Process.
In [10]:
%%HTML
<iframe width="800" height="600" src="https://www.youtube.com/embed/ebV-RoxQ6uI?si=3HZxhsMXIgUimRMS" title="YouTube video player" frameborder="0" allow="accelerometer; autoplay; clipboard-write; encrypted-media; gyroscope; picture-in-picture; web-share" allowfullscreen></iframe>
  • Place the Springform pans at the back of the top shelf inside the Convection oven.
    • Make sure the pans are close to the center line at the back of the shelf.
    • This part of the Convection oven is the most level and there is a good chance to get Microfluidic chips that are of equal thickness.
    • Watch Video by executing the Next Cell.
In [12]:
%%HTML
<iframe width="800" height="600" src="https://www.youtube.com/embed/_zWebK_7Vtc?si=hA5-IDOWPiW-u0tK" title="YouTube video player" frameborder="0" allow="accelerometer; autoplay; clipboard-write; encrypted-media; gyroscope; picture-in-picture; web-share" allowfullscreen></iframe>
  • The convection oven should be set to 120°C.
    • Make Sure there is no ramp time before the oven heats to 120°C
    • Also make sure there is no ramp down time after which the oven automatically reduced temperature or shuts down.
    • Bake for 90 mins.
    • Execute the Cell below to Watch a Video on how to program the oven.
In [13]:
%%HTML
<iframe width="800" height="600" src="https://www.youtube.com/embed/9puMipWFt3Y?si=Kuiwy5jE9qAqfZpB" title="YouTube video player" frameborder="0" allow="accelerometer; autoplay; clipboard-write; encrypted-media; gyroscope; picture-in-picture; web-share" allowfullscreen></iframe>
  • Wear Double Gloves and Quickly Remove the Pans from the Oven:
    • Avoid Buring Yourself.
    • Wait 5 minutes for the Metal to Cool down.
  • Remove the PDMS Replica from the Mold and Cut the Individual Chips out:
    • Remove the pans from the oven.
    • Release the base of the pans.
    • Now run a scraper blade along the edge of the base of the pan to carve the PDMS out. There are many long blades inside the cleanroom storage box. Read the labels on the blades and use the newest ones.
    • Carefully insert the tweezer below the PDMS replica parallel to and directly above the primary flat of the wafer. Simultaneously, the tip of the tweezer should be touching the inner edge/circumference of the pan base.
    • Now move the tweezers away from the primary flat slowly and carefully peel the PDMS replica from the mold. Now place it on a cutting mat with the pattern facing up.
    • There should be a thinner area of even thickness PDMS around the pattern and a thicker edge around the pattern. Cut the thick edge off the PDMS replica using a scraper blade on the cutting mat. Avoid cutting any of the Chip pattern and lines around this thinner central region at this time.
    • Now place the scraper blade along the long parallel lines in the remaining PDMS and cut along those lines on the cutting pad. You should now have three long strips of Microfluidic Chips. The lines present in the pattern are intended as a guide to make it easier to cut the microfluidic chips out.
    • Place the scraper blade along the shorter lines between the microfluidic chips and cut individual chips out.
    • The pattern of the microfluidic chips should always be facing upwards towards you.
    • Execute the Cell Below to Watch a video of the Process.
In [19]:
%%HTML
<iframe width="800" height="600" src="https://www.youtube.com/embed/7LdVA51isCA?si=gqeYRwKm9iPNmclN" title="YouTube video player" frameborder="0" allow="accelerometer; autoplay; clipboard-write; encrypted-media; gyroscope; picture-in-picture; web-share" allowfullscreen></iframe>
  • Punch Inlet/Outlet Holes for the PDMS Chips:
    • There should be Rapid-Core 1.2 mm Biopsy punches stored inside the cleanroom storage box.
    • Check the date/label on the punches and get the most recently opened Rapid-Core 1.2mm Biopsy Punches.
    • Now using a 1.2mm Biopsy puncher, punch 4 holes into each microfluidic chip on the cutting mat.
    • The alignment patterns in or around the inlet/outlet areas of the microfluidic chip should visually make it easier to identify the locations for the holes.
    • It’s important to get clean holes with no debris on the inside of the holes. Rapid-Core punchers work quite well but if the puncher gets too blunt then the holes will have some debris on the inside and will look uneven.
    • Use your judgement to change the biopsy puncher if it has become too blunt. Most punches work well for at least 5 PDMS replicas or 50 chips.
    • Scraper blades can also get blunt but last much longer. Remember to label any new punches or scraper blades with the date it was opened or first used.
    • Execute the Cell Below to Watch a Video.
In [15]:
%%HTML
<iframe width="800" height="600" src="https://www.youtube.com/embed/913BxpM5F7g?si=MJatxyNW5S-mF3nw" title="YouTube video player" frameborder="0" allow="accelerometer; autoplay; clipboard-write; encrypted-media; gyroscope; picture-in-picture; web-share" allowfullscreen></iframe>
  • Clean the Pattern on the PDMS Chips with Tape:
    • Clean and Blowdry a Petri Dish and its lid with the Nitrogen Gun.
    • Cover the surface of the microfluidic chip with Scotch magic tape to clean any dust or debris on the microfluidic chip pattern.
    • The tape should be attached to the mat and then pulled over the Microfluidic chip.
    • To remove the tape move your hand perpendicular to the direction of the tape.
    • Make sure there are no air bubbles between the tape and microfluidic chip.
    • Remove the Scotch tape and put it on some cloth wipes.
    • Now place the cleaned chip in a Petri dish facing up towards you.
    • Execute the Cell Below to Watch a Video.
In [16]:
%%HTML
<iframe width="800" height="600" src="https://www.youtube.com/embed/5FQJ3f-eFJo?si=Z_2osIp61t-cC9sl" title="YouTube video player" frameborder="0" allow="accelerometer; autoplay; clipboard-write; encrypted-media; gyroscope; picture-in-picture; web-share" allowfullscreen></iframe>
  • Cover the Chips stored inside the Petridish with Tape to protect them from Dust:
    • Cover the chips with Scotch tape once you have a row of chips.
    • This is to prevent dust from accumulating on the chip surface and for trapping any debris still stuck on the chip surface.
    • Make sure there are no air bubbles between the Tape and the patterned surface on the Chips.
    • Execute the Cell Below to Watch a Video.
In [17]:
%%HTML
<iframe width="800" height="600" src="https://www.youtube.com/embed/31pfDild7Kc?si=5SZwwo1wADw0es8G" title="YouTube video player" frameborder="0" allow="accelerometer; autoplay; clipboard-write; encrypted-media; gyroscope; picture-in-picture; web-share" allowfullscreen></iframe>
  • By now you should have punched holes, cleaned and covered all the chips with scotch tape. Now label the petri dish with the date of production for the chips, your name and the Version number for the Microfluidic Chips.

  • Store the Petri Dishes in the storage box used for the cleanrooom/cleanspace.

  • Remove the Tape and Wafer from the Pan:

    • Remove the Kapton Tape in the same (clockwise) direction that you put the tape on the wafer.
    • The tape should come out in a smooth single motion if you do this correctly.
    • Stick the peeled tape on a Cloth Wipe.
    • Now using just your fingers try to push the wafer slightly.
    • If the wafer moves freely that means there was no PDMS below the wafer and you can easily remove it.
    • If the wafer doesn't easily move then put the lower lip of the wafer tweezer below any gap you can find under the wafer.
    • Now move the wafer tweezer's lower lip slowly along the circumference of the wafer for a full 360 degrees till you come back to the same position.
    • This motion should release the wafer from the base without damaging the wafer.
    • Inspect the Wafer for PDMS debris and blow particles away using the Nitrogen Gun.
    • Check the back of the wafers to make sure there are no particles or PDMS residue.
    • Blow dry with the Nitrogen gun to get rid of any particles.
    • Avoid touching the pattern on the front of the wafer.
    • Store the cleaned wafer in the Wafer Carrier in its correct position.
    • Execute the Cell Below to Watch a video of the Process.
In [18]:
%%HTML
<iframe width="800" height="600" src="https://www.youtube.com/embed/wS99efm0txI?si=gOTnekUwijDVlEVZ" title="YouTube video player" frameborder="0" allow="accelerometer; autoplay; clipboard-write; encrypted-media; gyroscope; picture-in-picture; web-share" allowfullscreen></iframe>
  • Clean your work area and get rid of any trash.
  • Store all the items in their correct location.
  • Log off the FOM System.
  • Update the Logbook with the final weights of the Base and Curing agent and note the logout time.