Protocol for Aquapel Treatment of PDMS-Glass Bonded ChronoSeq-V14 Microfluidic Chips

Purpose of Protocol

  • Droplet Generation does not work without Aquapel Treatment of the Glass Bonded PDMS Microfluidic Chips.
  • Aquapel has a Fluorinated Active ingredient that works well with Fluorinated Oil/Sufractants used in Droplet Microfluidics.
  • This protocol has an additional benefit of Filtering out poorly bonded PDMS chips or identifying a bad batch of PDMS.

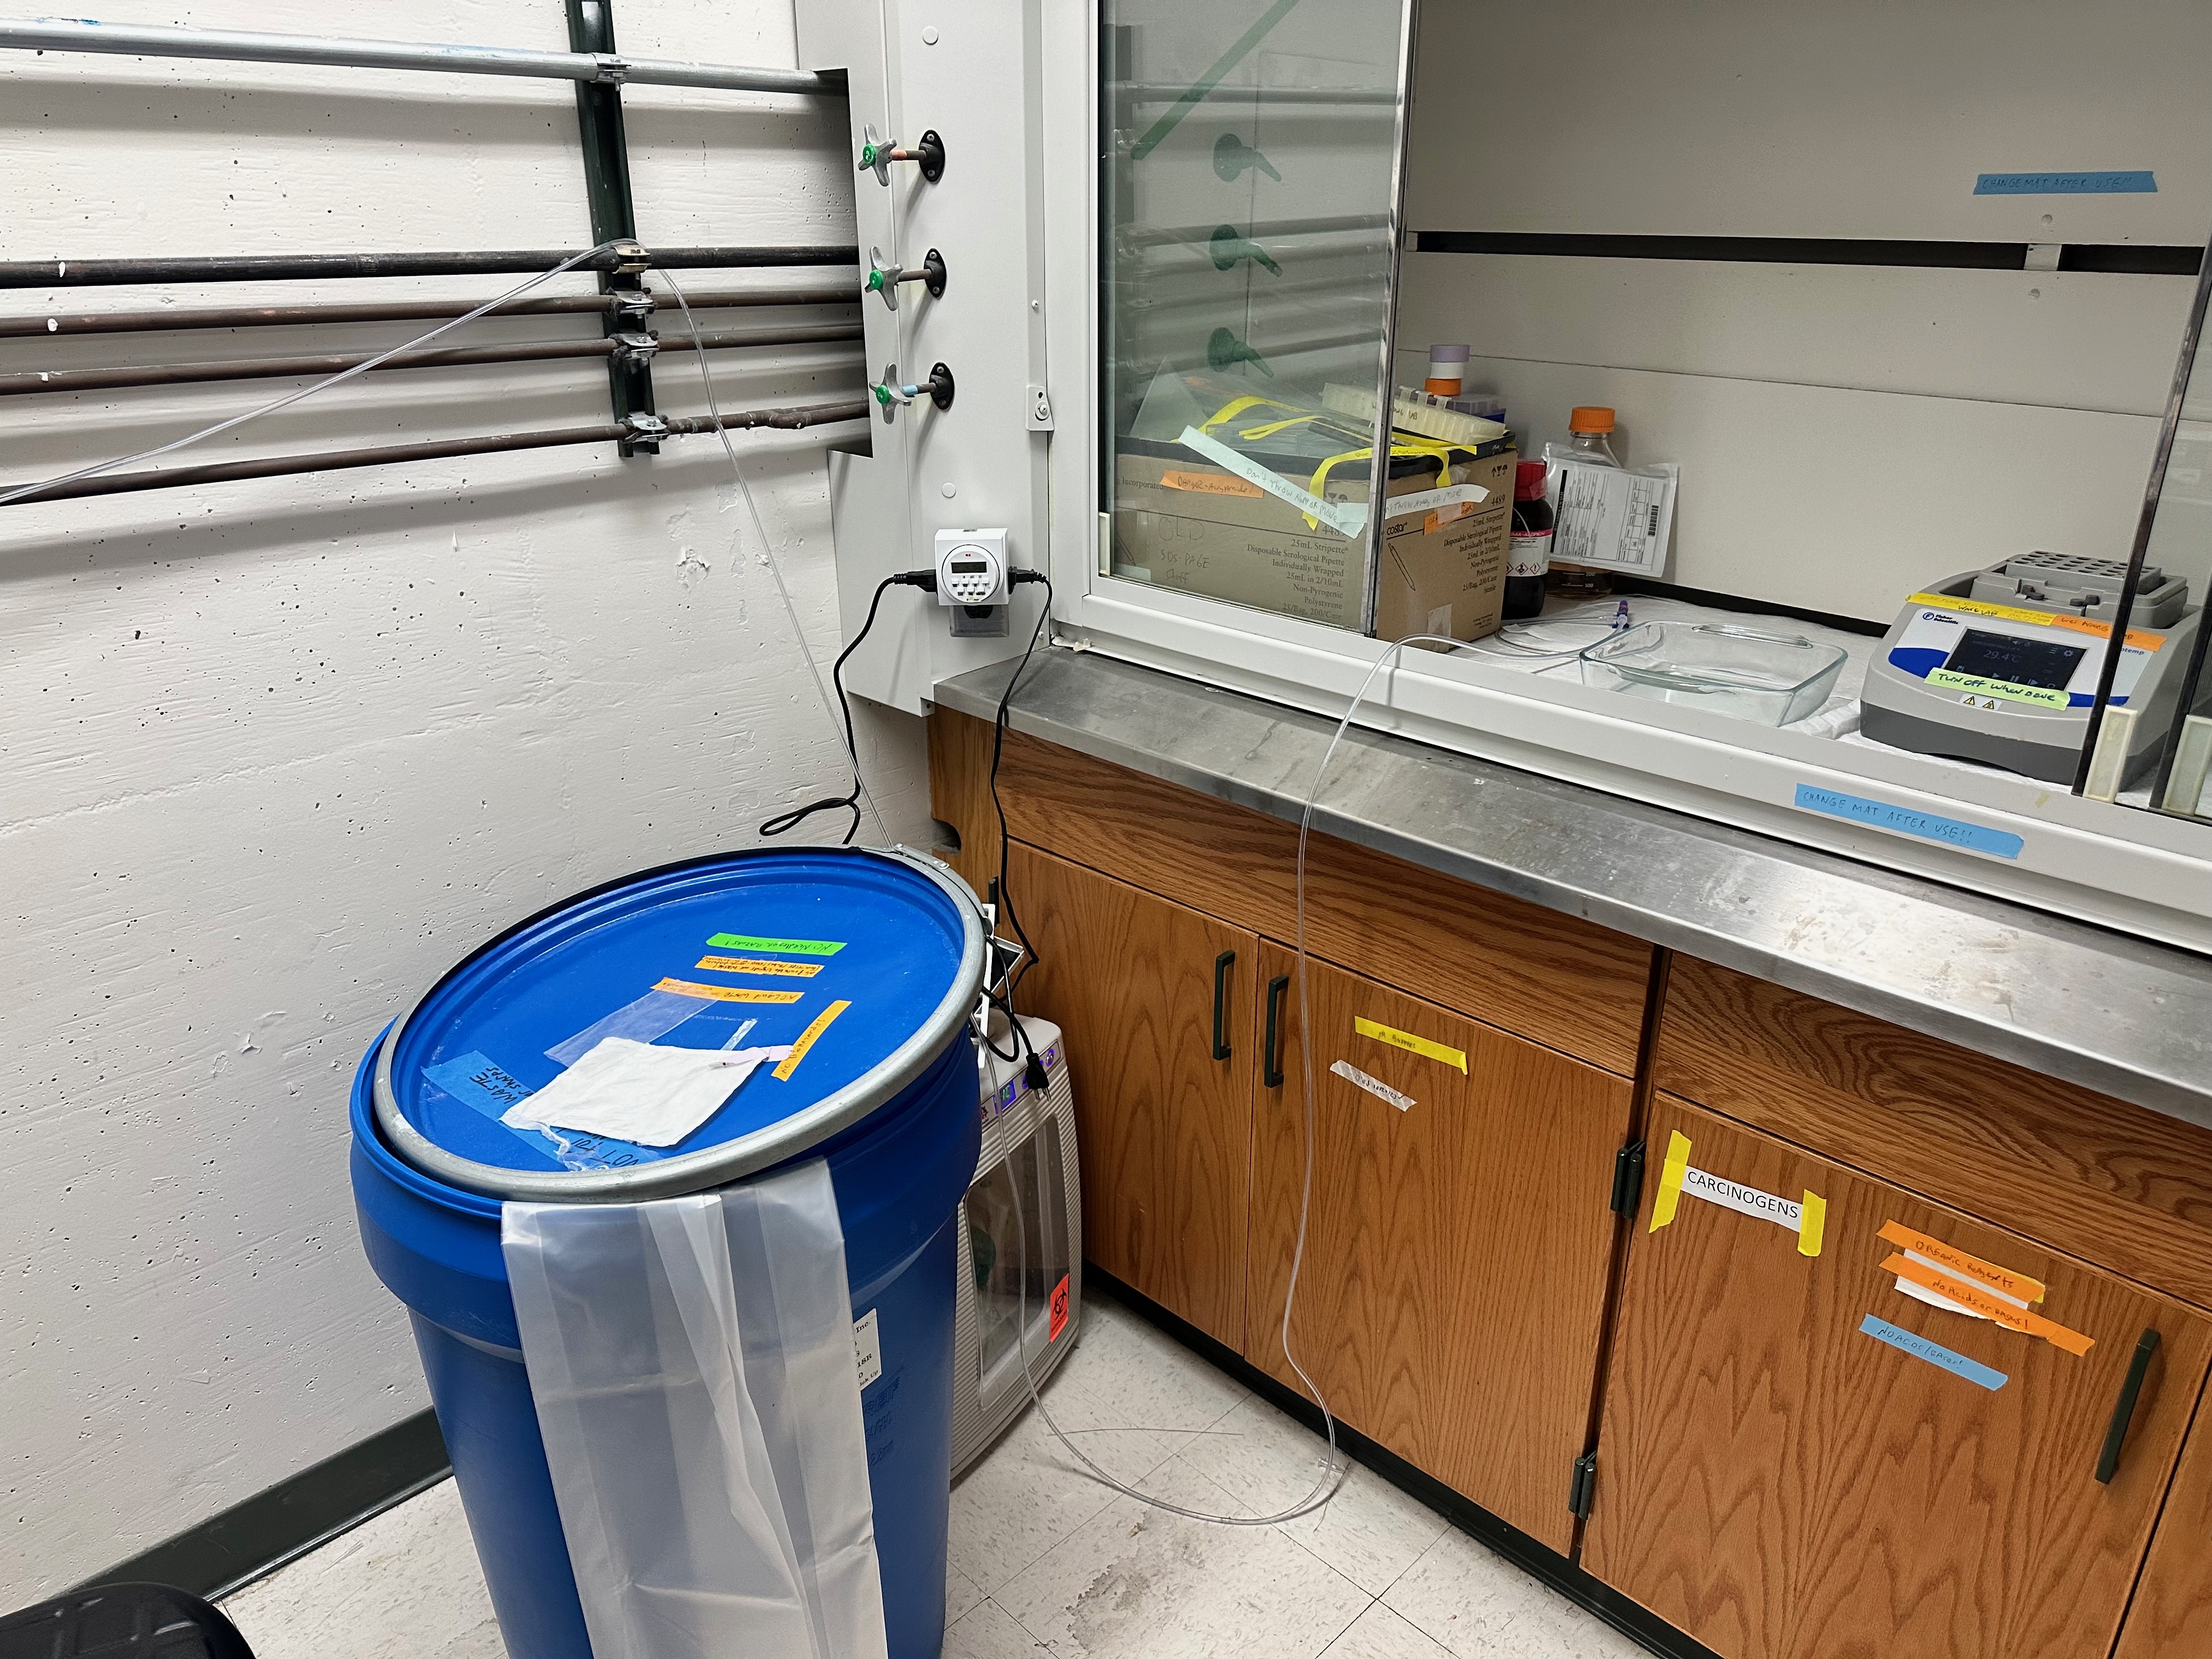
Prepare Fume Hood and Incubator

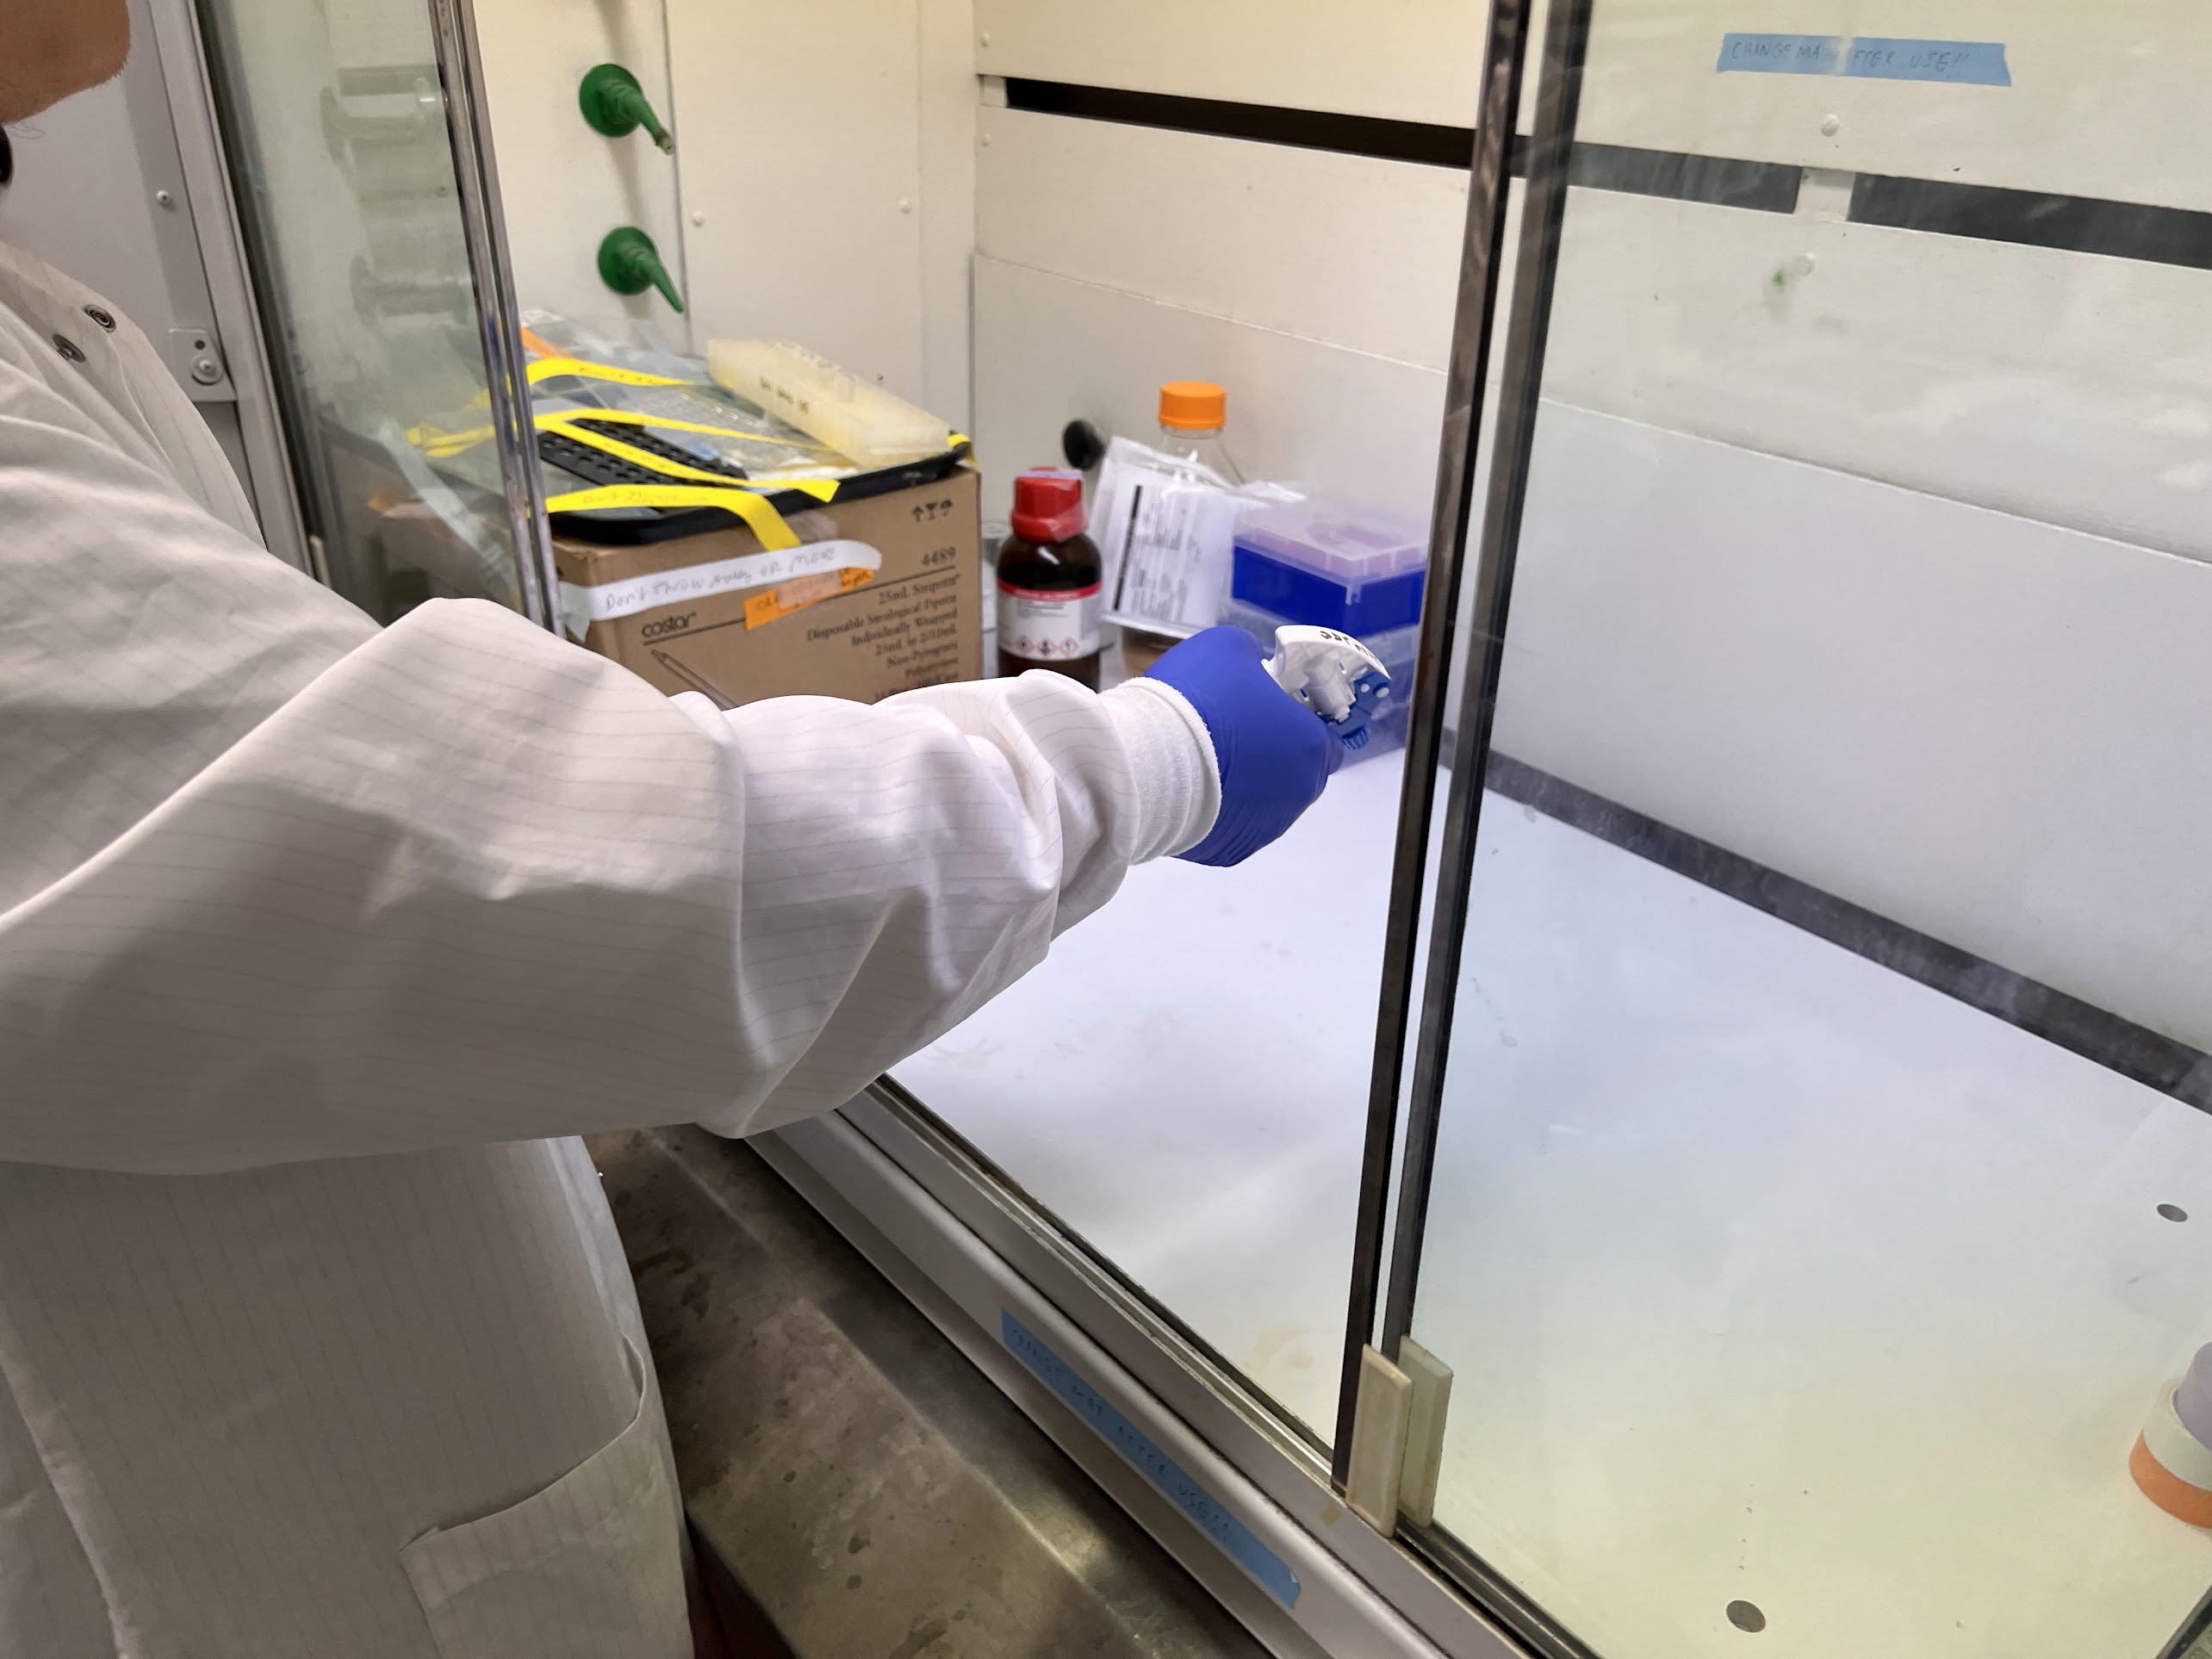
  • Prepare the Fume Hood:
    • Turn on the Fume Hood light.
    • Before you begin, clean you Fume hood:
      • Discard any previous absorbent mats in the Fume Hood in a large Blue Bin for Waste Contaminated with Chemicals.
      • Spray the Working Area with 70% Ethanol.
      • Use Paper Towels to Wipe the Area Clean.
      • Discard the Paper Towels in the large Blue Bin for Waste Contaminated with Chemicals.
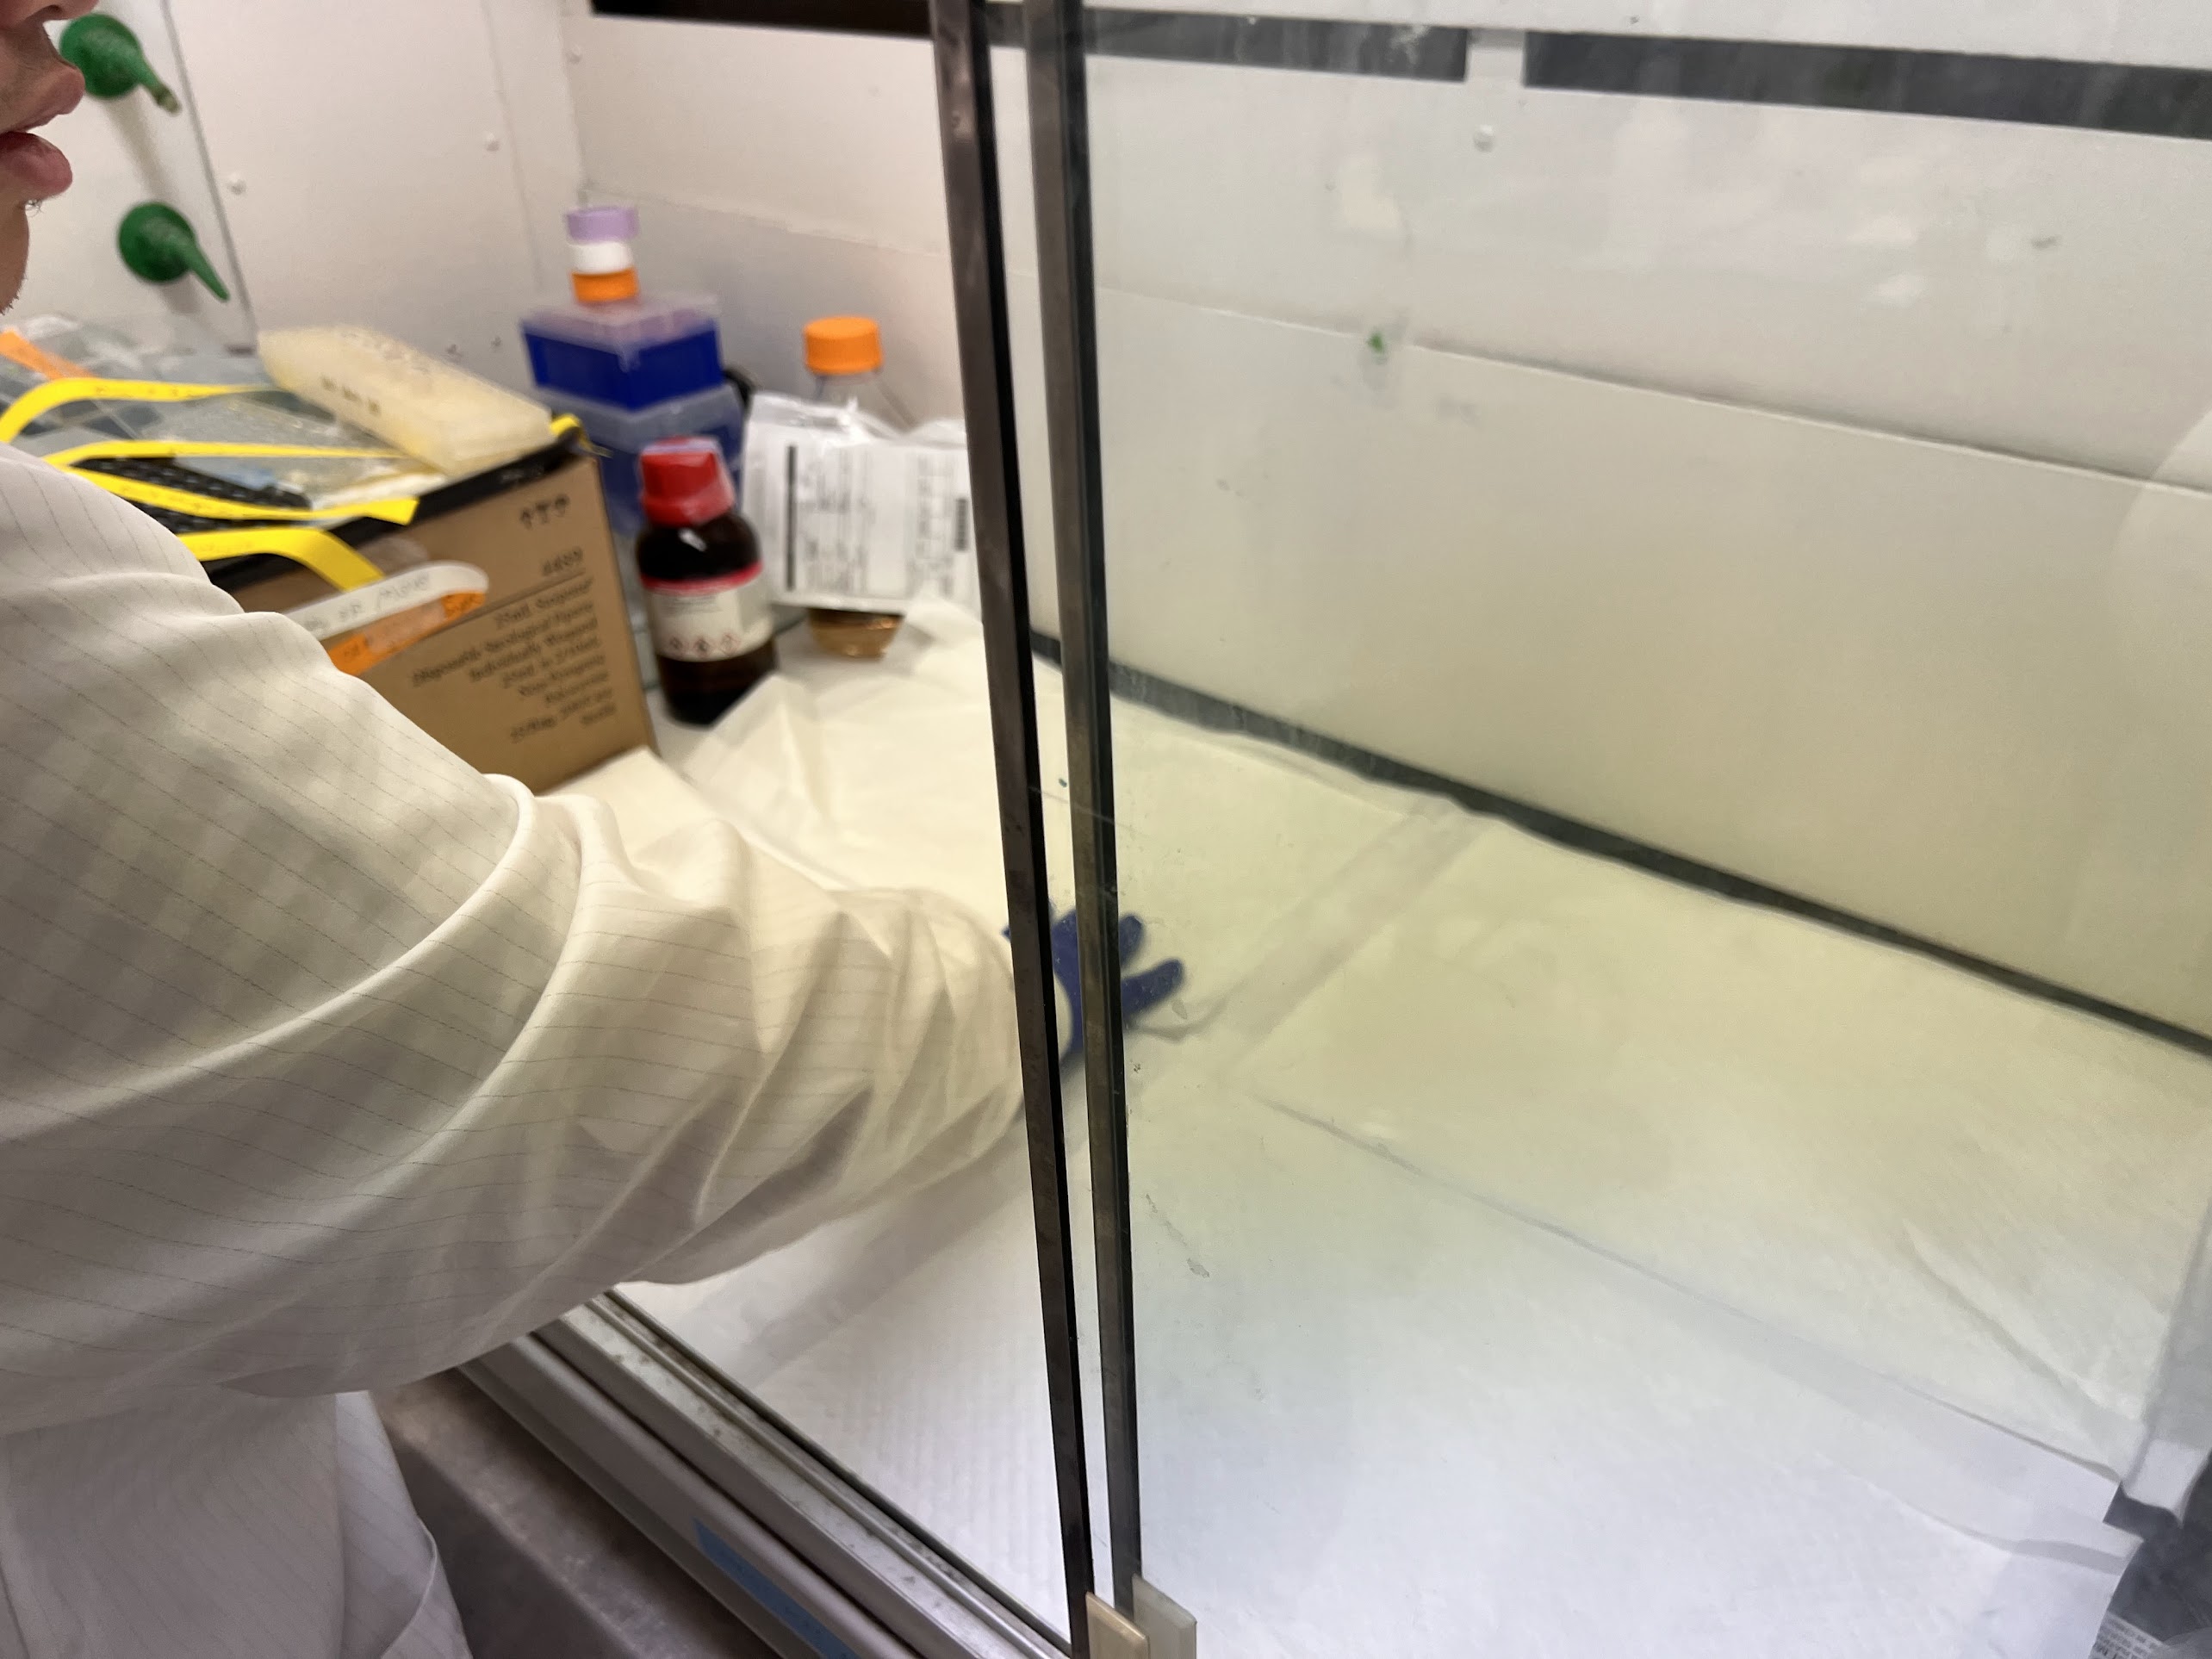
    • Lay down four absorbent mats inside the fume hood. These should quickly absorb any spills.
    • Make sure there is enough space to work.
Clean the Hood with Ethanol Spray and Wipe Clean Lay Down Absorbent Mats
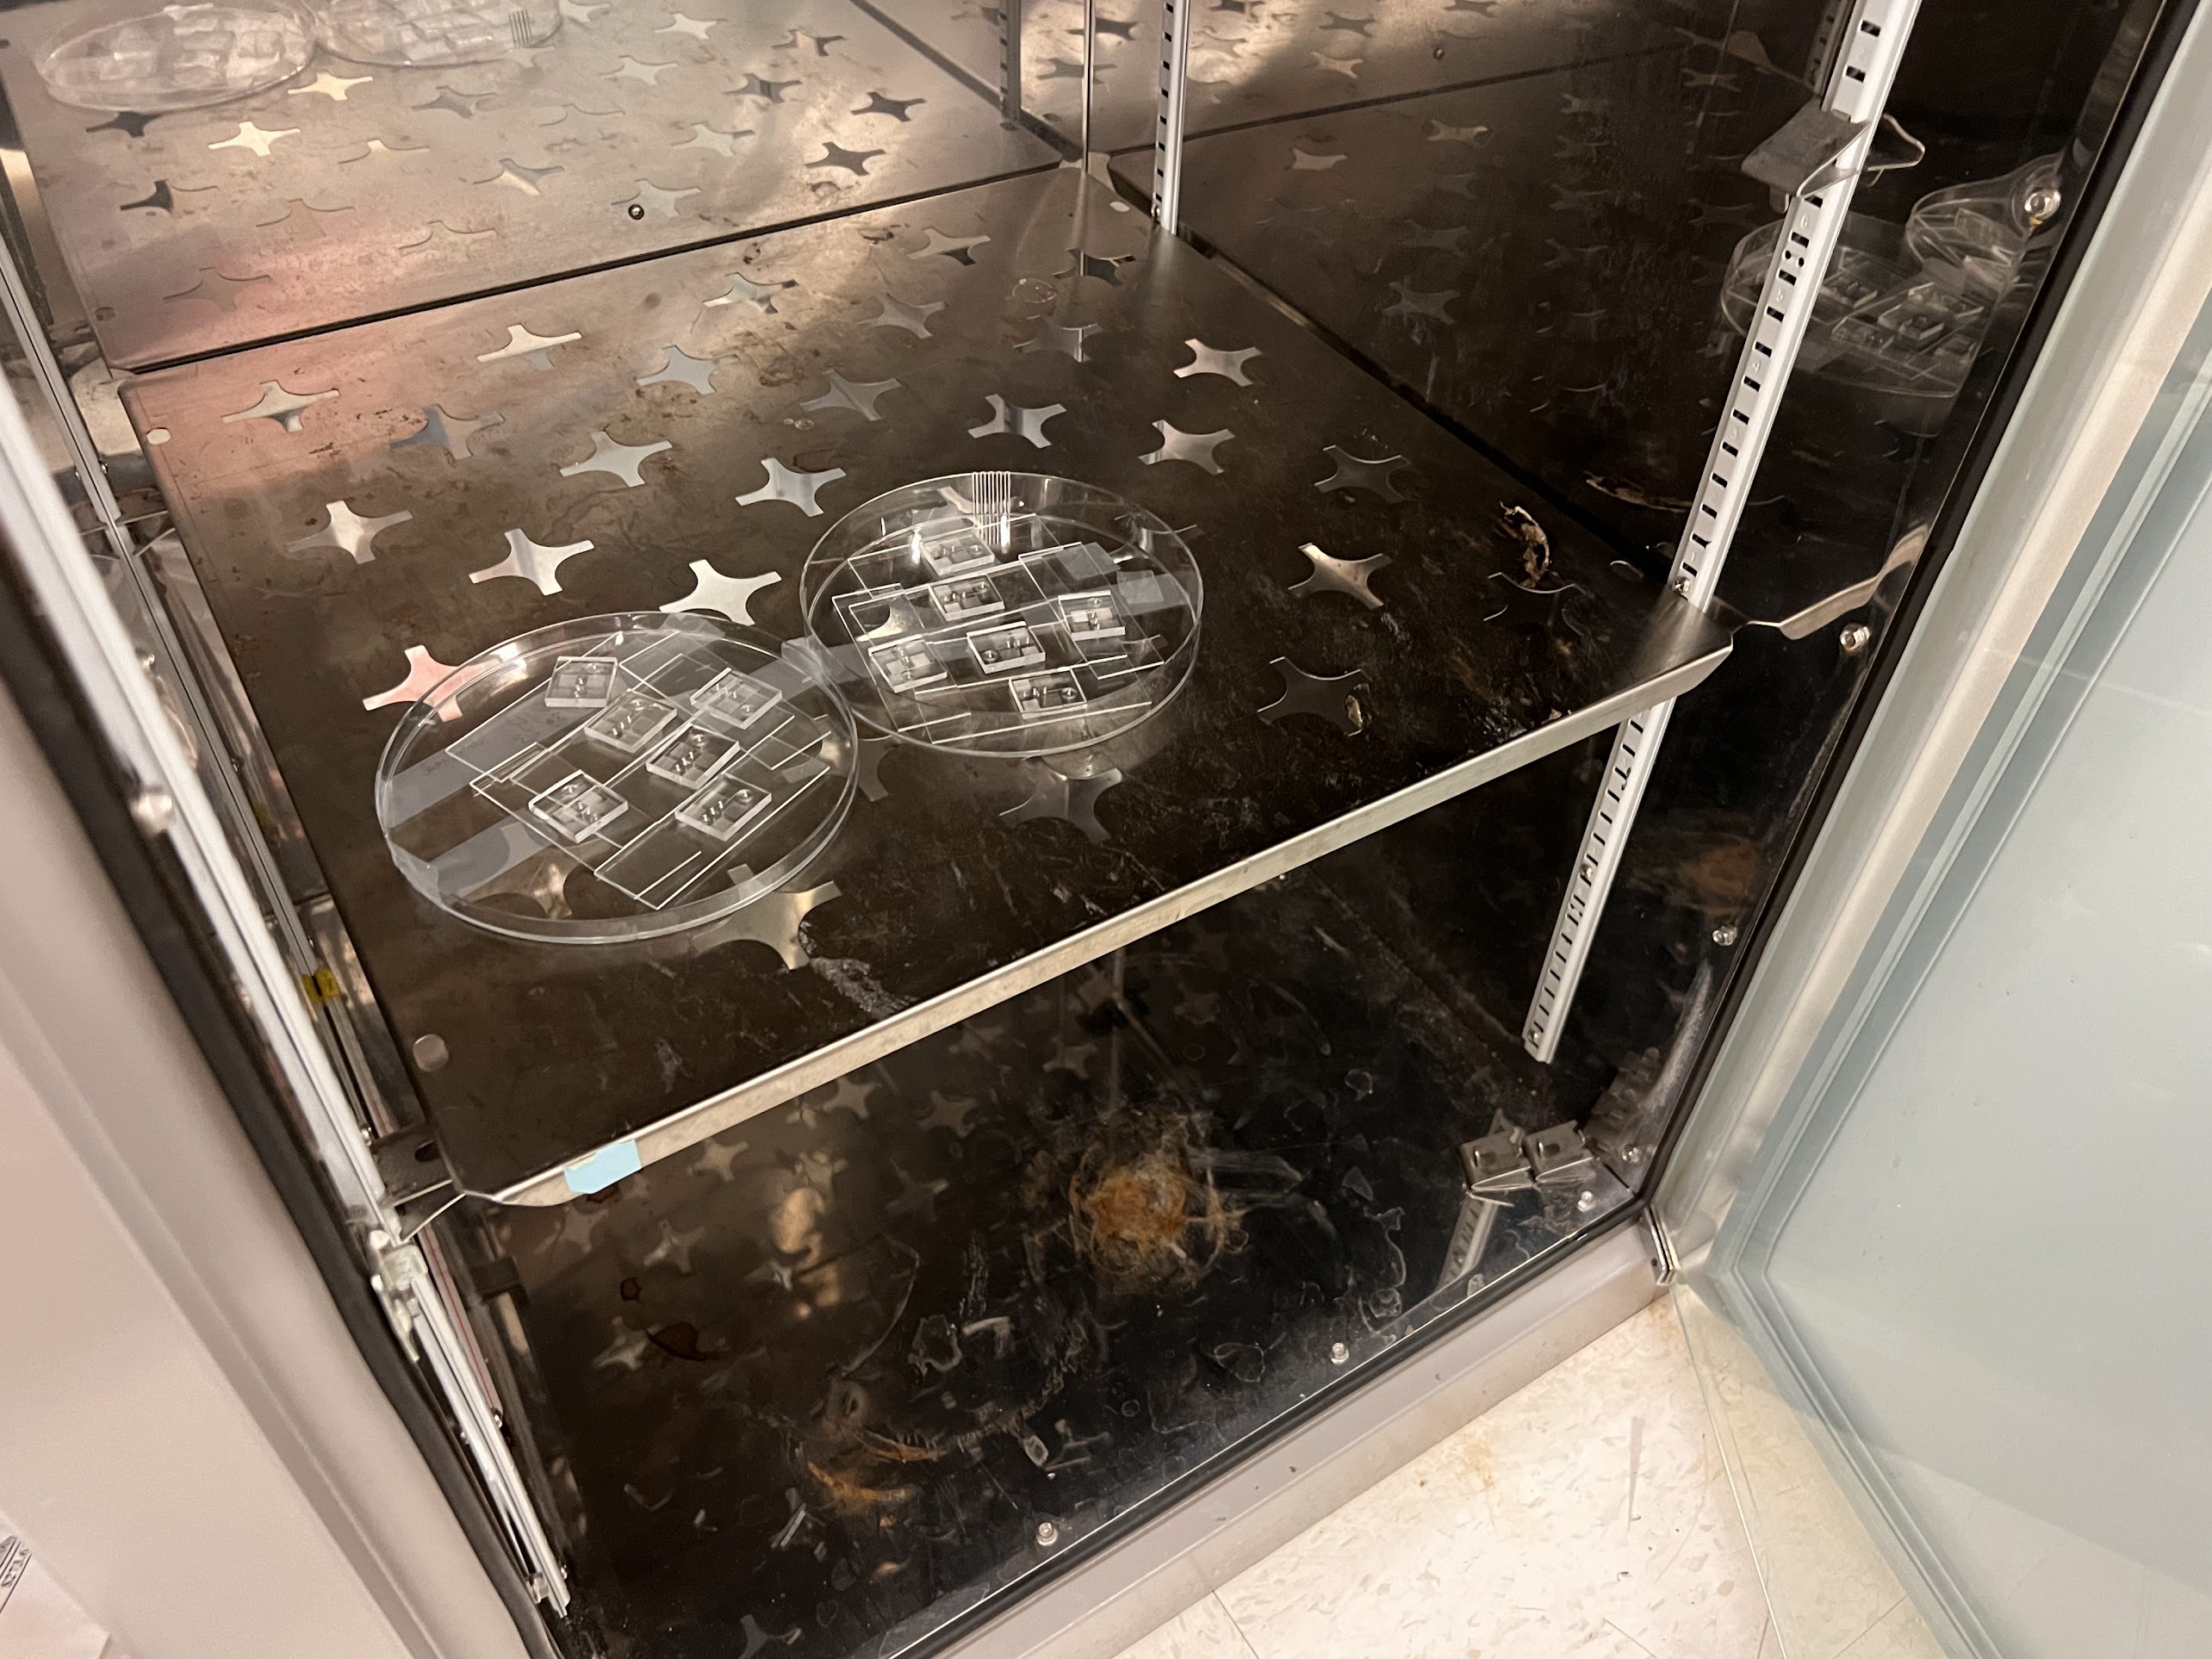
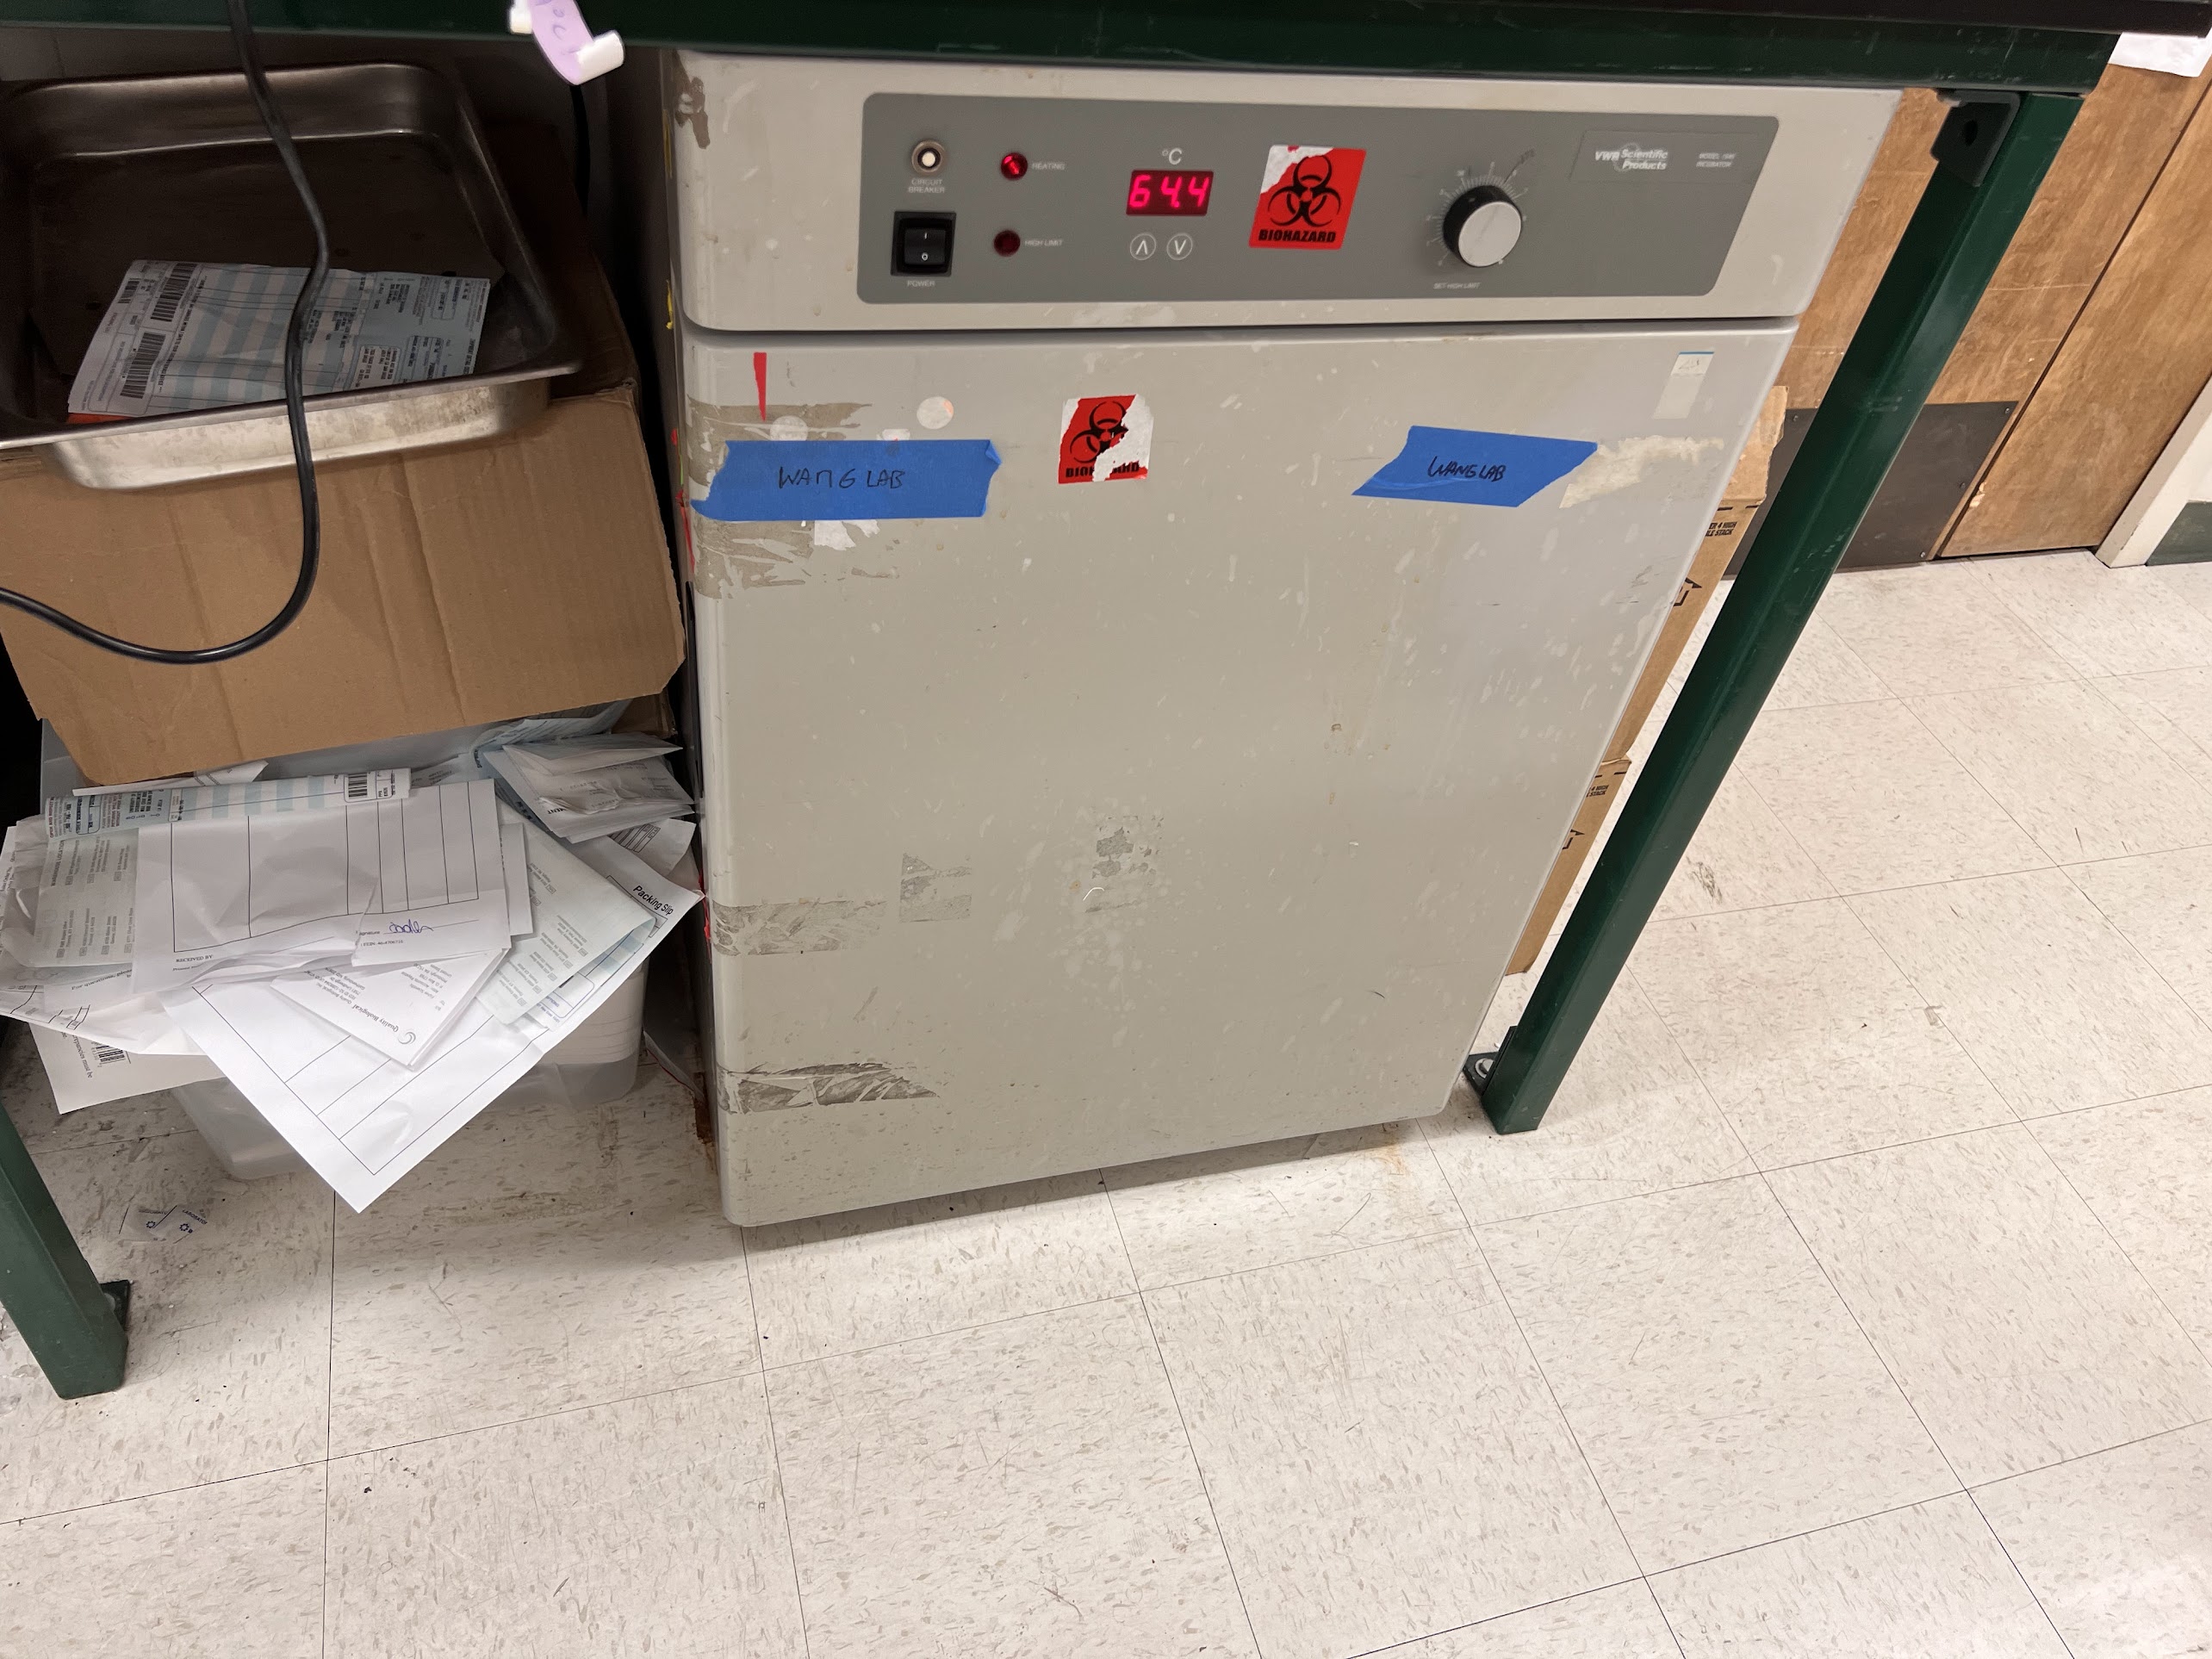
  • Set a Laboratory incubator or oven to 65°C.

Pneumatics Assembly

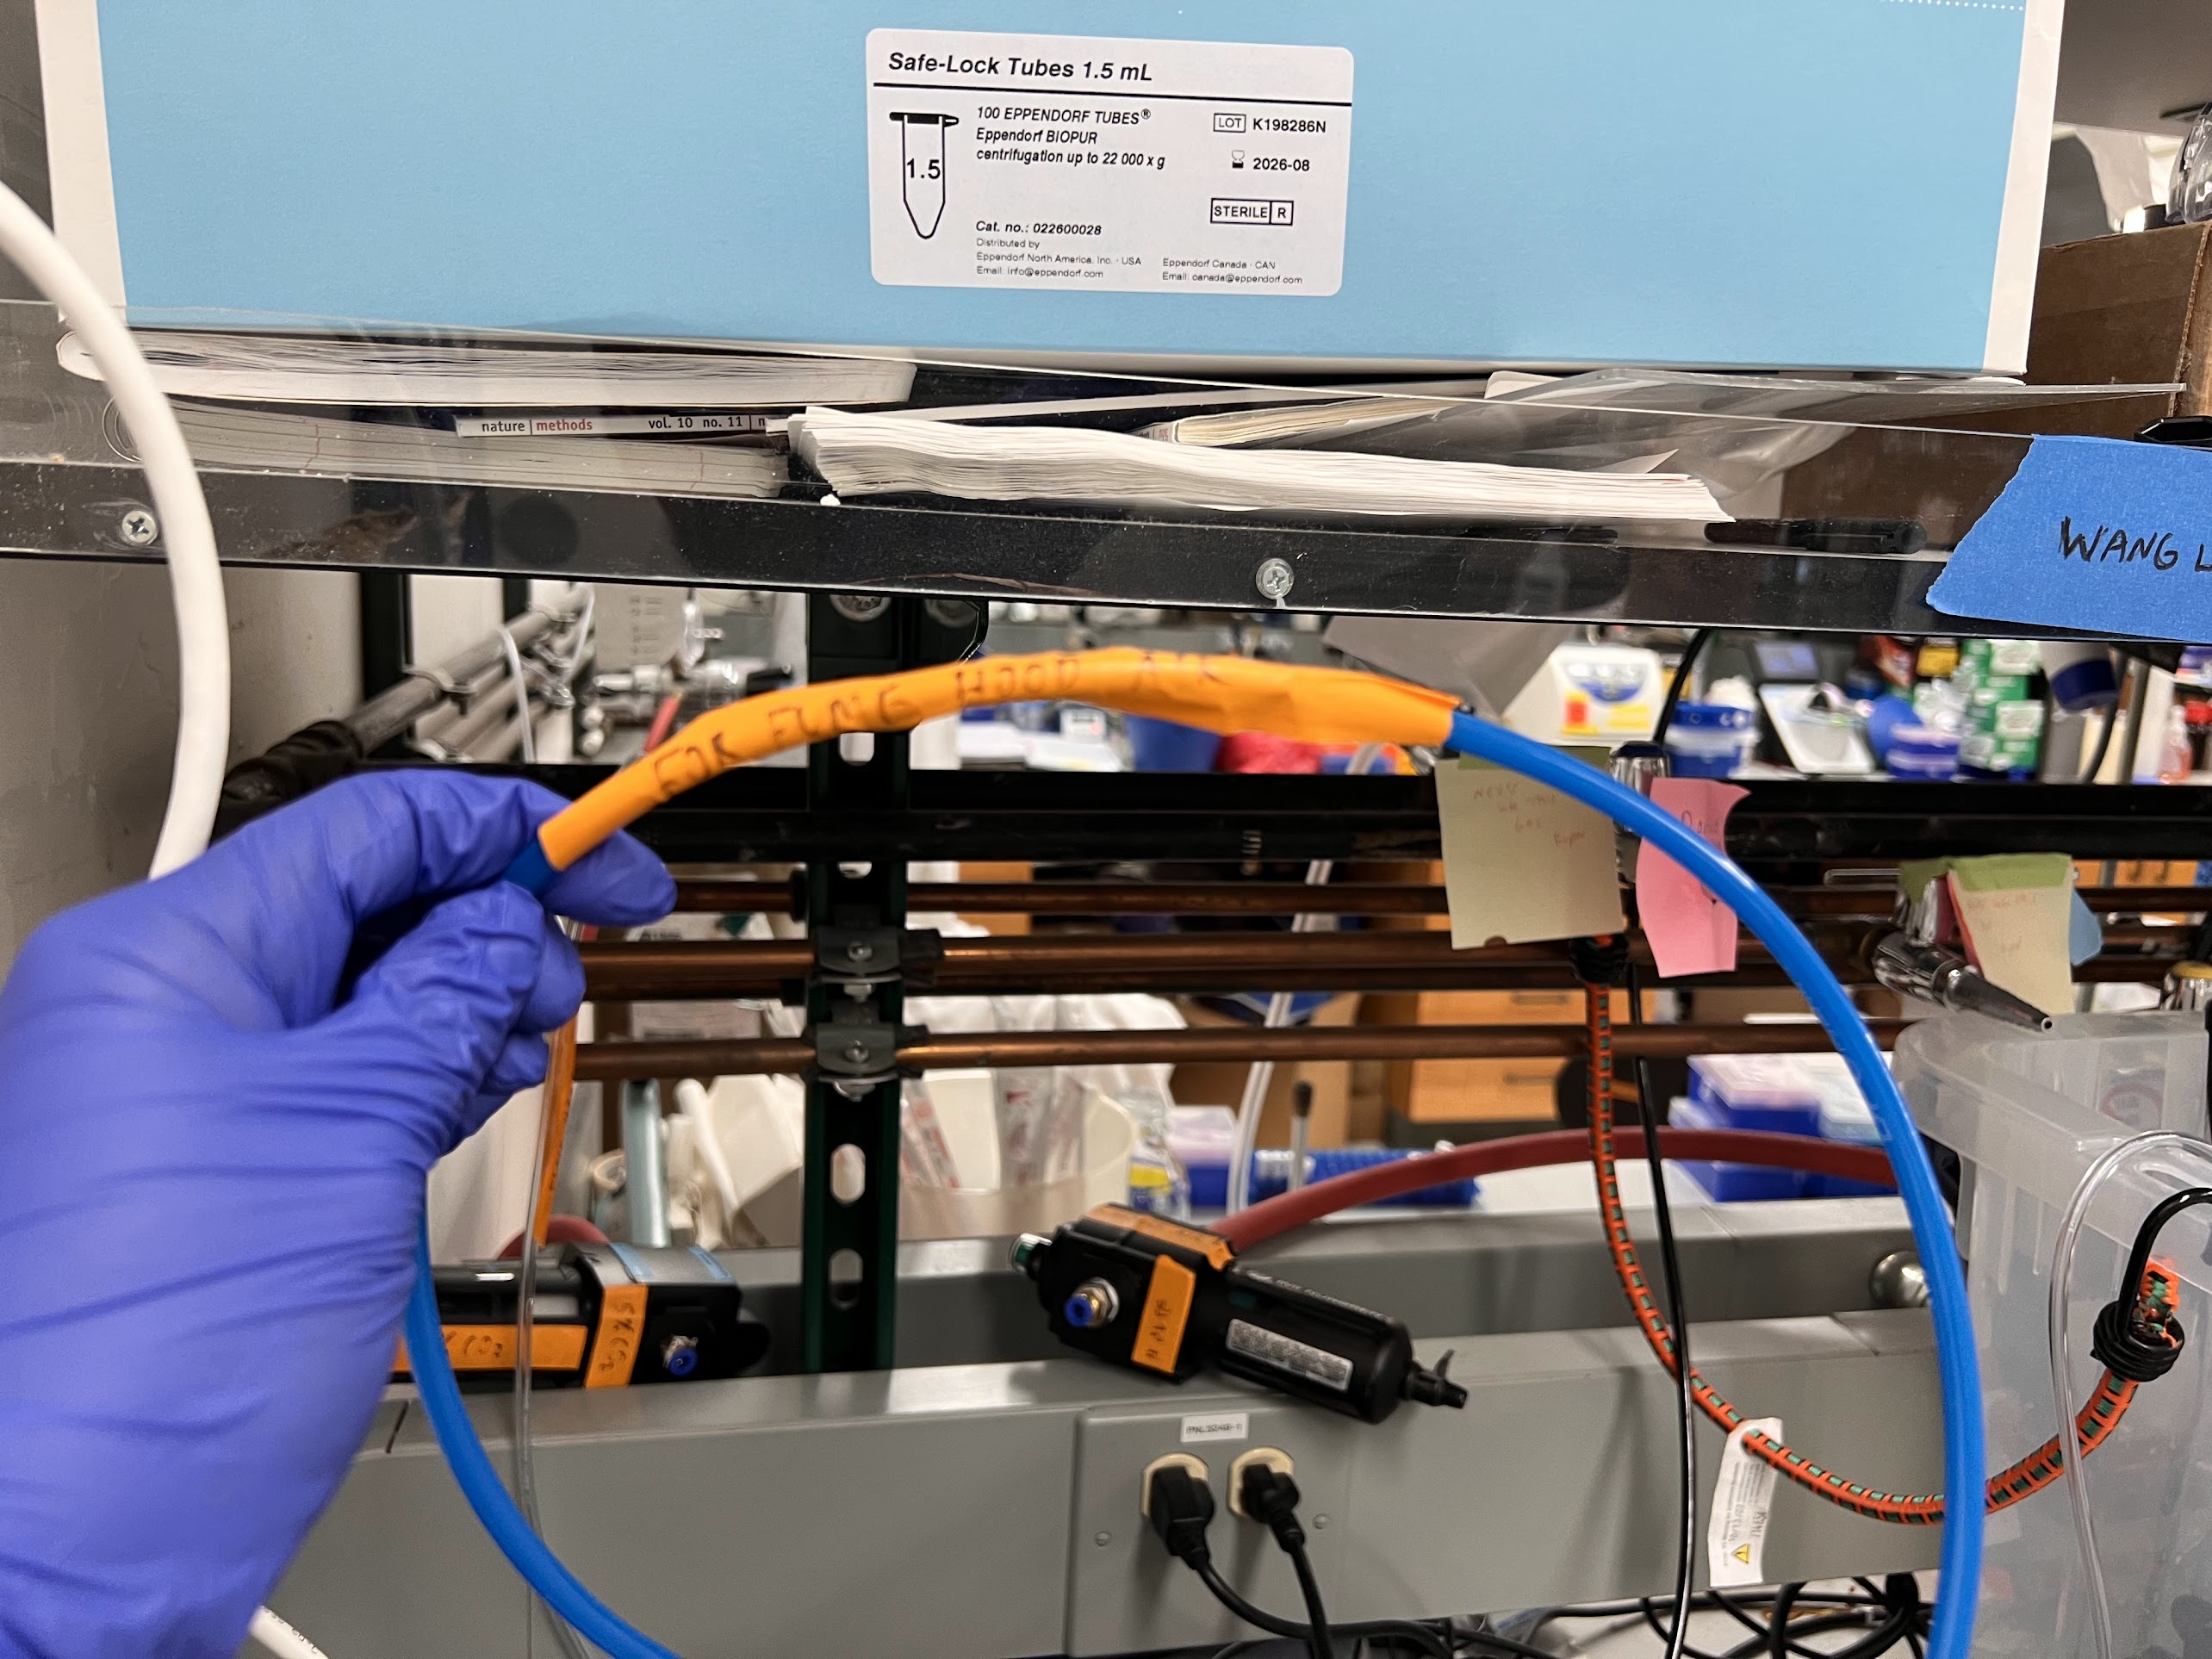
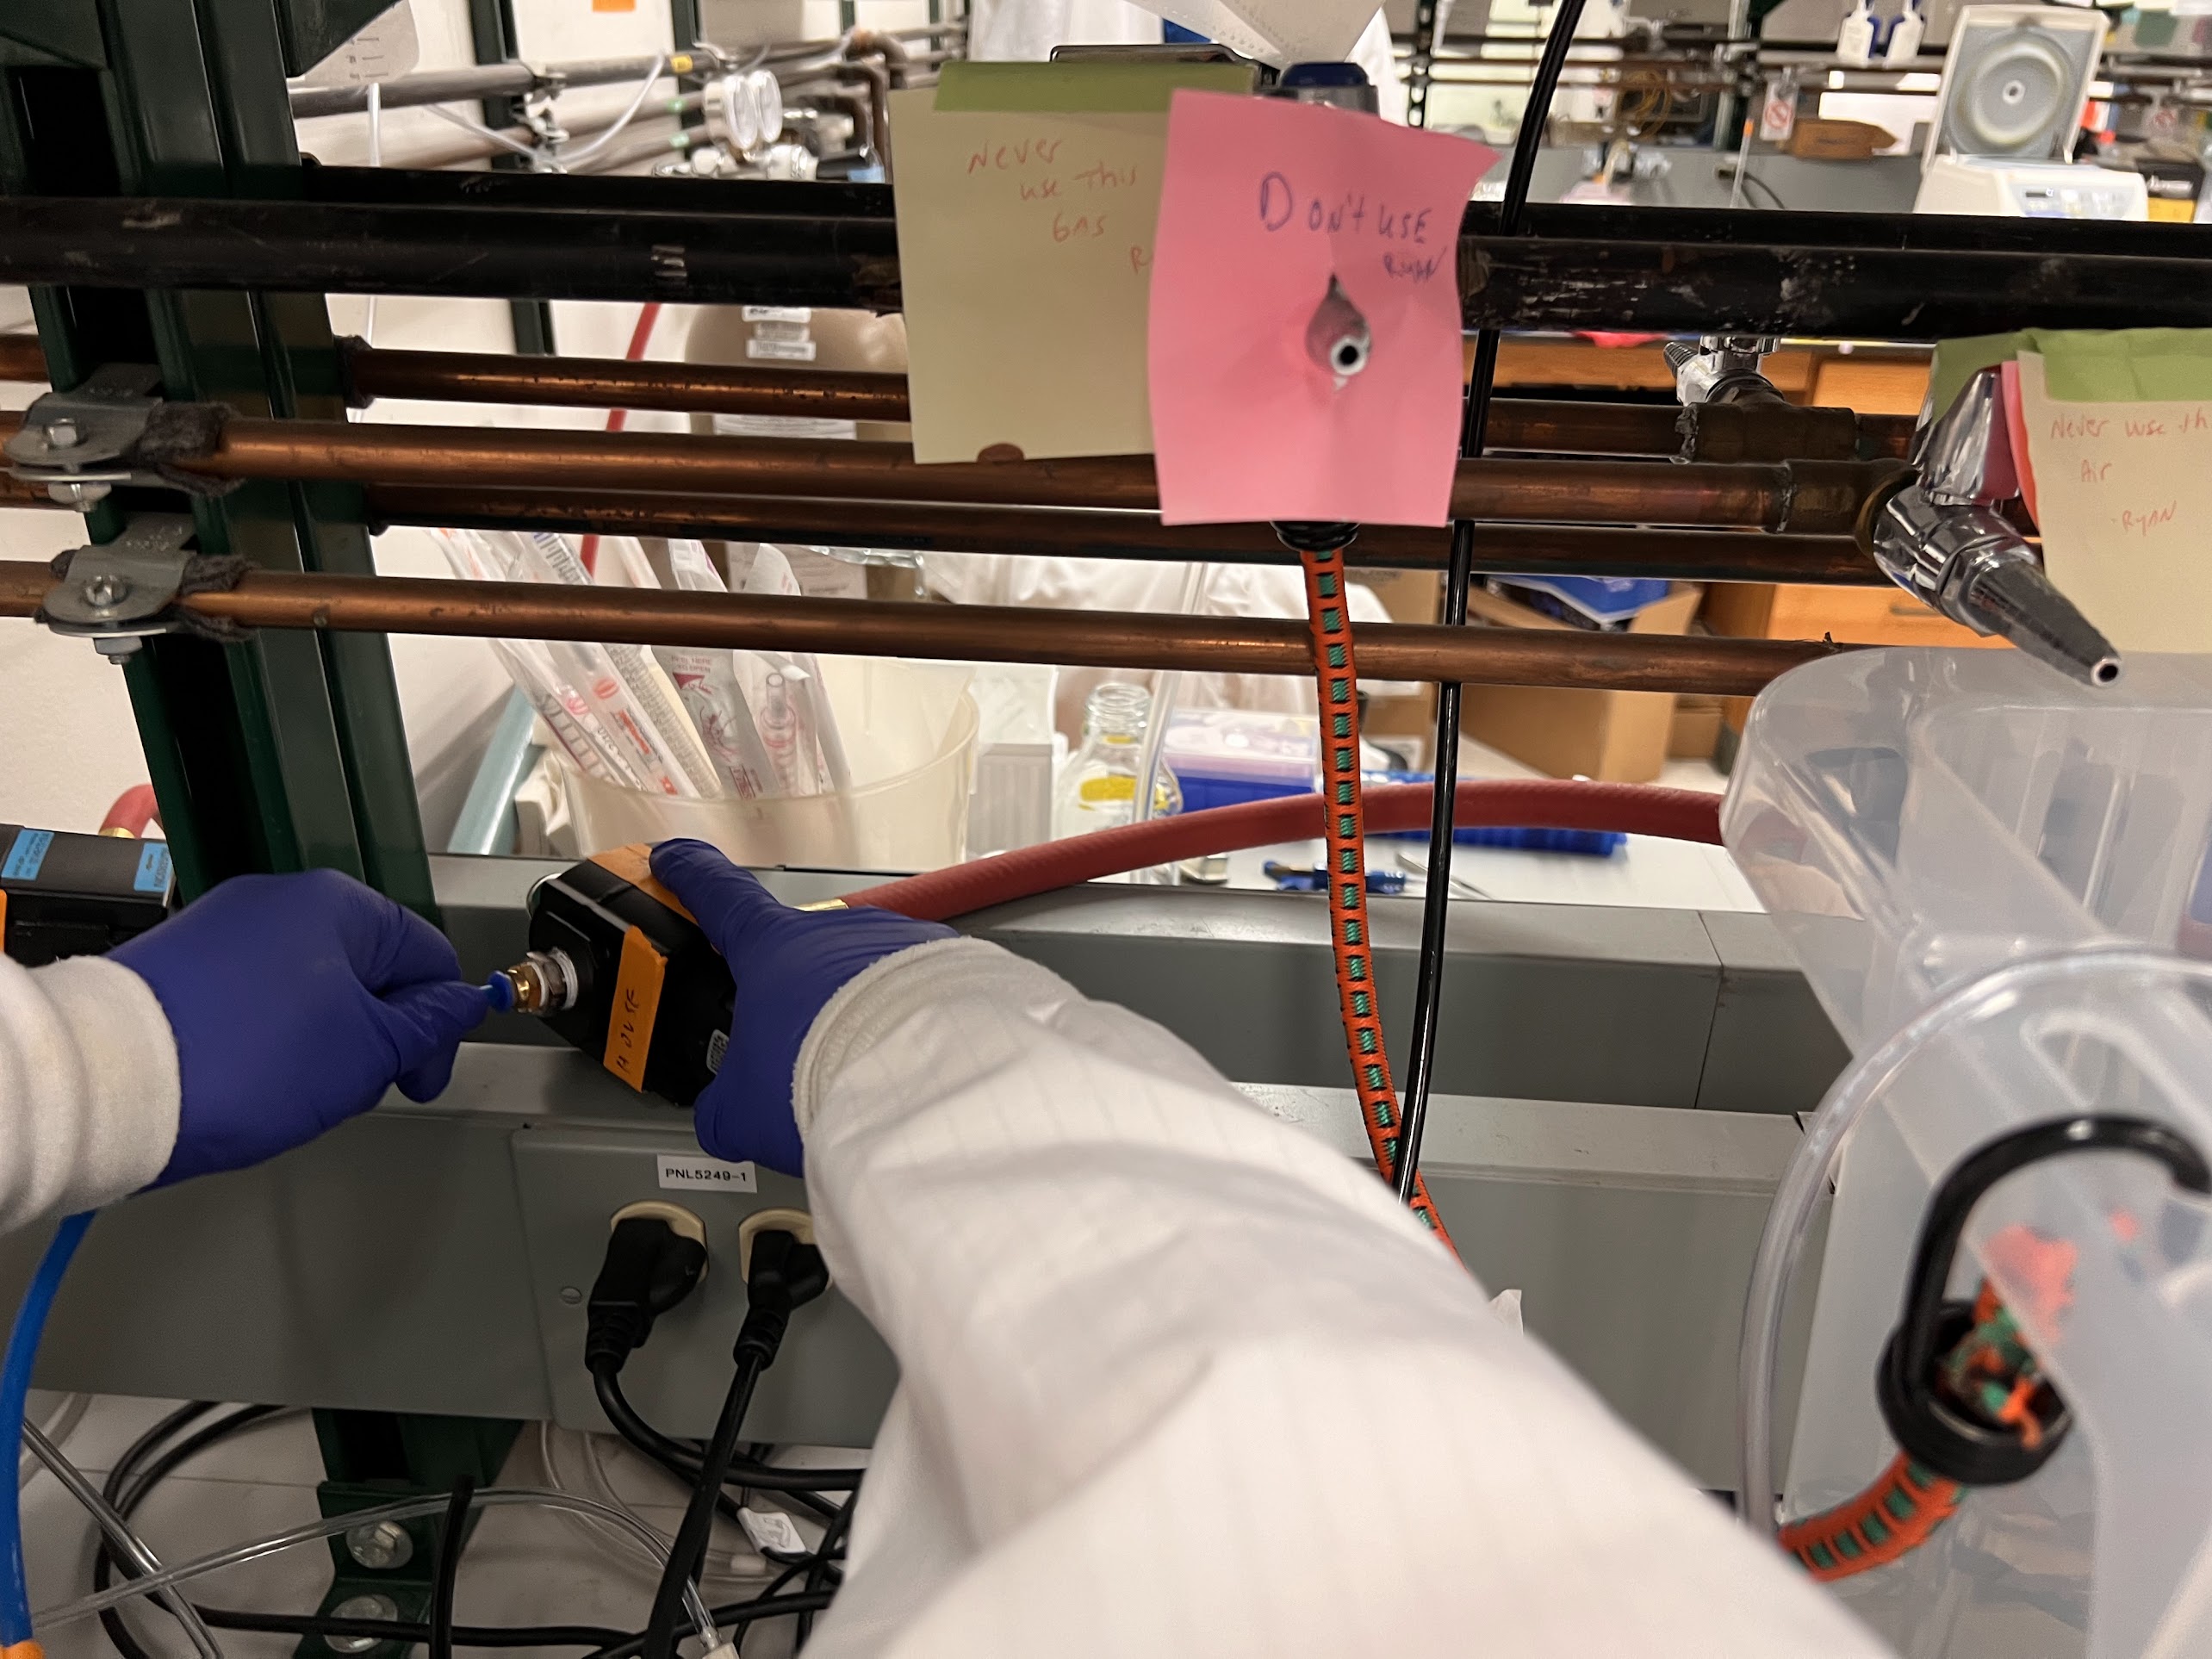
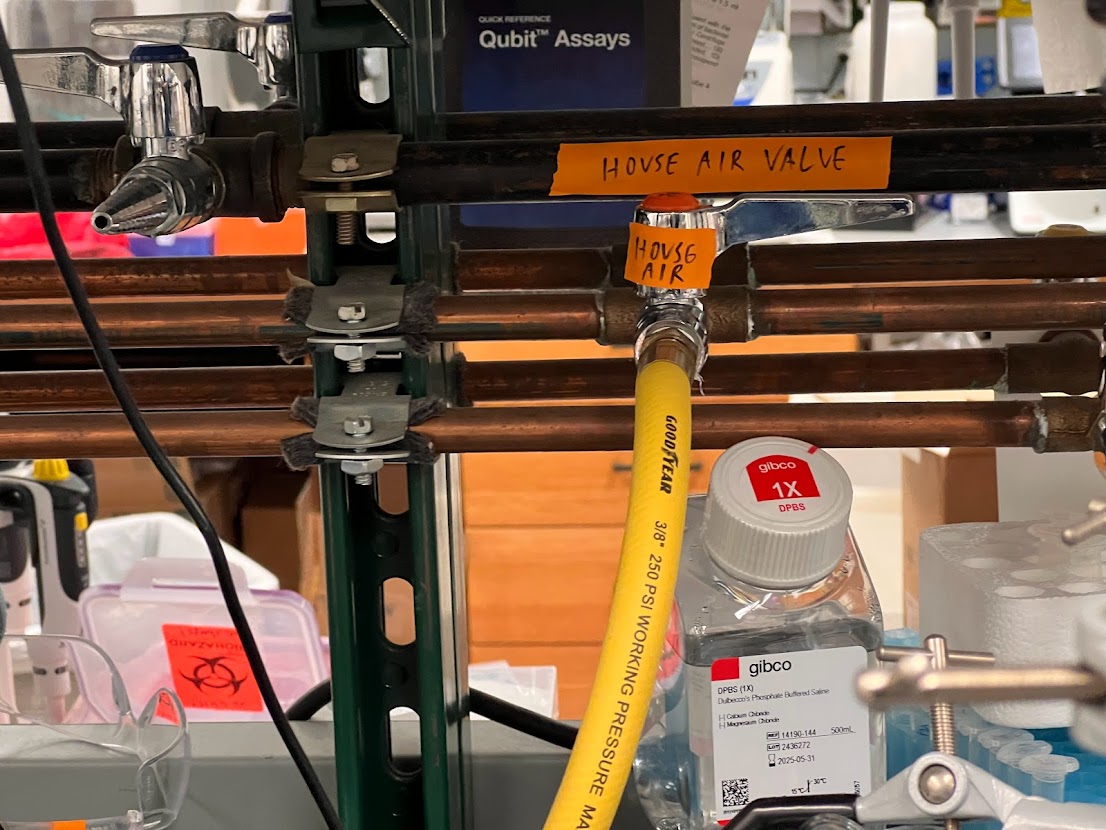
  • Connect the house air to 6mm Pneumatic tubing.
    • This 6mm Tubing should be labeled "For Fume Hood".
Label the 6mm Pneumatic Tubing as "For Fume Hood" Connect it to House Air
  • Connect the 6mm Pneumatic Tubing to Tygon Tubing
    • Push the Luer-Lock side of a P851-Luer to Barb Adapter into the 6mm tubing.
    • Push the 6mm Tubing in a right-left twisting motion till it touches the inner wall of the Luer portion of the Adapter.
    • Now Push the 3/32" ID Tygon Tubing onto the Barb Side of the Luer-Barb Adapter.
This is what the Connection between the 6mm Pneumatic Tubing with the Tygon Tubing using the Luer-Barb Adapter look like
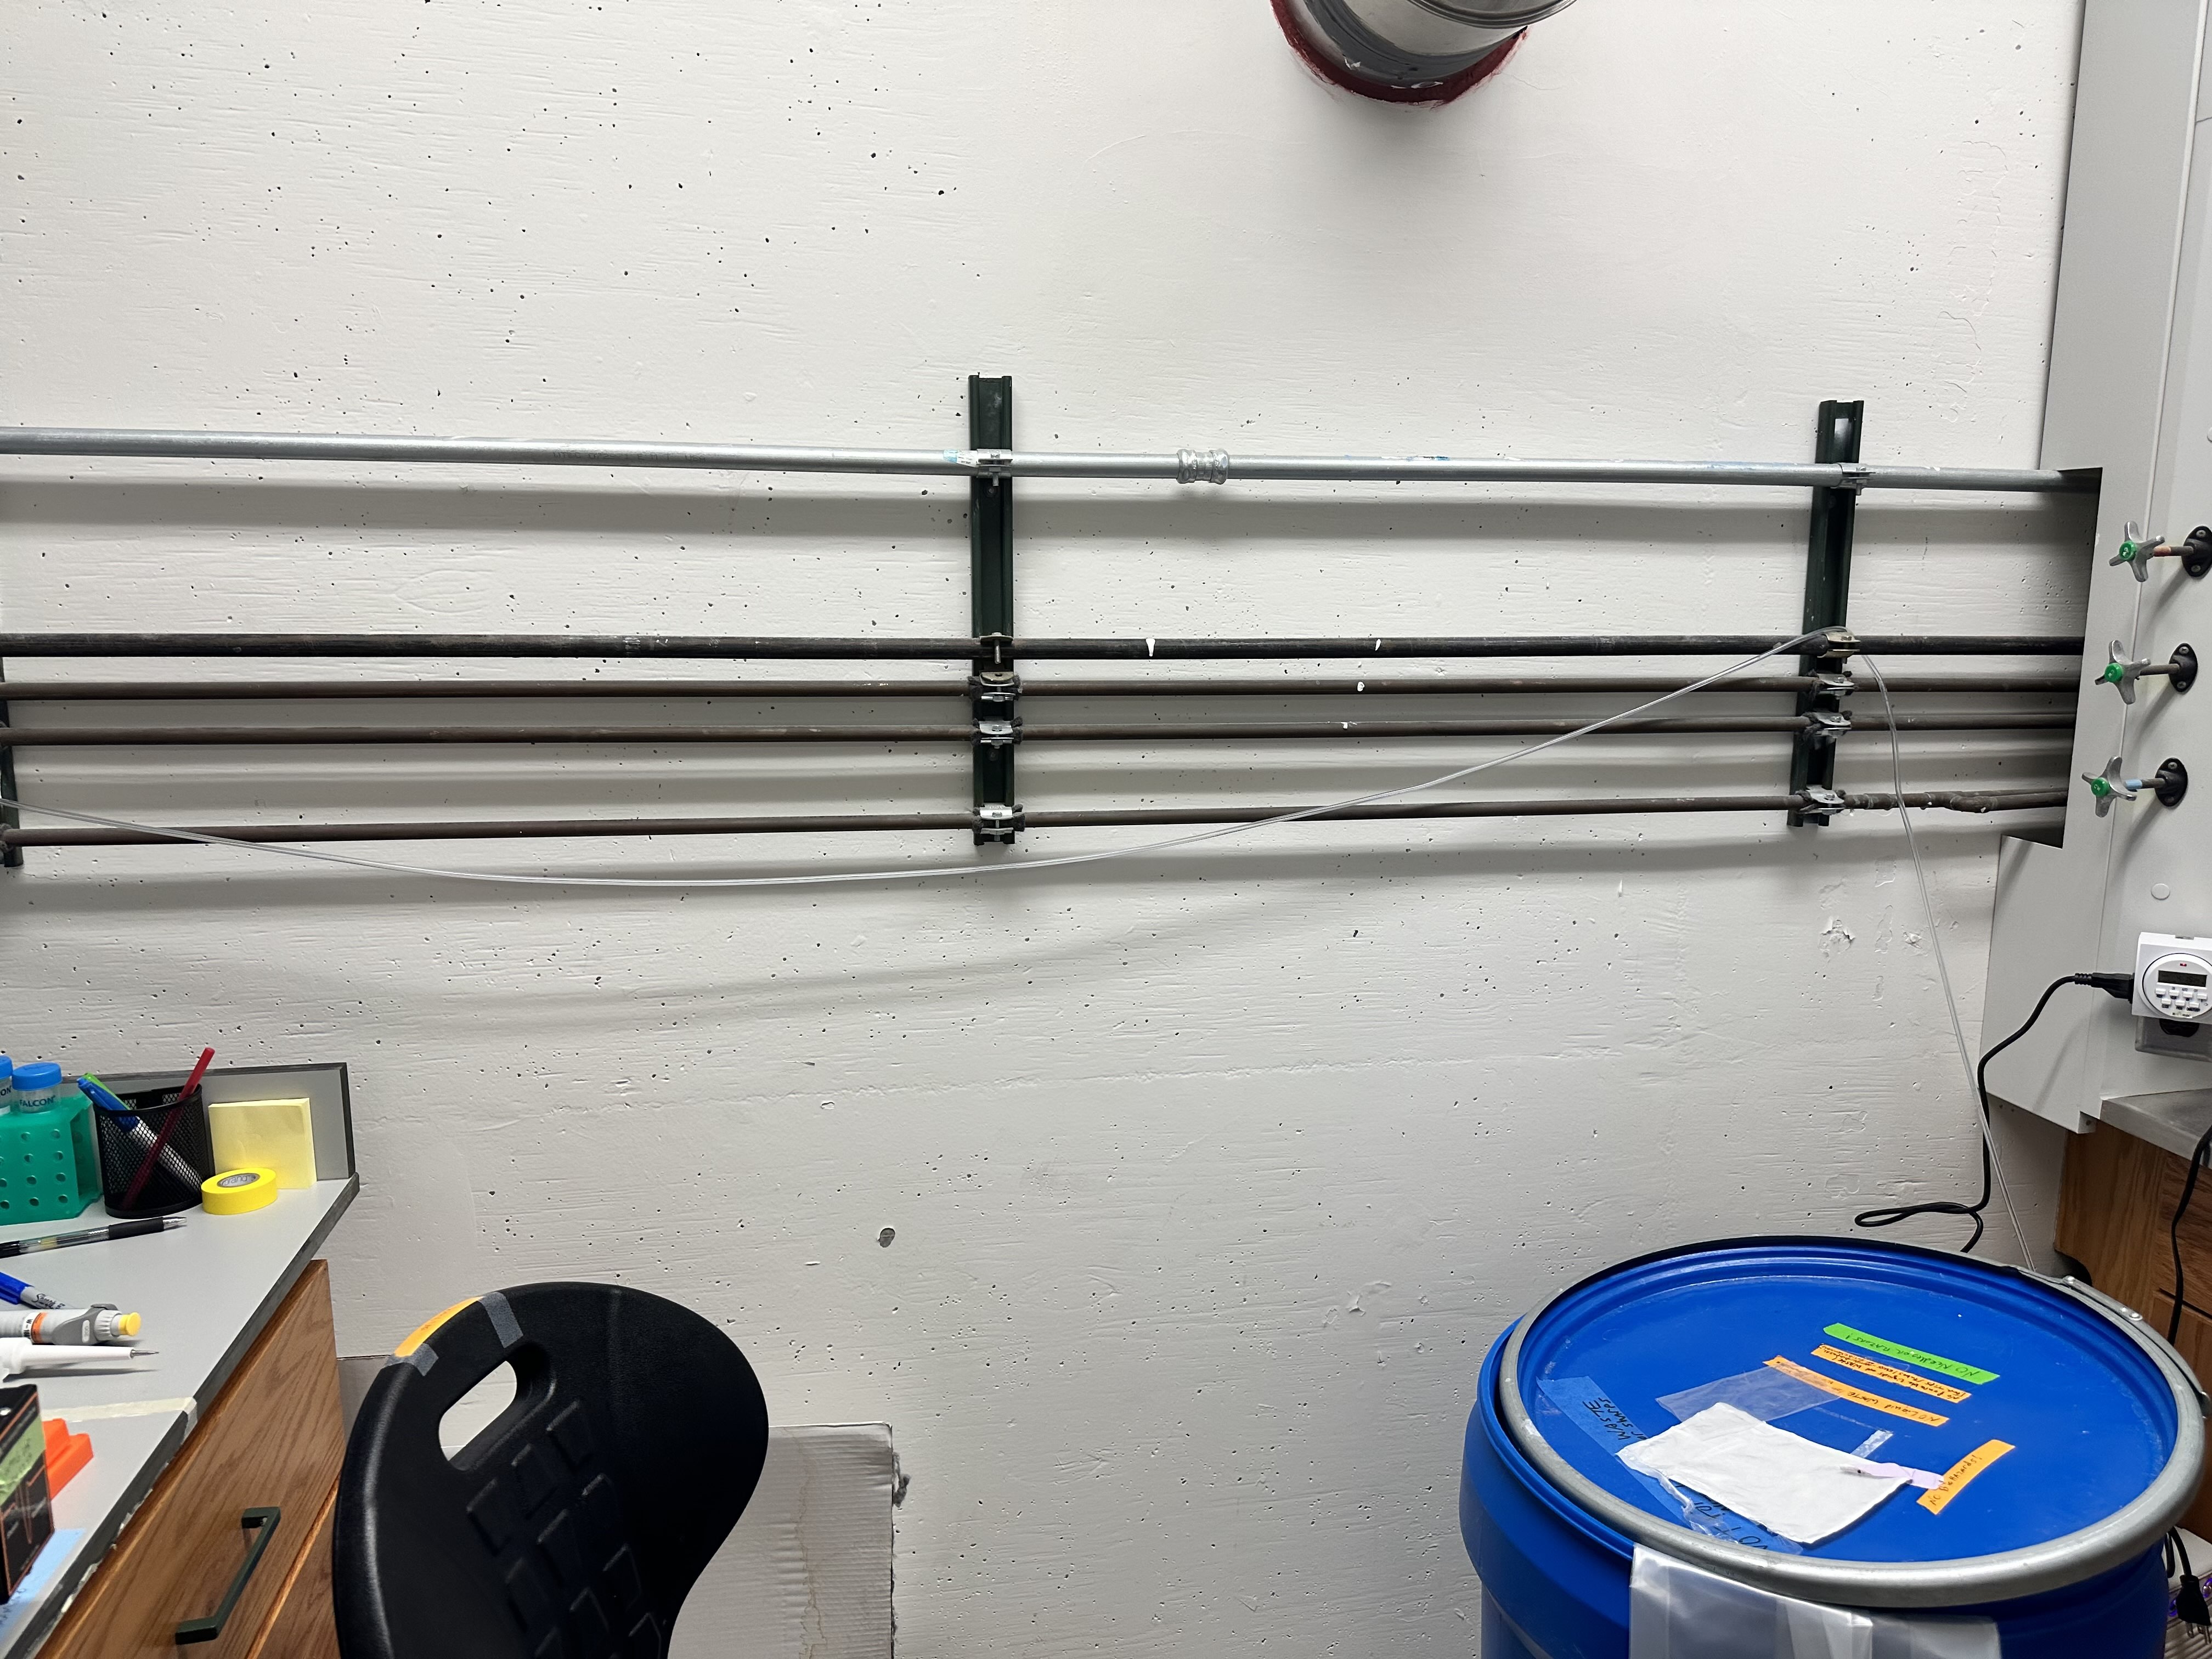
  • Unroll Enough Tygon Tubing to reach the Fume Hood:
    • Now cut a long enough segment of Tygon tubing that you can reach the Fume hood from the compressed air system location.
    • Avoid tripping hazards by securely routing the tubing along the walls to the fume hood.
    • Use large Scissors to cut the Tygon tubing.
Tygon Tubing Going from Pressure Source to Fume Hood Tygon Tubing Going from Pressure Source to Fume Hood Continued..
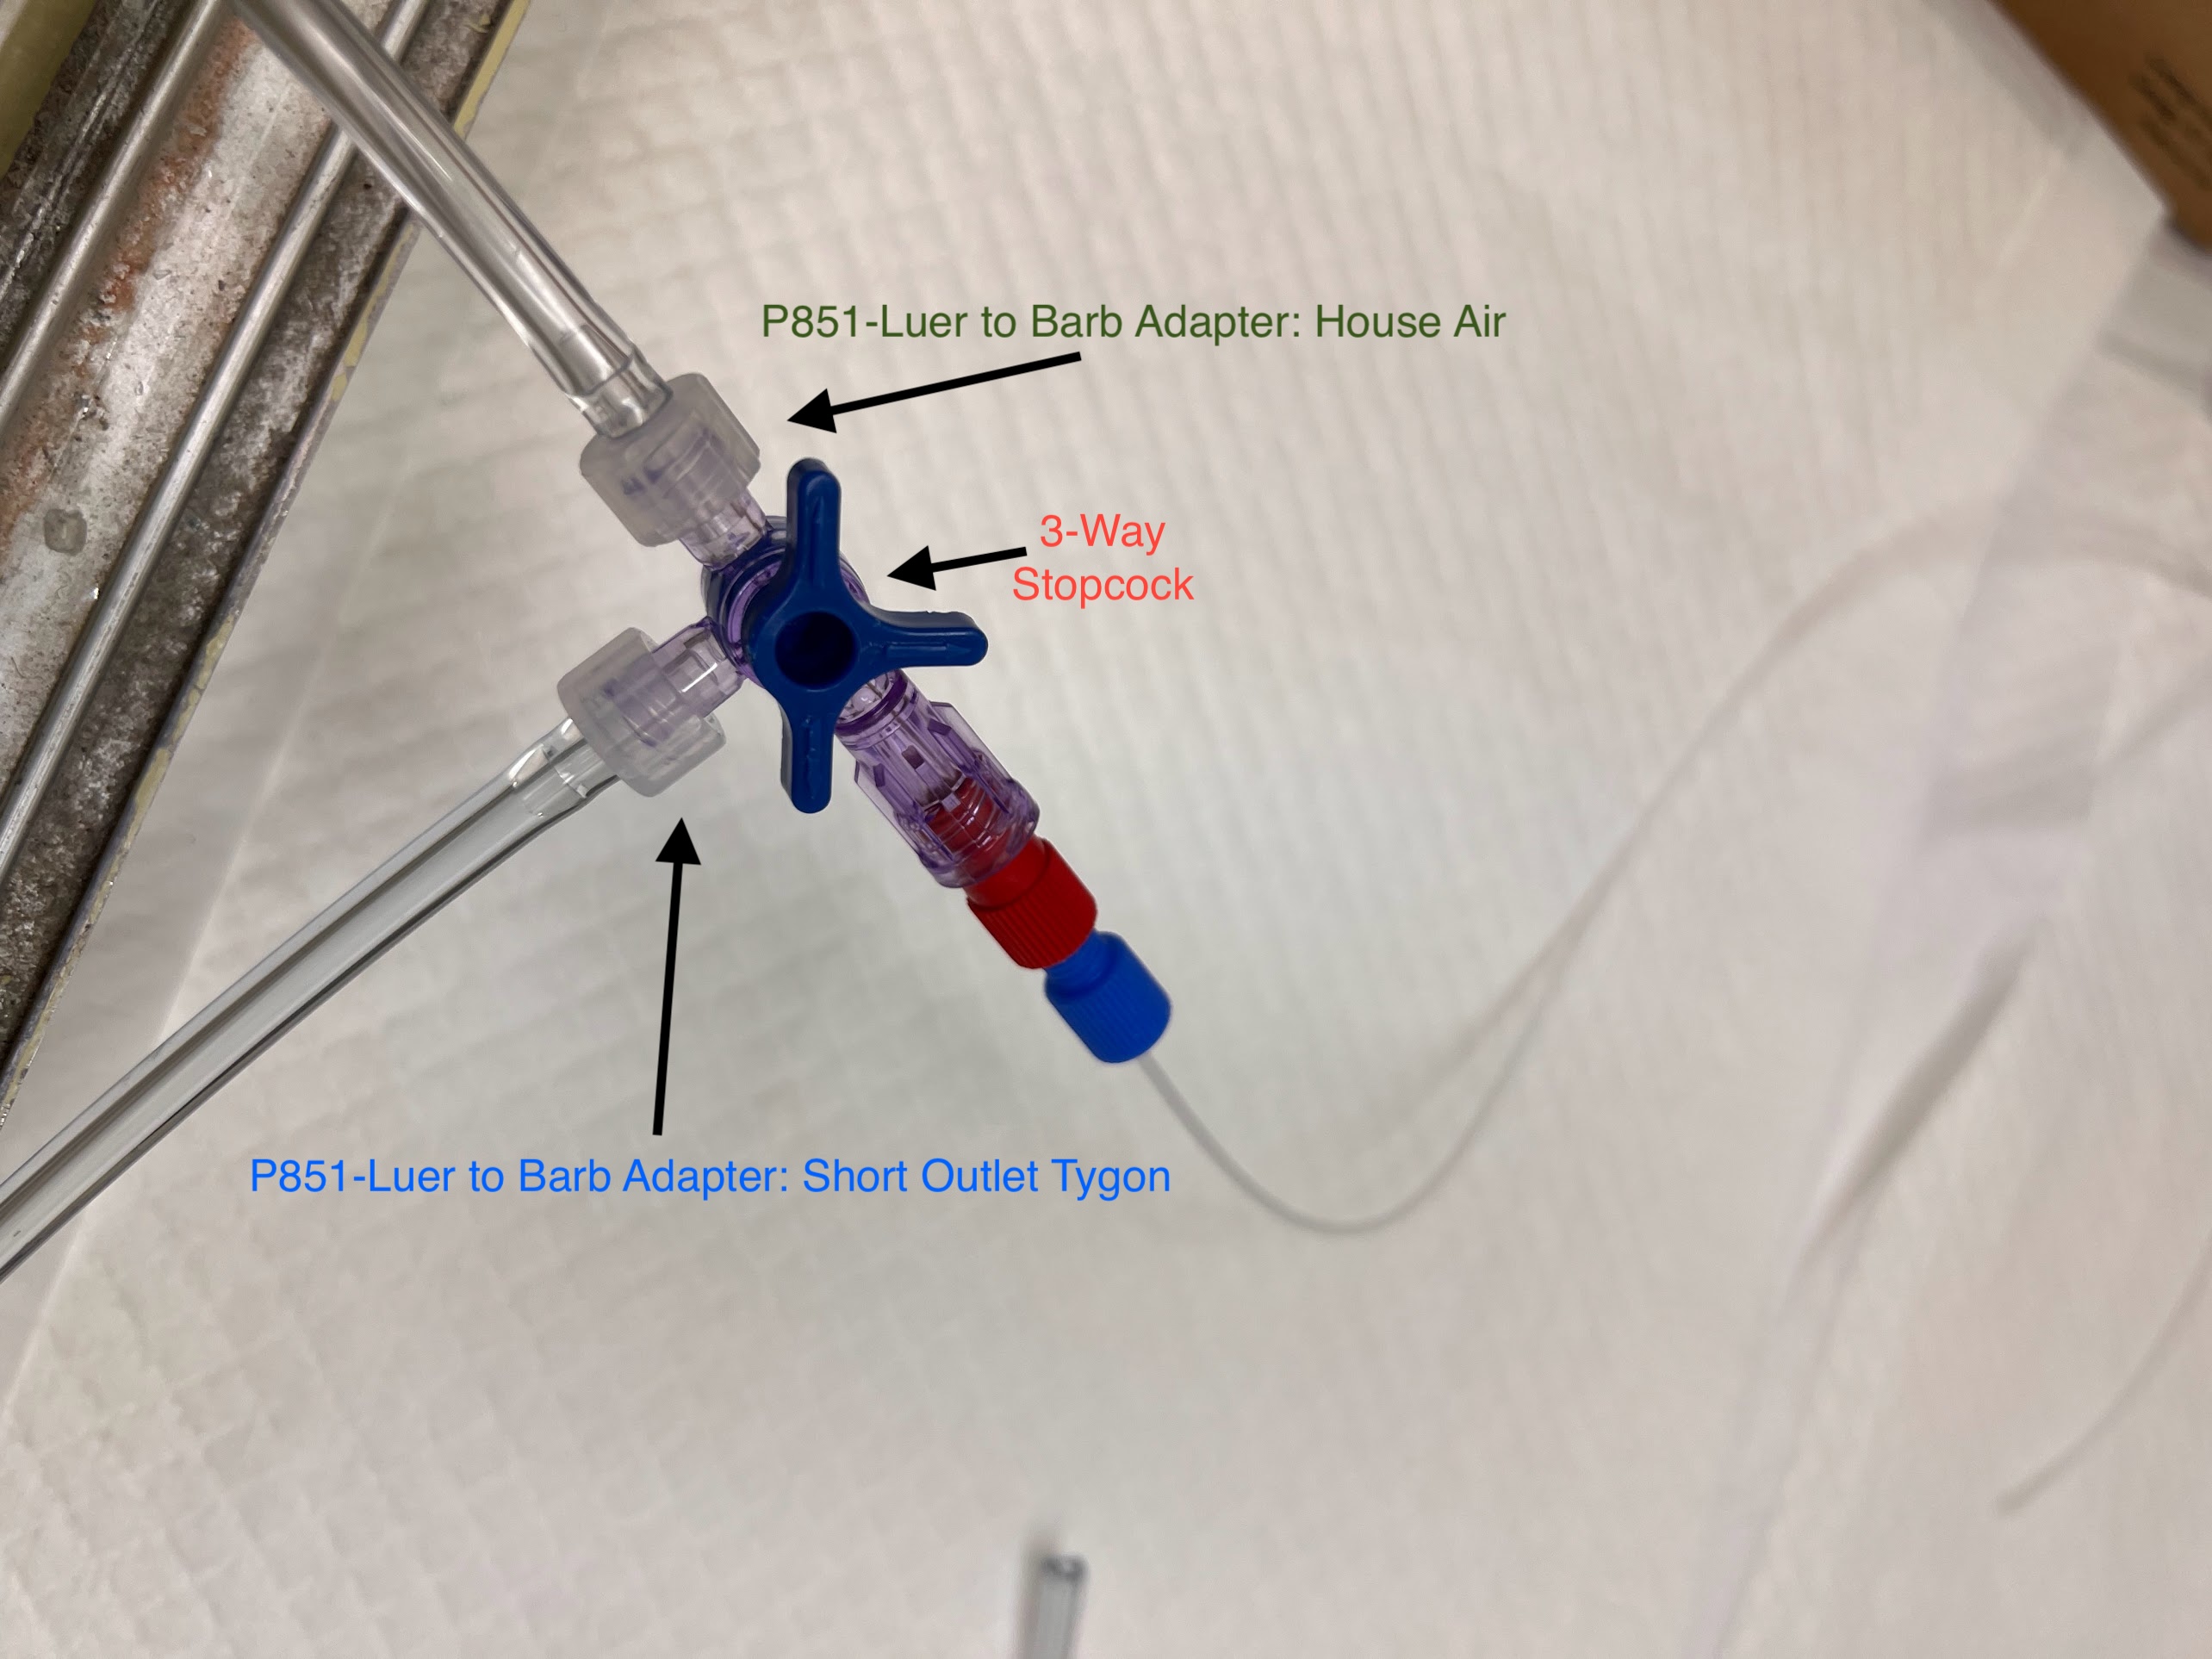
  • Connect the Tygon tubing to a 3-way Stopcock inside the Fume hood using the P851-Luer to Barb Adapter.
    • There are two Male Luer Locks and One Female Luer Lock on the 3-Way Stopcock.
    • This Stopcock can be used to Turn the Air Pressure off or Redirect Air Flow towards the Female Luer Lock Direction or Male Luer Lock Direction.
    • Connect Two P851- Luer to Barb Adapters on the Male Luer Locks on the Stopcock.
      • One Side Connect the Tygon Tubing coming from the House Air supply.
      • On the Second Side Connect a Short Tygon Segment.
Tygon Connections Using the Luer Barb Adapter Short Tygon Tubing for Second Male Luer Connection
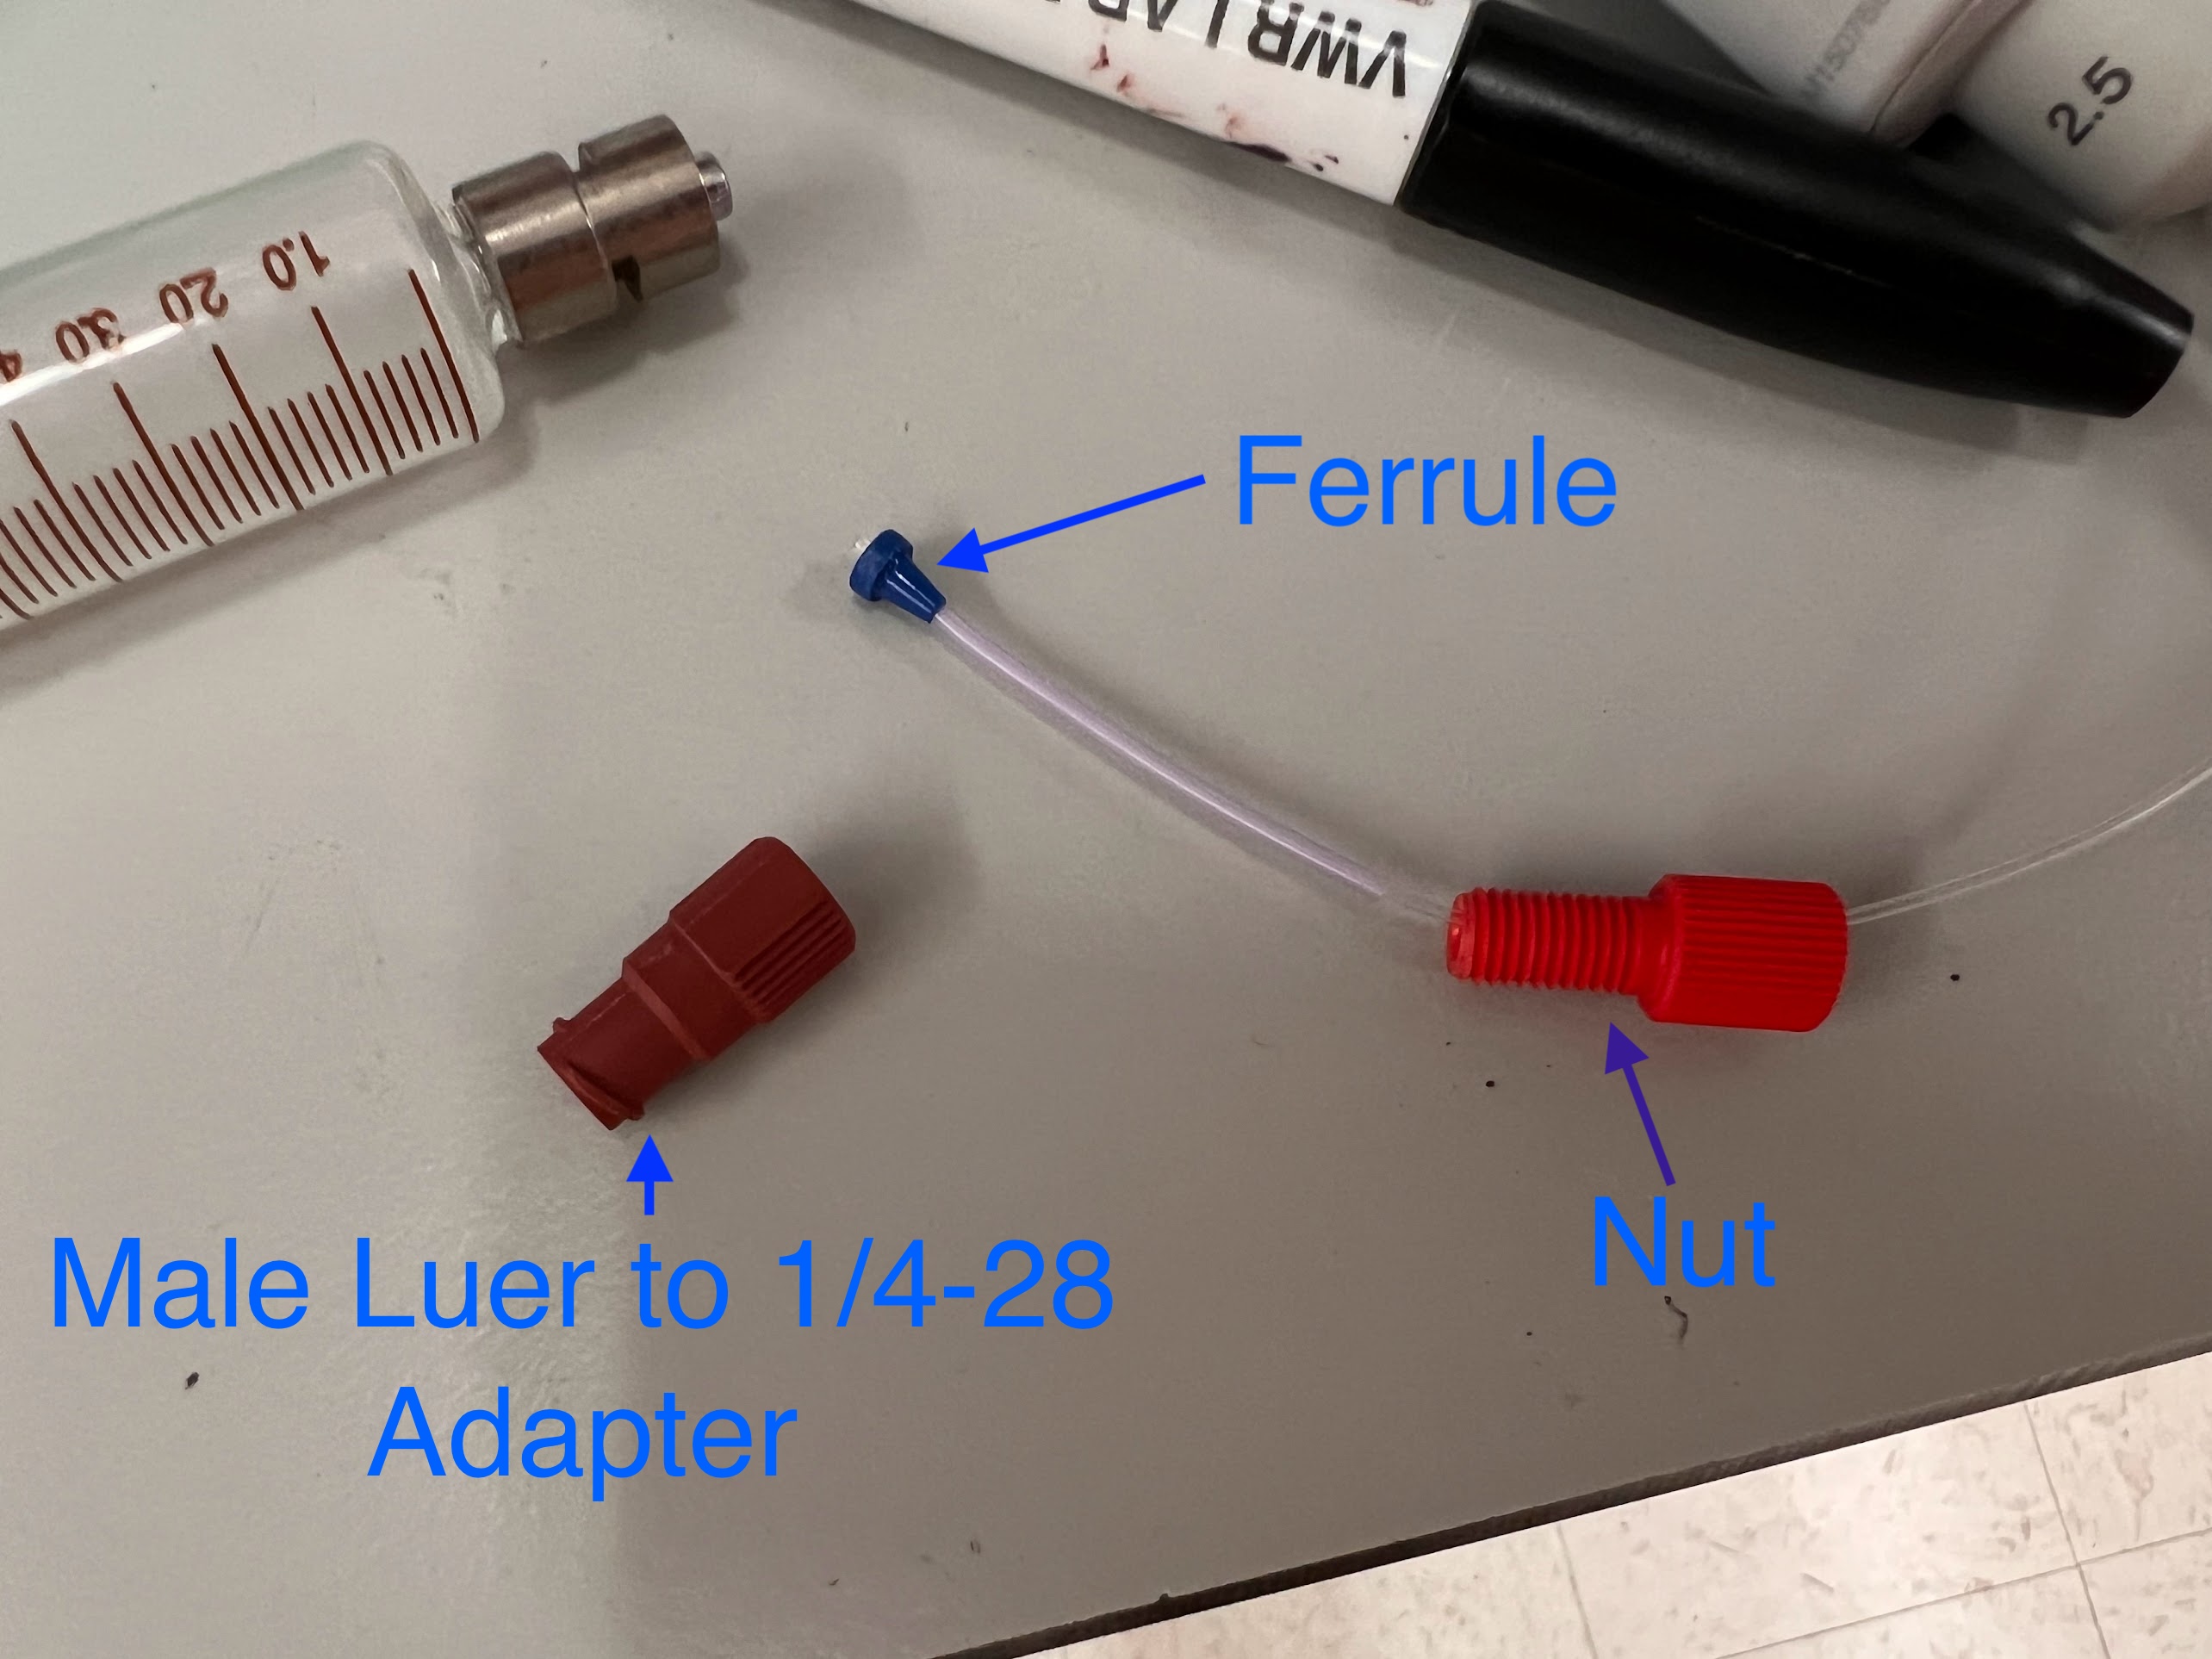
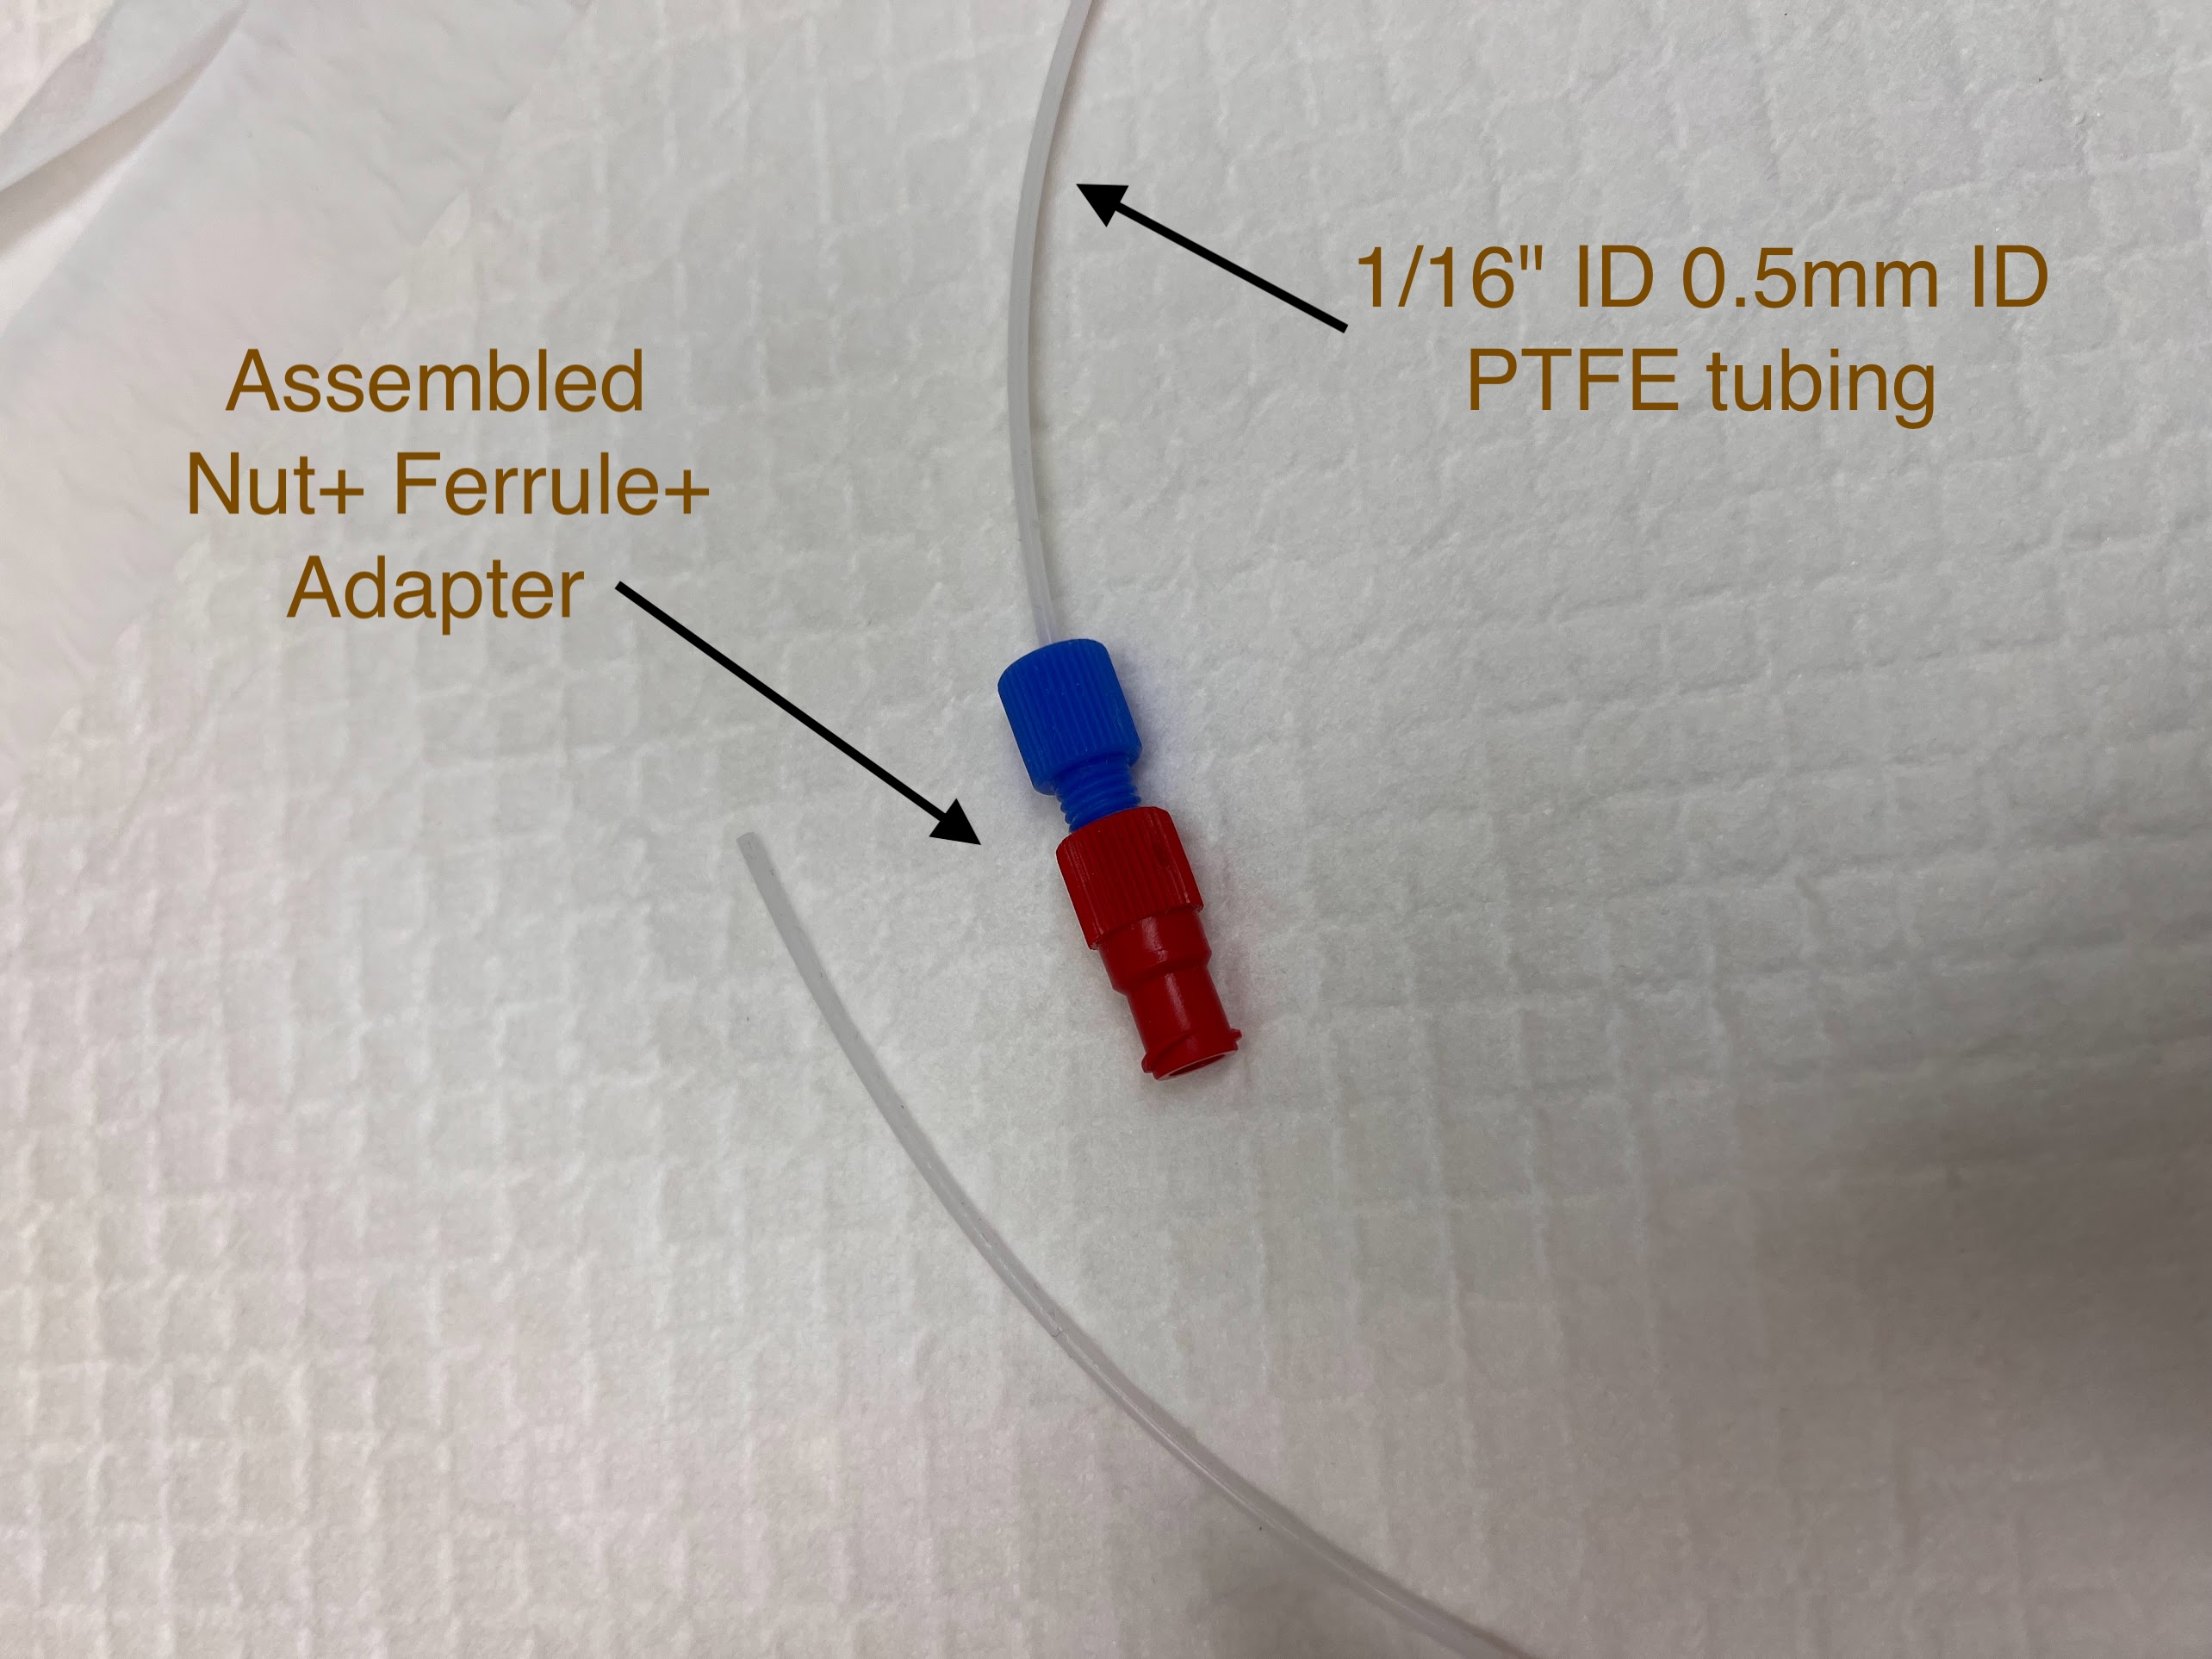
  • Now using this Luer to 1/4-28 Adapter, a Nut and Ferrule you can connect the 1/16" ID 0.5mm ID PTFE tubing {CAT NO. JR-T-4183-M25} {email precision@vici.com for a Quote} to the 3-way stopcock.
    • This tubing will be used to blow any liquid out of the Microfluidic chips.
    • Cut about 1 meter of PTFE tubing using a Stanley Razor Blade.
    • Connect to the Female Luer on the 3-Way Stopcock. Screw all the way in.
Components Assembled Connected To 3-Way Stopcock
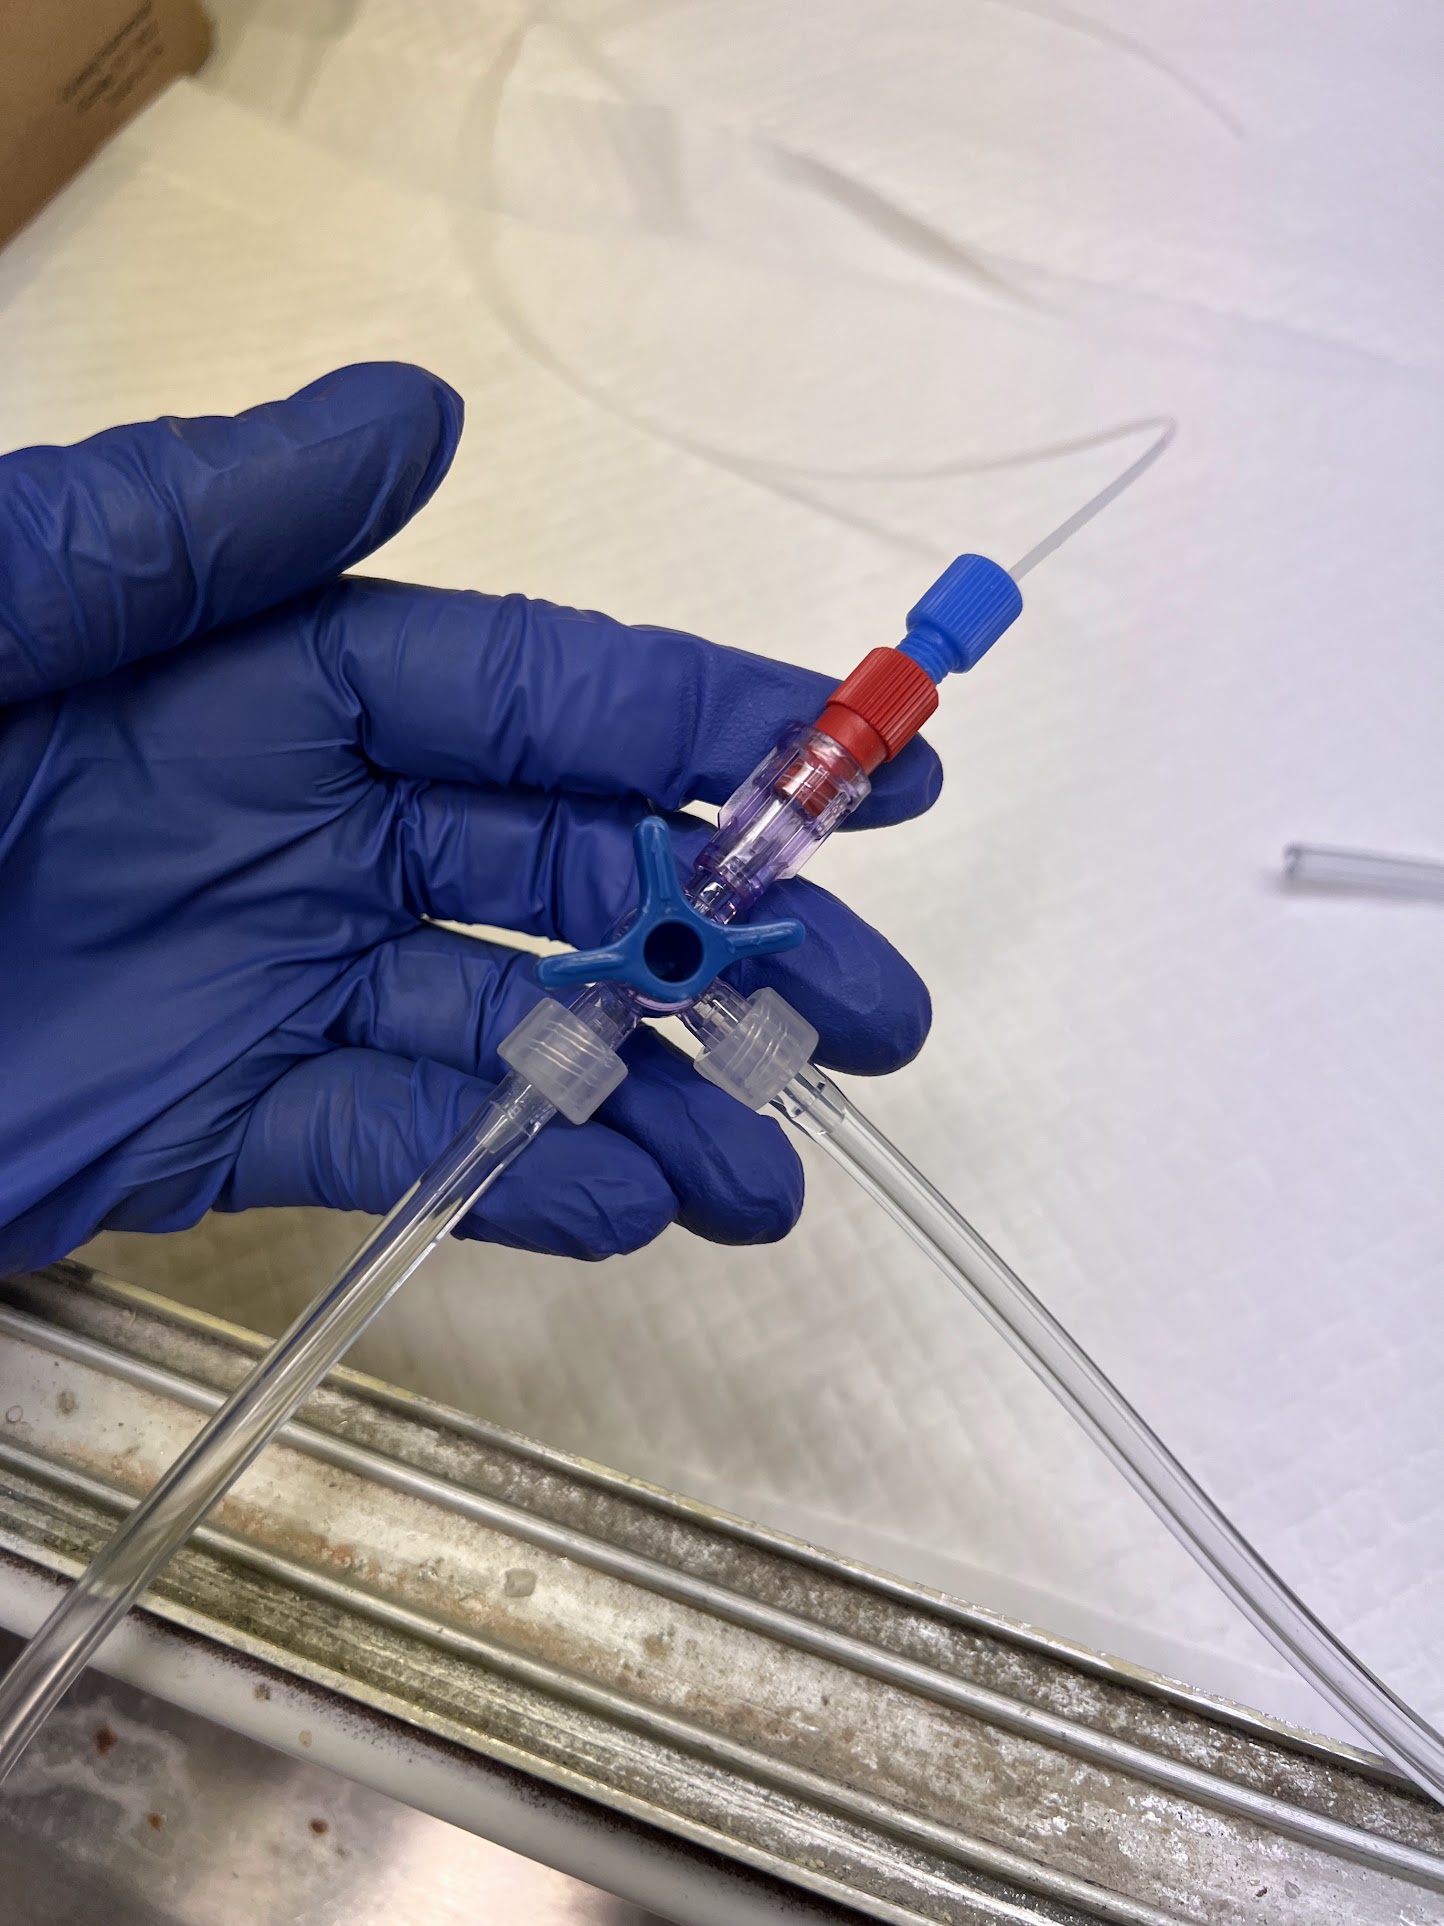
  • Make Sure the Stopcock is in the Closed Position same as the image above.
  • Turn on the House Air. Make sure there are no leaks.

Prepare Syringe Assemblies

  • Now cut two segments of about 50cm segments of the 1mm OD FEP tubing from VICI metronics {CAT NO. MT-F-40020} using Stanley Razor blades.
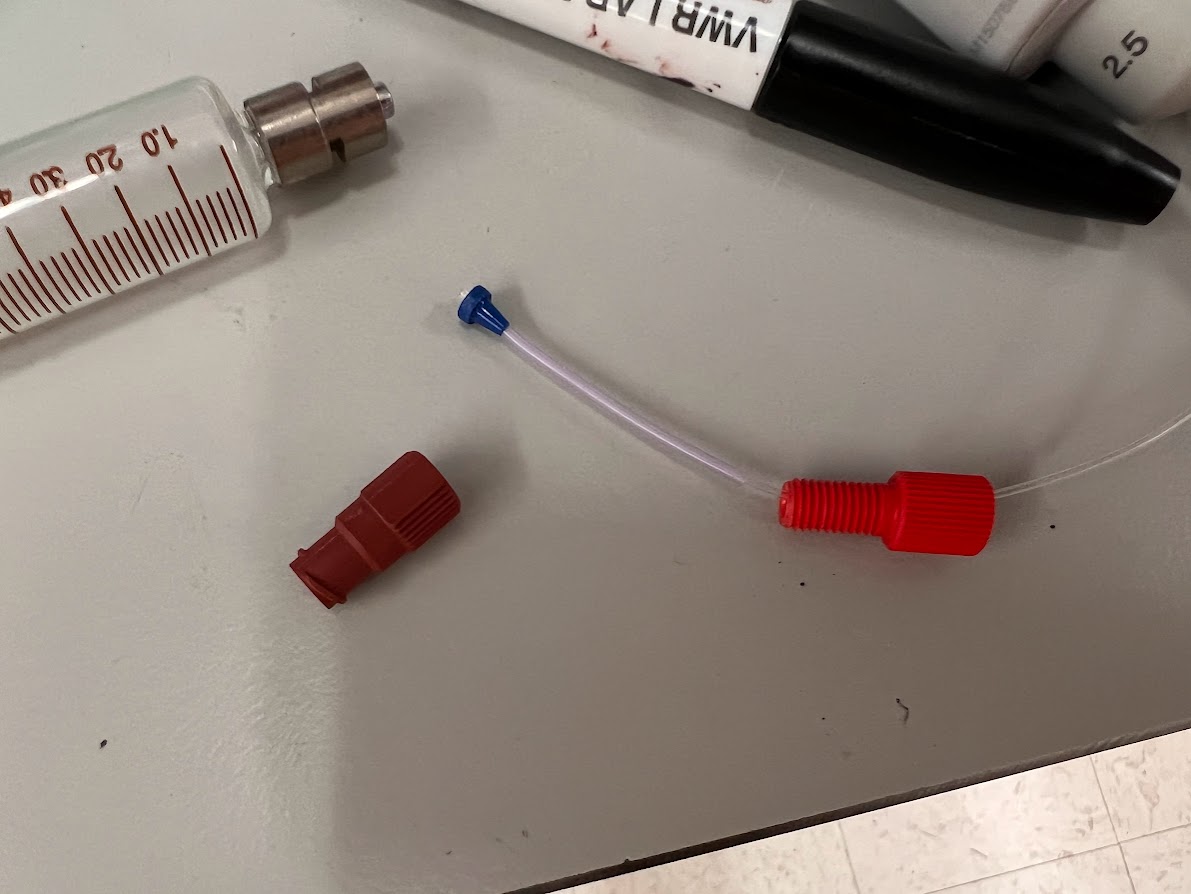
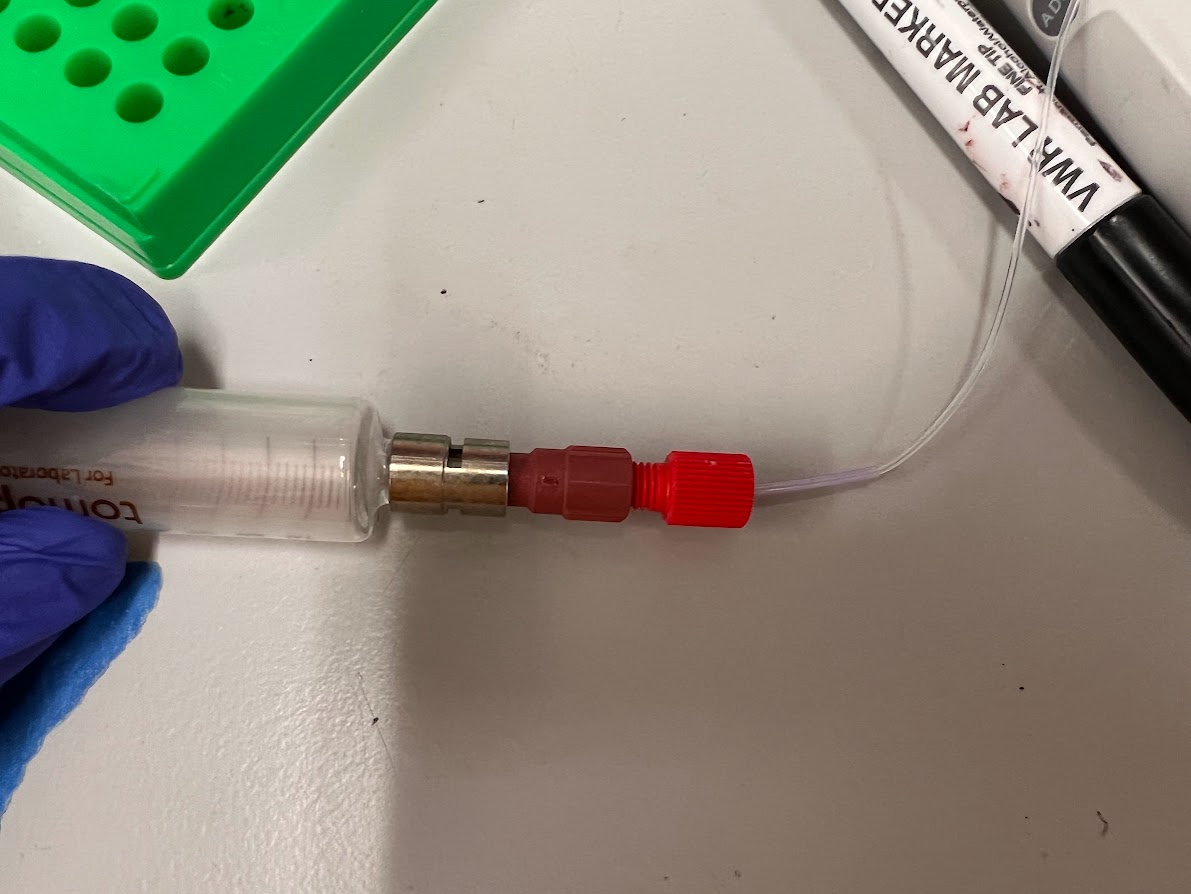
  • Using the Luer to 1/4-28 Adapter, Nut, Ferrule and Nanotight Adapter you can connect to a Glass Syringe.
    • Prepare Two Syringe Assemblies. Label one as "Aquapel" and the second one "FC-40".
    • The FEP tubing should be sticking out slightly
    • Make sure the seal is tight.
1mm OD FEP Tubing Should Stick Out Slightly Main Components Before Assembly
Screw Everything In Label The Syringe
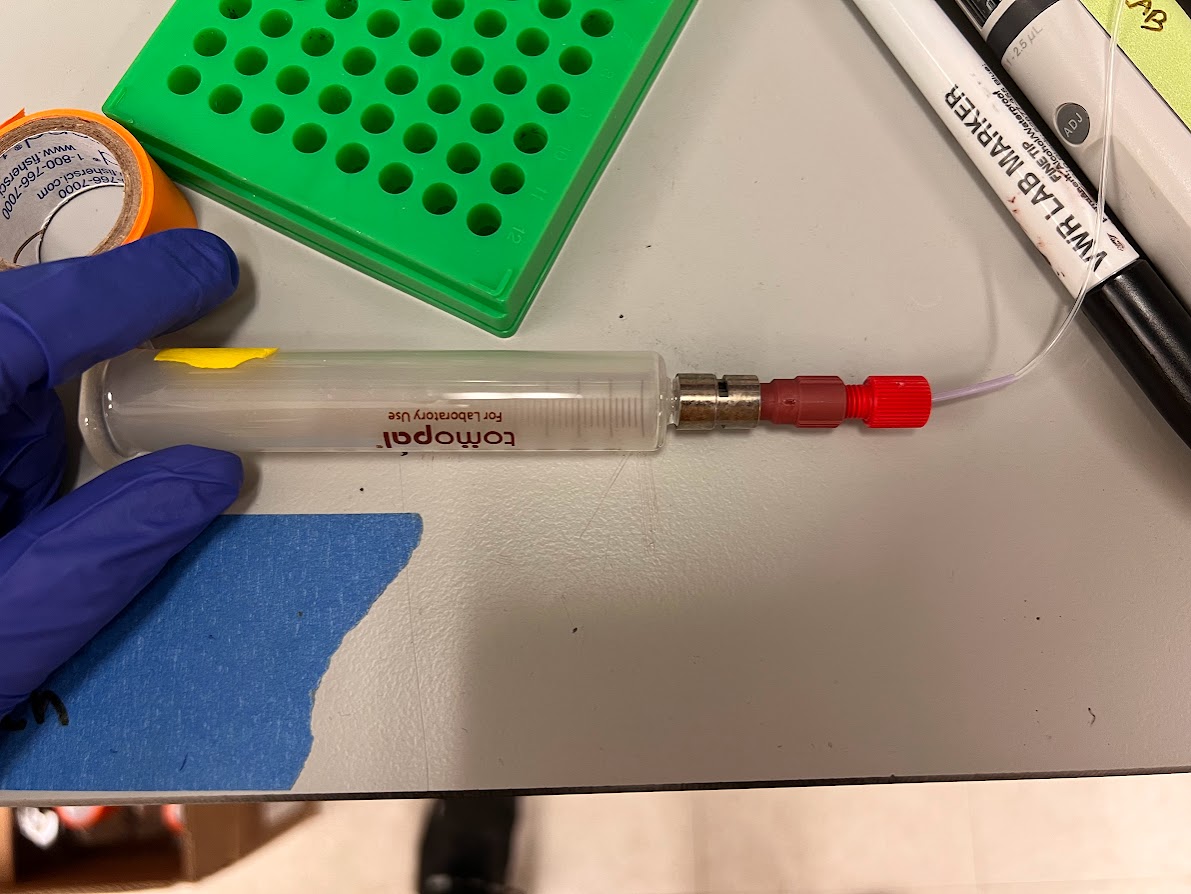
  • Turn on the Compressed Air for the Short Tygon Section of the 3-Way Stopcock inside the Fume Hood.
  • For Both Syringes:
    • Remove the Plunger from the Syringe Body.
    • Use Compressed Air to Blow Dust out from Inside the Syringe Body.
    • Use Compressed Air to also Blow Dust off the Syringe Plunger.
    • Insert the Plunger back into the Syringe Body.
    • Turn off the Compressed Air using the 3-Way Stopcock.

FC-40 Syringe

  • Place a Black Bin with the Correct Waste Tag inside the Fume Hood. We will discard all Aquapel and FC-40 Contaminated Items in this Bin.
  • Filter 6ml of FC-40 {Cat No. F9755-100ML} using a 40μm Cell Strainer.
  • Remove the plunger from the FC-40 Glass syringe and use a pipette to transfer the Filtered FC-40 into the Syringe Body.
  • Reattach the plunger, flip the syringe and blow the air out.
    • Keep pushing the plunger down still a little bit of FC-40 Comes out.
    • Use the absorbent pad to catch any spilt FC-40.
    • Execute the Cell Below to Watch a Video of the Process
In [1]:
%%HTML 
<iframe width="800" height="600" src="https://www.youtube.com/embed/ZCFe1tpc51c?si=bPKcZLcgjvDhJ5f1" title="YouTube video player" frameborder="0" allow="accelerometer; autoplay; clipboard-write; encrypted-media; gyroscope; picture-in-picture; web-share" allowfullscreen></iframe>
  • Change your Gloves. Discard the previous pair into the Black Hazardous Waste Bin.

Aquapel Syringe

⚠WARNING: Aquapel is Toxic. Avoid Breathing in the Fumes by Working in the Fume hood and Follow all precautions below.

  • Wear double Nitrile Gloves.
  • Read the Aquapel SDS.
  • Regularly change your gloves if you spill any liquid on them.
  • Dispose of Hazardous waste properly in Waste Tagged containers.
  • Tape the First Layer of Gloves to your labcoat to avoid exposing your skin accidentally.
    • Execute the cell below to watch the video.
    • Put on a second layer of gloves on top after you have taped the first layer.
In [2]:
%%HTML
<iframe width="560" height="315" src="https://www.youtube.com/embed/T7JGnFHAbhU?si=7X8rGl0iXm3G1dOH" title="YouTube video player" frameborder="0" allow="accelerometer; autoplay; clipboard-write; encrypted-media; gyroscope; picture-in-picture; web-share" allowfullscreen></iframe>
  • Now carefully cut the Aquapel ampule out of the Aquapel applicator using a Stanley Razor Blade.
    • Don’t apply too much force or the glass can break.
    • Try not to press down on the Fins to avoid breaking the glass prematurely.
    • Use the technique shown in the video to Pop the Ampule out without damaging it.
    • Execute Cell below to watch the video.
In [3]:
%%HTML
<iframe width="560" height="315" src="https://www.youtube.com/embed/z8sPT_TWX4I?si=GhxNJIgRr0OY2gBO" title="YouTube video player" frameborder="0" allow="accelerometer; autoplay; clipboard-write; encrypted-media; gyroscope; picture-in-picture; web-share" allowfullscreen></iframe>
  • Discard the Empty Applicator into the Hazardous Waste Black Bin.
  • Clean the Aquapel Ampule with 70% Ethanol and Paper Towels.
    • Make sure there are no Fibers or particles on the glass surface.
    • Dry the Ampule thoroughly and your Gloves with Paper towel to make sure no Ethanol is left.
    • Now put this Ampule inside a 50ml Falcon tube.
    • Execute the Cell Below to Watch the Video.
In [4]:
%%HTML
<iframe width="800" height="600" src="https://www.youtube.com/embed/5-be_1YvLCU?si=aIuYa6A7qYPmY00y" title="YouTube video player" frameborder="0" allow="accelerometer; autoplay; clipboard-write; encrypted-media; gyroscope; picture-in-picture; web-share" allowfullscreen></iframe>
  • Break the Glass Ampule:
    • Wear a Face shield for protection and use the Glass sliding windows on the Fume hood to shield you from any flying glass debris.
    • Break the Glass Ampule using Needle Nose pliers inside the Fume hood.
    • The 50ml tube will catch any Aquapel solution that spills out of the Ampule.
    • Execute the Cell Below to Watch the Video.
In [5]:
%%HTML
<iframe width="800" height="600" src="https://www.youtube.com/embed/ZN6y4esvqok?si=oHs9JCPdGLNOPrRL" title="YouTube video player" frameborder="0" allow="accelerometer; autoplay; clipboard-write; encrypted-media; gyroscope; picture-in-picture; web-share" allowfullscreen></iframe>
  • Change your Gloves.
  • Filter the Aquapel using a 40μm Cell Strainer.
  • Discard into the Black Black Hazardous Waste Bin with a Waste Tag:
    • The 50ml Tube with the Broken Aquapel Ampule.
    • Any remaining Broken Glass
    • The 40μm Cell Strainer.
    • Your Gloves.
  • Put on a New pair of Gloves. Discard the previous pair into the Black Hazardous Waste Bin.
  • Clean the Needle Nose Pliers with 70% Ethanol and Wipe with Paper Towels.
  • Put the Pliers Back to their Storage Location on your Bench.
  • Change your Gloves.
  • Remove the plunger from the Aquapel Glass syringe and use a pipette to transfer the Filtered Aquapel into the Syringe Body.
  • Reattach the plunger, flip the syringe and blow the air out.
    • Keep pushing the plunger down till a little bit of Aquapel Comes out.
    • Use the absorbent pad to catch any spilt Aquapel.
    • Execute the Cell Below to Watch a Video of the Process
In [6]:
%%HTML 
<iframe width="800" height="600" src="https://www.youtube.com/embed/ZCFe1tpc51c?si=bPKcZLcgjvDhJ5f1" title="YouTube video player" frameborder="0" allow="accelerometer; autoplay; clipboard-write; encrypted-media; gyroscope; picture-in-picture; web-share" allowfullscreen></iframe>
  • Change your Gloves. Discard the previous pair into the Black Hazardous Waste Bin.

Treatment of Microfluidic Chips with Aquapel


  • Remove the Scotch Tape from all 10 Microfluidic chips and line them up inside the Fume hood on the Absorbent mat.
  • How to do Aquapel Treatment for a Chip:
    • Now flip the Aquapel Syringe upside down and with one hand insert the FEP tubing into the Oil Inlet and with the other hand.
    • Push the Syringe down towards the ground to push the Aquapel into the chip.
    • The Aquapel will first come out of the Outlet hole. Keep pushing till you see some Aquapel also come out from the Bead inlet hole.
    • It generally takes a substantial amount of force to make the Aquapel come out of the Bead Channel. If the Aquapel comes out very easily this is a sign the chip was bonded poorly.
    • Delaminated chips can easily be detected as discussed in the next section of the protocol.
    • Now insert the FEP tubing into the Cell channel inlet and push any remaining air bubbles out of the Outlet hole.
    • Execute the Cell Below to Watch a Video of the Process.
In [7]:
%%HTML
<iframe width="800" height="600" src="https://www.youtube.com/embed/EshID8qx8eo?si=-ccbjnVUfqcC8AXn" title="YouTube video player" frameborder="0" allow="accelerometer; autoplay; clipboard-write; encrypted-media; gyroscope; picture-in-picture; web-share" allowfullscreen></iframe>
  • Do this for all Ten Microfluidic Chips.
  • Wait 1 minute.
  • Wipe all Ten chips with Paper towels to absorb most of the Aquapel.
  • Discard the paper towels in a Hazardous Waste Bin with a Waste Tag.
  • Change your gloves. Discard them into the Black Hazardous Waste Bin.
  • Now turn the compressed air on in the PTFE tubing by turning the 3-way stopcock.
  • We will now blow most of the Aquapel out of the chips using the Compressed Air.
  • Gently glide the 1/16” PTFE tubing over all 4 holes to expel the Aquapel out from the chip:
    • DO NOT INSERT THE PTFE tubing into the holes.
    • This can dislodge particles of PDMS and cause a blockage later.
    • You only want to glide across each hole without insertion.
    • Execute the Cell Below Watch a Video of the Process.

NOTE ON DELAMINATION:

  • Delamination might happen at this step for poorly bonded Chips. Discard chips that Delaminate.
  • Delaminated Chips will have an air bubble connecting Different channels such as Oil and Cell Channels.
  • Tilt the Chip to look for these Air bubbles in Delaminated Chips.
  • See the Troubleshooting Section in the PDMS bonding notebook for help.
  • Unfortunately PDMS is a finicky material and there can be significant differences between batches in terms of bonding efficiency. We have had anything from 15% to 100% Yeilds between different batches.
  • To combat these reliability issues we will try to make injection molded Microfluidic chips available in the future.
  • If you find a batch of PDMS that works really well for you, we suggest you make a lot of chips at the same time using that batch.
Before Delamination After Delamination
In [8]:
%%HTML
<iframe width="800" height="600" src="https://www.youtube.com/embed/bqIuMIx2sh8?si=nFCw24uZsAuLW0Ri" title="YouTube video player" frameborder="0" allow="accelerometer; autoplay; clipboard-write; encrypted-media; gyroscope; picture-in-picture; web-share" allowfullscreen></iframe>
  • Turn the compressed air off using the 3-way Stopcock.
  • Change your gloves. Discard them into the Black Hazardous Waste Bin.

Expel remaining Aquapel using FC-40 Treatment

  • Now take the FC-40 syringe and insert the FEP tubing into the Oil inlet hole. Push the syringe down till you see liquid come out from the Outlet hole.
  • Now insert the FEP tubing into the Cell inlet hole:
    • Push the Syringe down till you see liquid come out from the Outlet hole.
    • The remaining air bubbles should be expelled.
  • Now insert the FEP tubing into the Bead inlet hole:
    • Push the Syringe down till you see liquid come out from the Outlet hole.
    • The remaining air bubbles should be expelled.
  • Execute the Cell Below to Watch a Video of the Process.
In [9]:
%%HTML
<iframe width="800" height="600" src="https://www.youtube.com/embed/NWVpkkBnvjw?si=Du49e9DohfKAX0b1" title="YouTube video player" frameborder="0" allow="accelerometer; autoplay; clipboard-write; encrypted-media; gyroscope; picture-in-picture; web-share" allowfullscreen></iframe>
  • Do the FC-40 treatment for all 10 chips.
  • Now wipe all the chips with Paper Towels to absorb most of the FC-40.
  • Discard the paper towels in a Hazardous Waste Bin with a Waste Tag.
  • Change your gloves. Discard them into the Black Hazardous Waste Bin.
  • Now turn the compressed air on in the PTFE tubing by turning the 3-way stopcock.
  • Now just like the Aquapel expulsion steps, you want to glide across each hole without inserting the PTFE tubing.
    • DO NOT INSERT THE PTFE tubing into the holes.
    • This can dislodge particles of PDMS and cause a blockage later.
    • You only want to glide across each hole without insertion.
    • You should see most of the Liquid being blown out through the Outlet Hole.
    • Execute the Cell Below to Watch a Video of the Process.
In [10]:
%%HTML
<iframe width="800" height="600" src="https://www.youtube.com/embed/bqIuMIx2sh8?si=nFCw24uZsAuLW0Ri" title="YouTube video player" frameborder="0" allow="accelerometer; autoplay; clipboard-write; encrypted-media; gyroscope; picture-in-picture; web-share" allowfullscreen></iframe>
  • Now do this for all 10 Microfluidic chips.
  • Change your gloves. Discard them into the Black Hazardous Waste Bin.

Bake to Remove remaining solvent and then store

  • Line the Chips up in the Cover and Main Dish of the Micofluidic Chips Storage Dish.
    • Make sure the PDMS is fully exposed to Airflow.
    • No Glass should block or be on the PDMS surface.
    • PDMS should have good airflow for Effective Removal of any remaining FC-40


  • Bake the chips at 65°C for 20 mins inside the Lab Incubator or Oven.


  • Take the Chips out and Cover them immediately with Scotch Magic Tape. DO NOT tuck the tape under the glass.
    • Watch a Video of the Process by Executing the Cell Below.
In [11]:
%%HTML 
<iframe width="800" height="600" src="https://www.youtube.com/embed/CHmnzHu_d2k?si=TjOuUQLGAj4lYbdw" title="YouTube video player" frameborder="0" allow="accelerometer; autoplay; clipboard-write; encrypted-media; gyroscope; picture-in-picture; web-share" allowfullscreen></iframe>
  • Label the Storage Dish with the Date of Aquapel Treatment.
  • Change your gloves. Discard them into the Black Hazardous Waste Bin.

Remove any remaining Liquid in the Syringes.

  • Inside the Fume Hood:
    • Transfer any Remaining Aquapel into a 50ml Falcon Tube.
    • Remove the Plunger and Capture any remaining Aquapel into the 50ml Tube.
    • Discard the Tube into the Black Hazardous Waste Bin.
  • Change your gloves. Discard them into the Black Hazardous Waste Bin.
  • Transfer any Remaining FC-40 Back into its Storage Container
    • Remove the Fitting Before Transfer
  • Reattach the Fittings for the FC-40 Syringe.

Wash with Ethanol and then Dry with Compressed Air

  • Move back to the Fume Hood
  • One by One for both Syringes:
    • Remove the plunger
    • Spray the inside of the Glass Syringe and Plunger with 70% Ethanol.
    • Use the Short Tygon Segment to Blow compressed air for drying the Syringe Body and Plunger.
    • Execute the Cell Below to Watch a Video of the Process for one of Syringes.
In [12]:
%%HTML
<iframe width="800" height="600" src="https://www.youtube.com/embed/FLy_lB3I5kc?si=oBjWqVHEkf5Nlk6G" title="YouTube video player" frameborder="0" allow="accelerometer; autoplay; clipboard-write; encrypted-media; gyroscope; picture-in-picture; web-share" allowfullscreen></iframe>
  • Change your gloves. Discard them into the Black Hazardous Waste Bin.

Cleanup

  • Store the Syringe Body and Plungers Separately on your Bench.
  • Turn off the House Air.
  • Discard all absorbent mats in the Fume Hood in a large Blue Bin for Waste Contaminated with Chemicals.
  • Lay down four new absorbent mats inside the fume hood.
  • Turn off the Fume Hood Lights.
  • Put the Black Hazardous Waste Bin back to its Storage Location.